Forkin'
Around with My R100GS
R100GS Fork Rebuild
I know this subject has been covered by a couple other GS dudes out in webland but I'm just taking notes, least I forget.
5-13-07
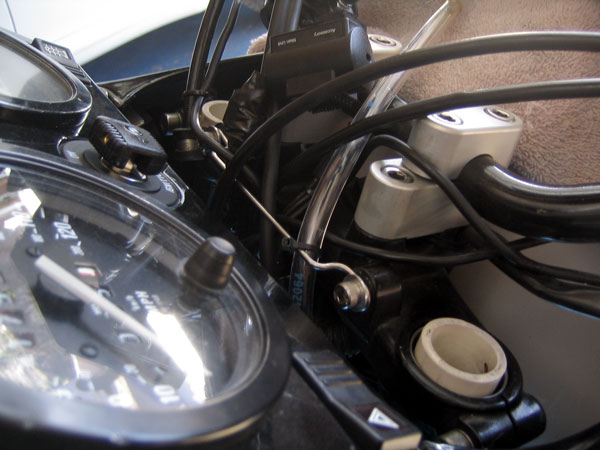
So I've done everything else to this old bike, at least the basic maintenance
from stem-to-stern, but not the forks. They seem to work pretty good all in all,
but they've developed a leaky seal on the left side. With the PD tank full of
fuel the front end could get kinda sproingy in the rough stuff. There was definitely
a tendency to dive when the stock Brembo was used in short notice. Besides, I've
herd so much about the coveted Racetech
Gold Valve Emulator that I just had to try it...always room for improvement.
Racetech Gold, everything I needed for a fork rebuild ordered from Chicago BMW, and a newer 4-pot R1100S Brembo caliper in hand, I took a deep breath, a slug of Red and, well...thought about it for a few more days...
O.K., I'm ready now...it goes a lil somethin' like this...
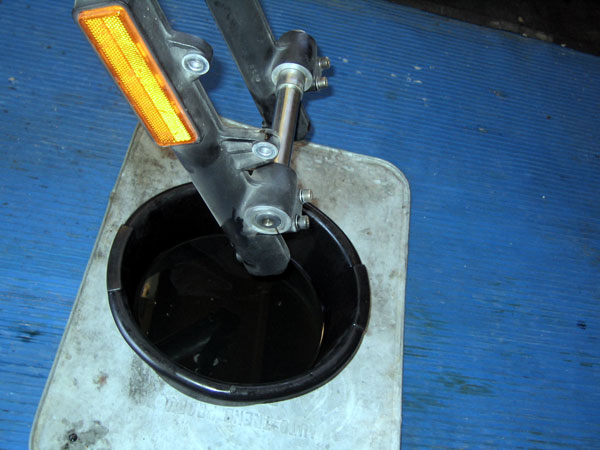
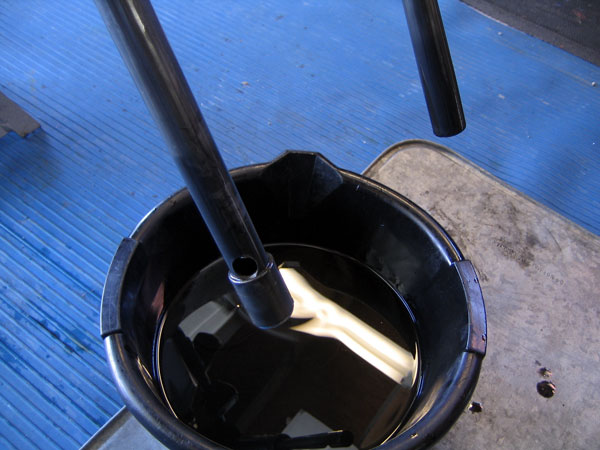
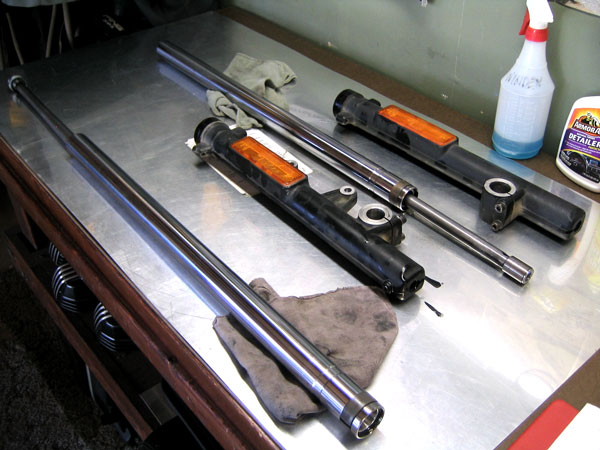
After
removing the front wheel, fender, fork brace, and the caliper, loosening the handlebars
and lying them back on the gas tank, and replacing the axel, make sure you have
a nice oil catching system to get the goo...me, I double up, or I'll have oil
up to my elbows and then I'll walk around in it. Very messy fellow, just check
the grease stains on all my favorite tee shirts...anyway remove the Phillips head
screw at the bottom-rear of each slider before you remove the fork tube caps so
the stuff doesn't gush out onto your new sport shoes.
Racetech Gold Valve Emulator that I just had to try it...always room for improvement.
Racetech Gold, everything I needed for a fork rebuild ordered from Chicago BMW, and a newer 4-pot R1100S Brembo caliper* in hand, I took a deep breath, a slug of Red and, well...thought about it for a few more days... *(left front donated by and thank you KiwiCarl!)
O.K.,
I'm ready now...it goes a lil somethin; like this...
After
removing the front wheel, fender, fork brace, and the caliper, loosening the handlebars
and lying them back on the gastank, and replacing the axel, make sure you have
a nice oil catching system to get the goo...me, I double up, or I'll have oil
up to my elbows and then I'll walk around in it. Very messy fellow, just check
the grease stains on all my favorite tee shirts...anyway remove the phillips head
screw at the bottom-rear of each slider before you remove the fork tube
caps so the stuff doesn't gush out onto your new sport shoes.
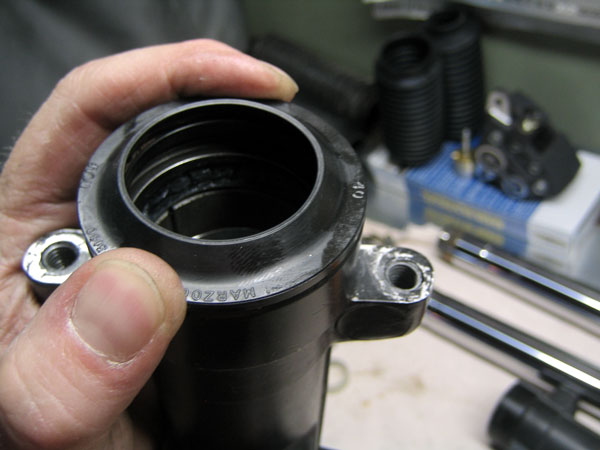
Once the worst is gone, then open the top allen filler plugs up top and drain some mo'...dang! how cheap, no picture! When these have drained, remove the bottom slider-to-fork rod allen bolts
Pull your fork sliders off every-so-gently a not to bugger up the seals...but wait, I'm replacing the seal...O.K., I'll be careful anyhoww.
..and drain some mo' mo'..
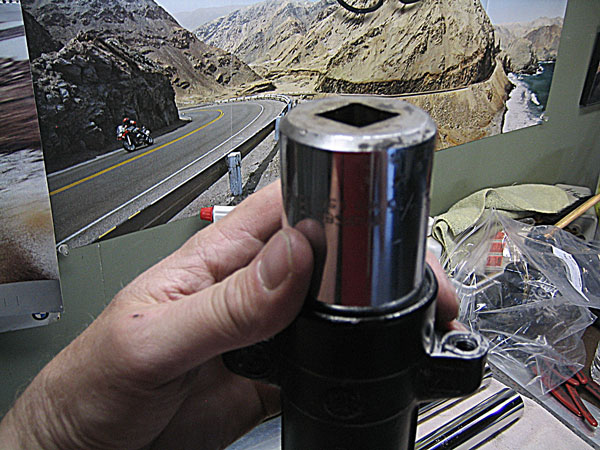
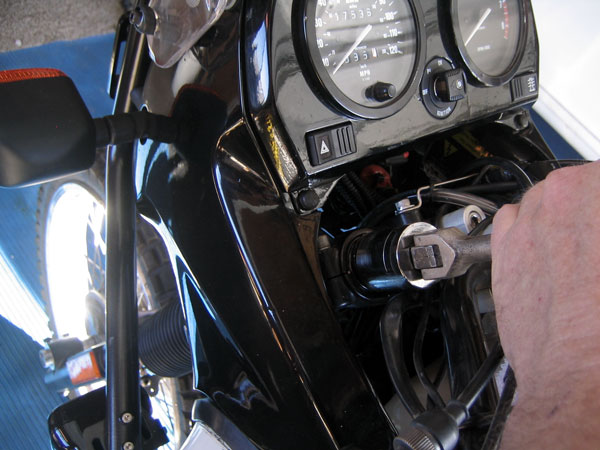
Now, after loosening all the top tripletree allen pinch-bolts, take your 22mm socket that's been ground flat (for better bite on the shallow fork tube cap) and back each cap off while applying pressure and easing out the cap...otherwise you could get a snake in the box surprise! ...but I doubt it.
Lookie what's inside! Pull the PVC spacer...hmmm mine's different than yours...
![]()
...then the springs, using a hook tool of some sort
Remove the gaiters or boots or rubbers or whatever your tem is...original clampage I disposed of.
...turns
out mine is alot different than yours....
It appears that I may already have
a modified fork.
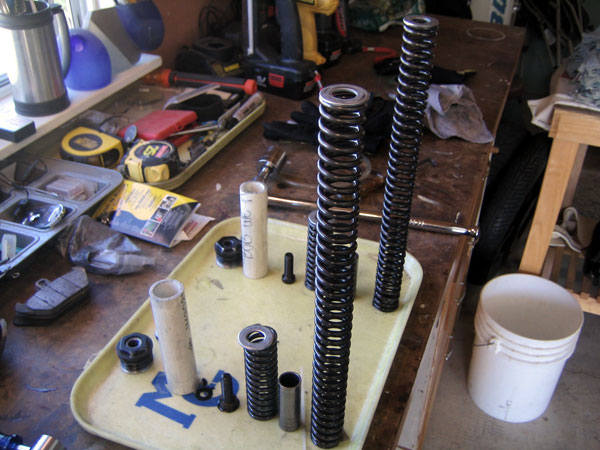
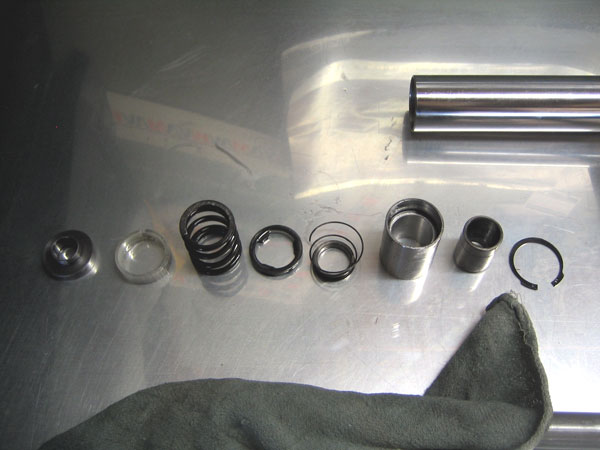
Take a look at my internal parts. They are in order of dis-assembly.
Top plug
Top fork cap
PVC pipe
Bottom fork cap
First washer and
spring (short)
Steel tube
Second washer and spring (long)
Both sides
are identical.
...one closer inspection I see that the short springs are more tightly wound than
the long ones.
This is an old school mod the P.O. must have had done. Cool,
or WA as the Japanese say.
The forks have been pretty good in the rough stuff,
but I've never ridden an airhead GS before this bike, so nothing to compare to.
Done the oil change-out at a previous time and with good results.
Now
I worry about stuff...look at these bushings..
...and why do these fork tubes have some kinda wear discoloration?
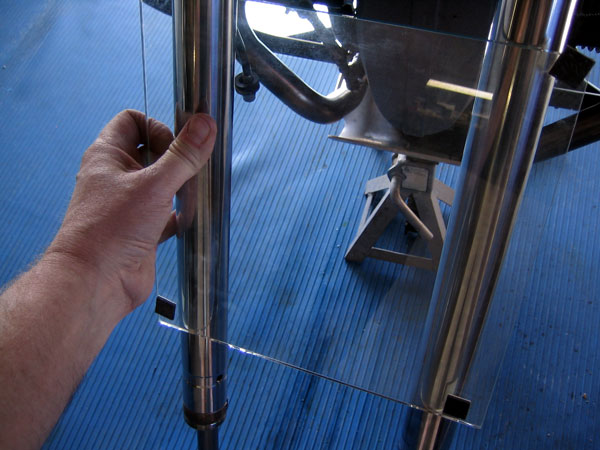
I decided not to worry about my balls so much and move on. I gave it the glass-for-flatness test and sure enuff, they were just a lil clickity clack off. I loosened the rest of the tripletree screws and rotated them and amazingly enough they became flat. Good enough, hope I don't die in a horrible forking-accident.....
I like to lay parts out in order and take cute little posing pics. Here's some, aren't they just precious!?!
Compression (right side) damping rod guts...eeewww!!
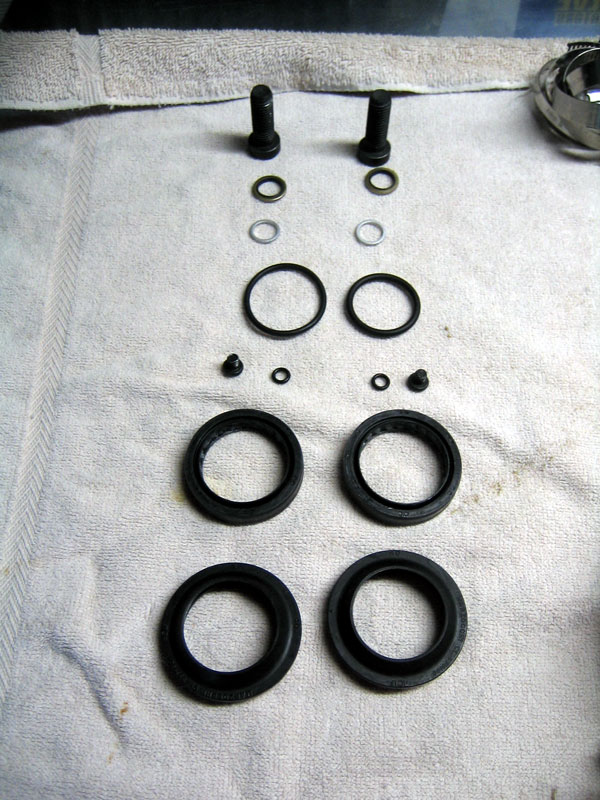
...and all the fresh rubbers and gaskets on the block...right-o!
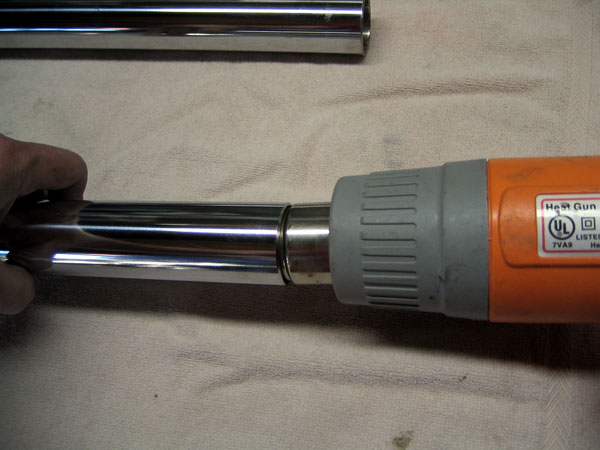
Now to clean everything up and do the mods. Clean clean clean, no dust, no grime, and no oil after-taste. I scrub and scrub with brake cleaner, degreaser, water, and air, then wipey wipey like a new born's butt...then I runs some hot air in it with my HB $12 heat gun to dries 'em out, yep! BZZZ!!! WHIR!! BZZZ!!!
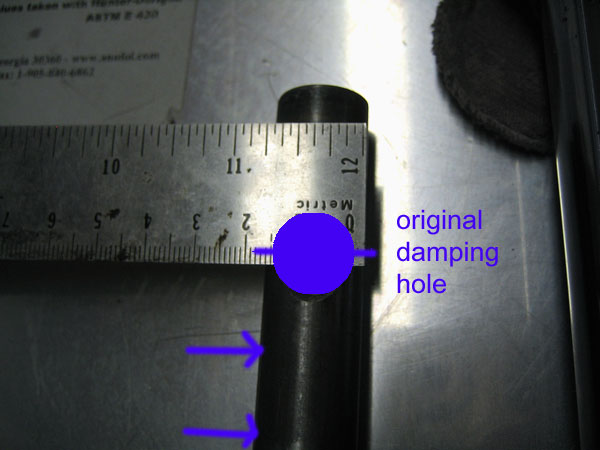
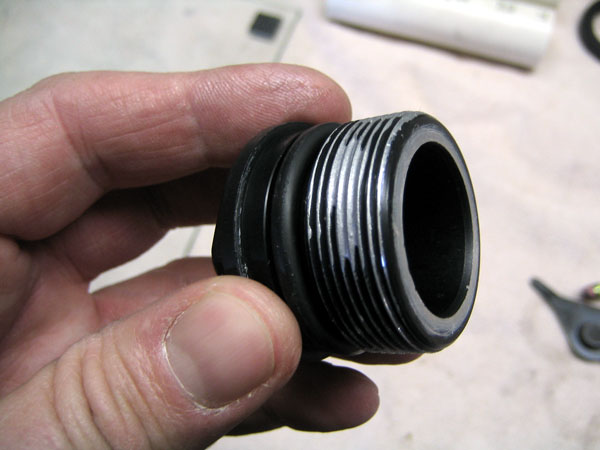
The Golden Valve...I opted to drill my damping holes on the right side tube both above the existing. It just doesn't make sense to drill a hole below the original if it will be covered up by the damping rod end bushing. Oh shoot, I forgot to take that pic, hey Oscar did a beauty job of drillin' them holes, honest. Just read the Racetech instructions and cheat a bit....like I do. Basically drill the two 5/16" holes above the original perpendicular.
Then you cut the PVC spacer to where it's even in length with the other side PVC when the one you cutting is stacked with the Golden Valv-uh and aluminum spacer provided...as shown...watch your fingers if you're foolish enough to do it like this...
![]()
...as
shown...hmm, looks even enough.. PVC note sez: "...eed more"...what?
(ignore this).
![]()
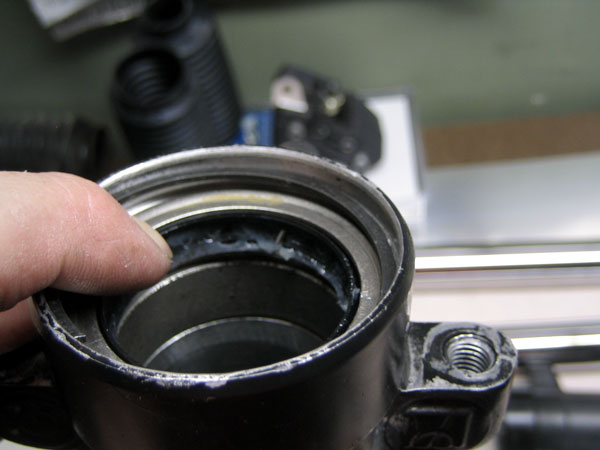
Now the fork seals. Removing the old ones is easier if you don't over think it...pop the fork "cup". Then remove the flat washer, and pry out the circlip...sounds easy don't it, I pried until I cried...then I figured out there was an easier way, don't ask me what it is but something about pushing down instead of out. It was time for my nappy...after that the seal came out easily with a plain screwdriver by walking it up side to side
Clean clean clean, then in with the new.
Got
the biggest-arse socket outta my daddy's tool crib and used it atop the old seal
to drive the new in. This took some ball-peenin' to get it all the way in. Find
a stool and get steal the old carpet out of the dog's bed and set it on the floor
for cushion. Then just pound the livin'...no, coerce it nicely until it is evenly
seated.
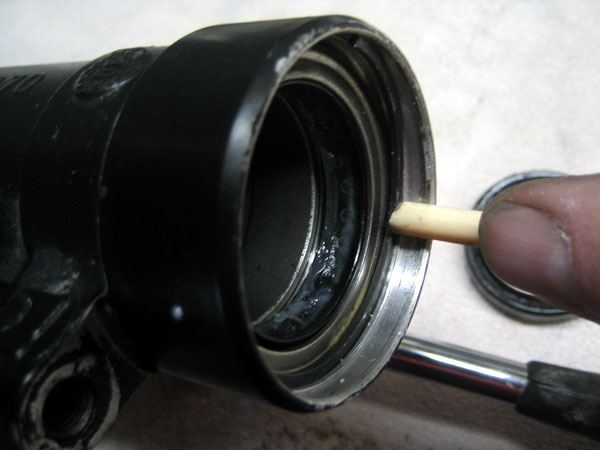
Seal nicely coerced, washer on top, circlip pressing in.....
Then to assure all the clip is snapped in good I used my trusty chopstick to press around the perimeter. Not sure why...I guess I just wanted to find a use for that bachelor stick I've had around so long.
...then on with the cup...
...and a new drain plug seal and tighten screw...
...and a fresh rod bolt washer...
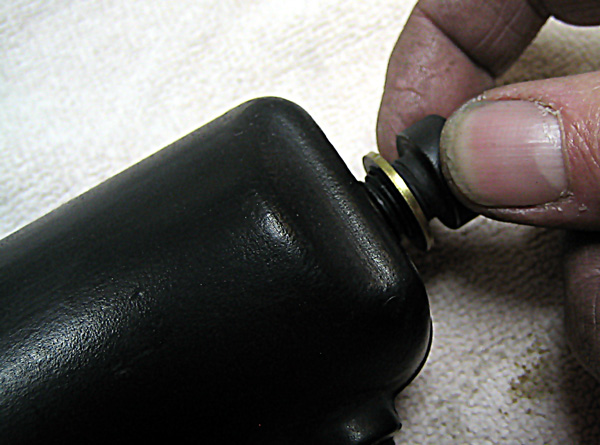
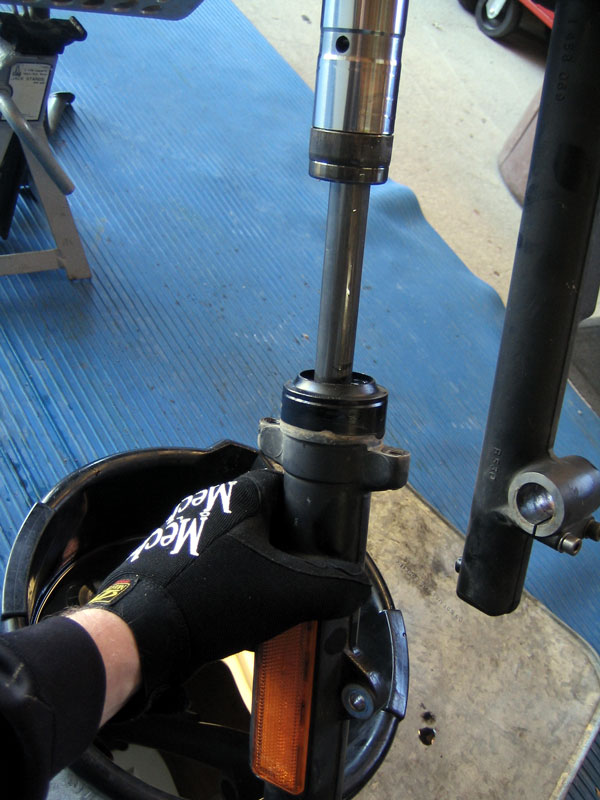
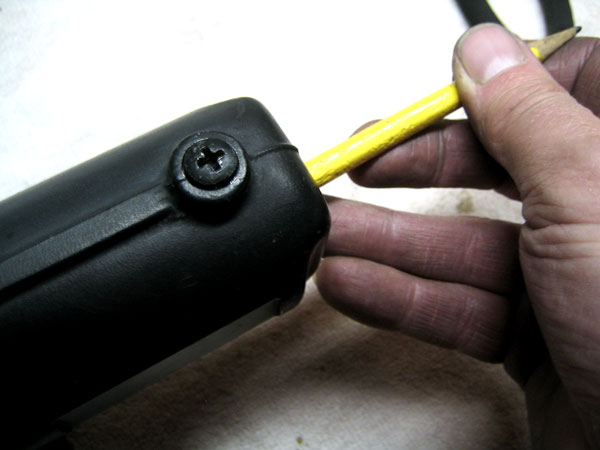
...install the slider assembly ever-so-gently after applying a little sex-lube (or other) to the frictiony surfaces and slide it right in, er, over. Then push the stanchion (slider) up to where you can feel the rod end at the bottom of the slider. I used a pencil to line up the threaded rod hole with the bolthole...like this but when installed on the bike...ick! Nasty cuticles on this dude, where's his Mechanix?
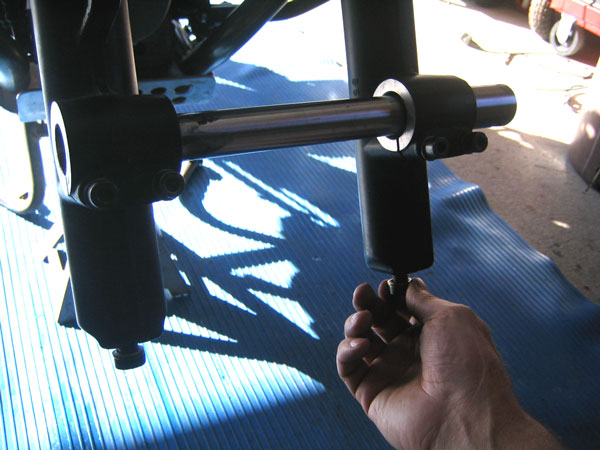
...in go the allen plugs and torque to spec after you've inserted the axel...is this too redundant?...old dudes tend to repeat themselves...

Drop
in all the goodies that you've cleaned and modded in order (see PDF). Right-side
(compression) will have the Racetech mod...damping rod with bushing (already installed)
aluminum spacer, gold valve emulator (spring adjuster up), guide ring (guide lip
up), fork spring, PVC spacer.
Same same other side w/o gold valve.
New cap seals and a touch of anti-seize to aid in threading in the caps...
...and a firm downward pressure and an even rotation to compress the springs and get the caps going. Then torque to spec.
Fill
with 15wt fork oil after 410cc left/ 440cc right. Since the manual said 420cc
each side and conflicting sources said anywhere fro $00cc-430cc I started with
425cc each side...then I called Ozzie's BMW in Chico, CA and talked to Mike the
Mechanic...he was surprised that 15wt was called for, which made me worry...the
highest they use at Ozzies is 10wt.
At any rate he said to use a turkey baster
and remove the extra 15cc's out of the left side and add it to the right side,
which will equal the correct 410 left/440 right quantities. So I did.
Fortunate lad that I am, I attained a Brembo 4-pot caliper*, same as the left side front on my 2001 R11S, and I was told this is also used on some K-bikes. *(left front donated by and thank you KiwiCarl!)
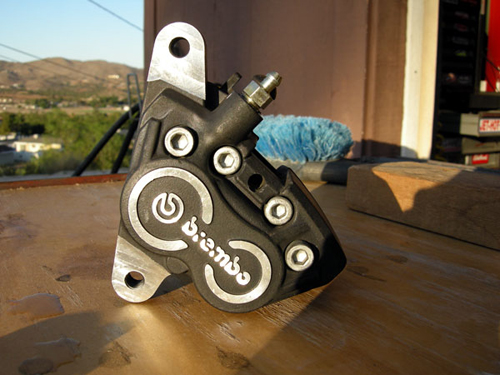
I had Oscar the CNC Guy shave 4mm off the bosses per info layed on me by my koolcat brothers at ADVRider...however once assembled it appears I could take about a MM more to line it up centered with the rotor...so either Oscar be jiving' me or somebody be telling me a story. Either way, the final results are a better modulated brake, not necessarily stronger, but better feel and less grab. Here's a thread of info concerning shaving the caliper.
Time
to re-assemble. All clean?...then we shall begin...After making sure all the fork
tube/damper parts were in order (see PDFs below) slide the fork tubes back up
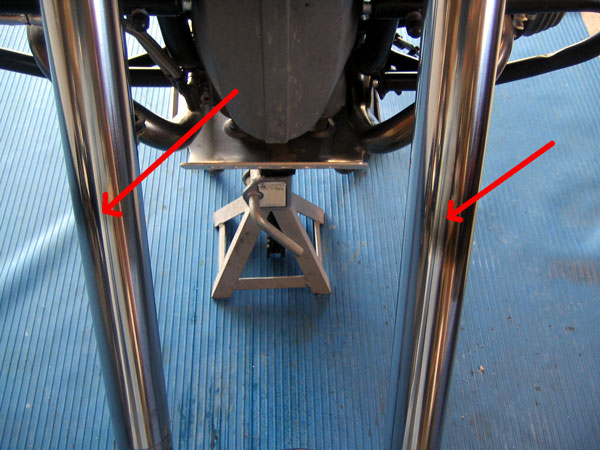
in the triples and snug the top tree bolts, not torqued. I lay the glass across
the tubes and rotated until the tubes are flat and straight I asked around to
see if the damper hole orientation was critical, no real response. Please e-mail
if you find anything out on this: Shade-tree
Rex
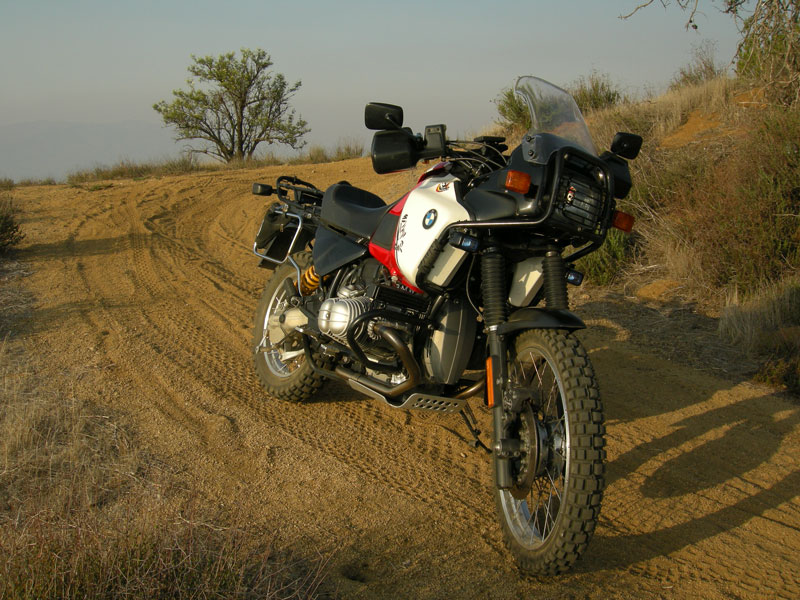
Booty call! New and official BMW factory booties...check!
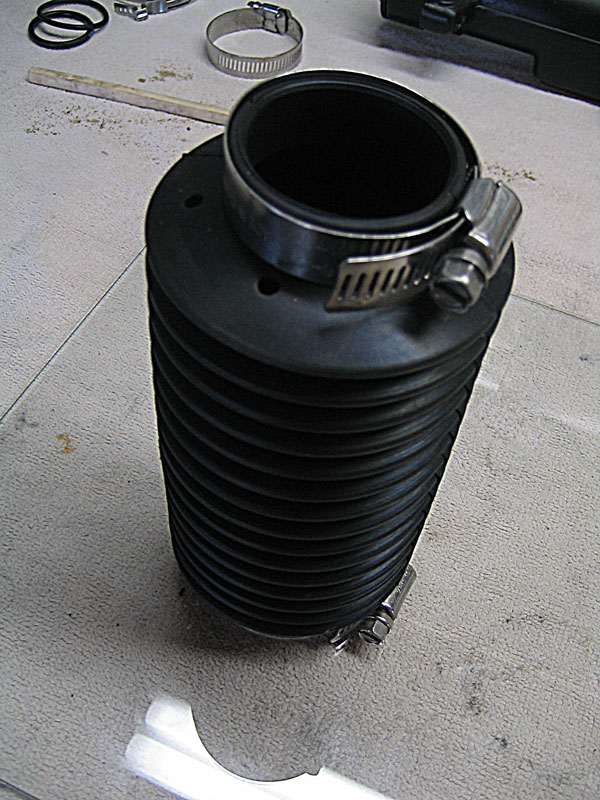
Install das boots with breathing holes at back, I like my clamps where I can tighten from the back, overlaps facing rear as not to grab nasty barbwire and branches, pointy side forward for aerodynamics...details details.
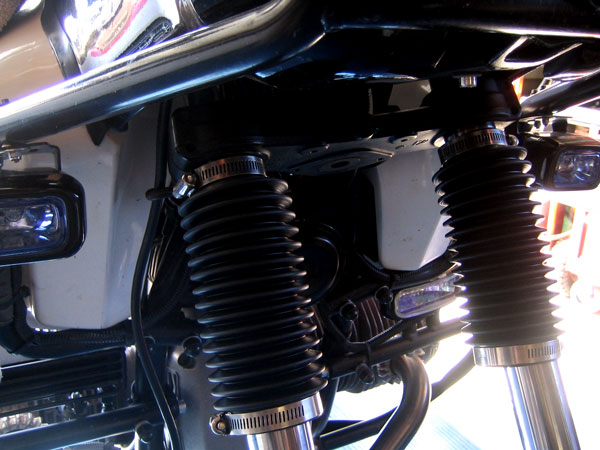
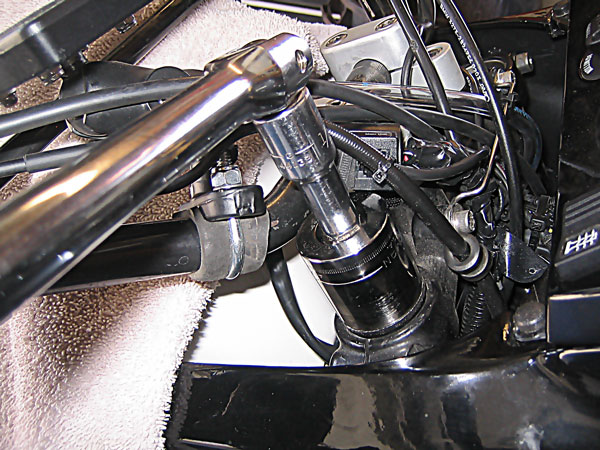
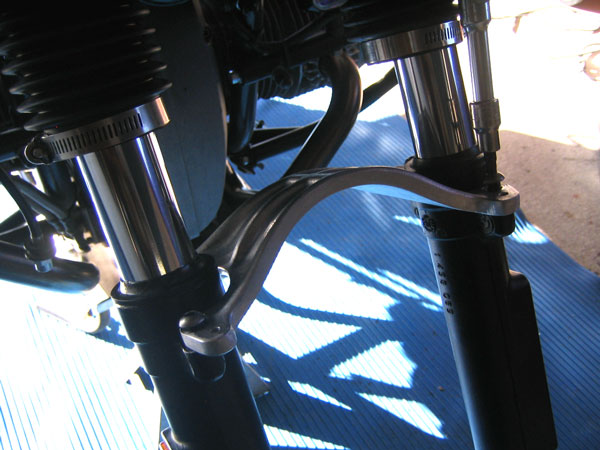
Install forkbrace, in this case I have the San Jose casted brace. I finger-tightened the brace screws and after installing the caliper and brake hose, I had to bleed the brake. I installed the front wheel and tightened all the clamp bolts and axle so that I could bounce the front end a few times to make sure there was no stiction and to align.
Then torqued everything to spec. All fresh.
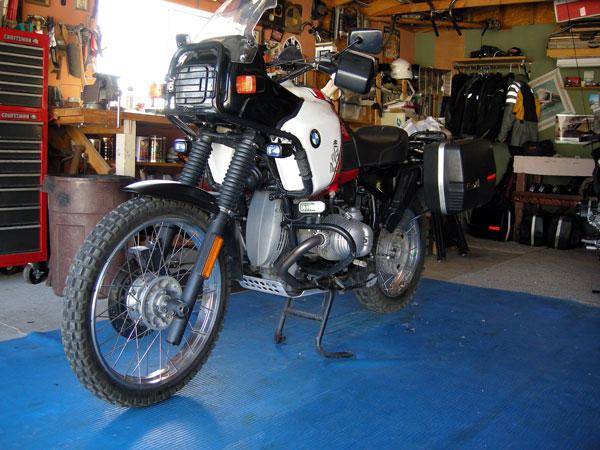
As
reported..."got it all together about dusk last night, I'm please to report
good results. The front end is much more compliant as well as calm in all respects.
The derelict bike seems to handle the paved roads and better both in cornering
and and every sort of bump with alot more finesse. I only did a few washboard
dirt sections but it is very much a noticable improvement.
The
new brake has more more gradual feel to it albeit not that much stronger, but
not grabby at all. No more grab-n-dive.
I think the issue here is because
of 2 things as far as the power goes.
I have used pads, today I'm going to
try and scout out some fresh EBC pads and drop them in for a try. If that doesn't
improve then I'm going to shave the bosses another MM. I can see that the caliper
isn't perfectly centered yet.
All
in all well worth the effort.
When I get it off in the rough stuff I'll let
you know how it feels.
I can already see that will a full PD tank that the
bike isn't going to want to dump forward as bad as before over whoops etc."
Footnotes:
The Real Test
zzz...zzz...zzzz...I
woke up from on the couch after mymother's day duties to find the sky over Acton
saturated with smoke.
I decided it was time to test the bike and get try and
run to the top of Parker Mountain to see what I could see fire-wise.
I threw
on the gear, grabbed the Nikon and hit the trail, right out my backyard the mountain
is appx 5000' elevation. It's the same nasty washout road I failed to accend on
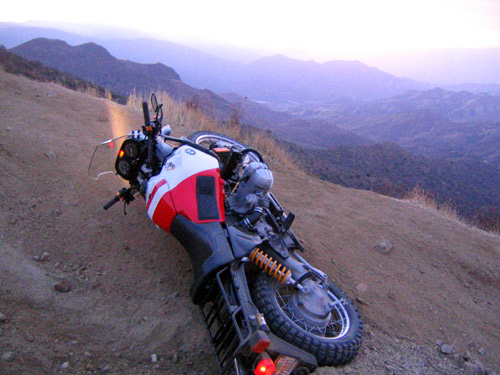
the maiden shakedown...remember this shot?
I'm
glad to report, that between my skills improving and the front-end rebuild the
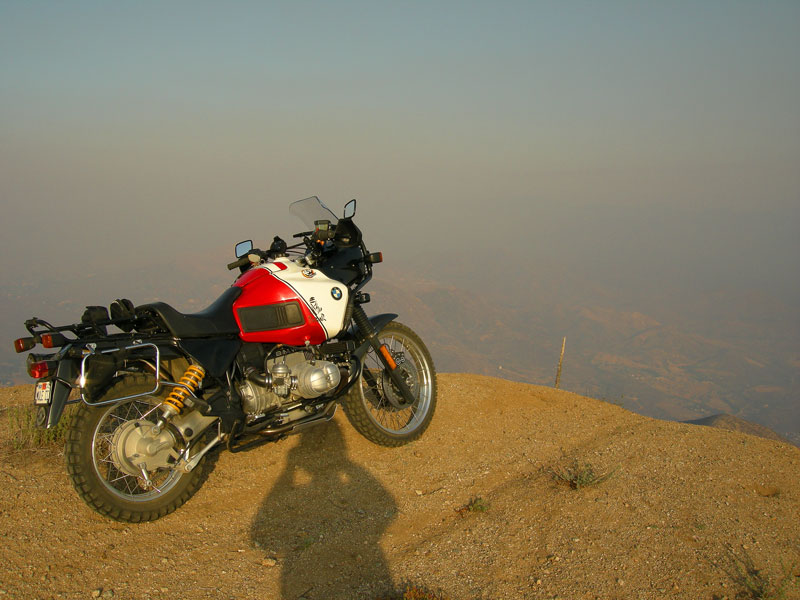
bike and I handle the nasty-ass stuff pretty well...we made it to the top!
Some very technical, rough and rocky going Baja-style...except on higher ground.
Deep washouts, 4X4 ruts and granite sections with solid rock deep washboard uphills.
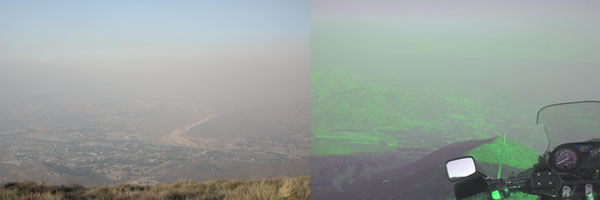
View from the Top
Oh these pics look like it was cake, but this is at the top, past the bad stuff. I was sweatin' about how I was gonna get down...I would have iked to take some shots of the bad sections, but there is no stopping once your committed.

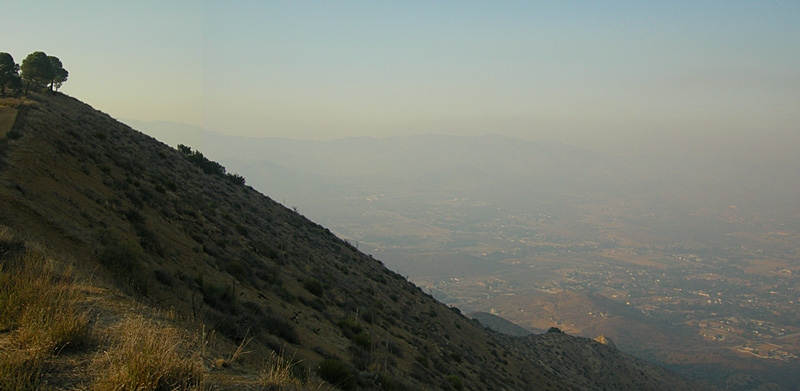
All
in all the front-end is more forgiving, and less dive-prone, basically more solid
and firm, yet supple...oh yeah...The new brake set-up helps because of a more
gradual modulation (less grab), the two combined made coming back down the bad
sections using the front brake alot less intimidating.
I'm a happy boy!