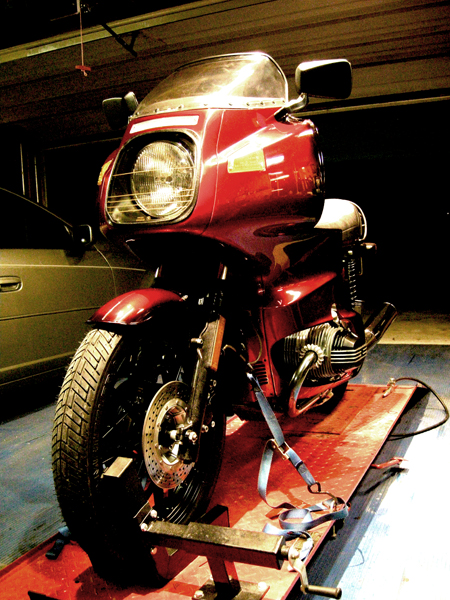
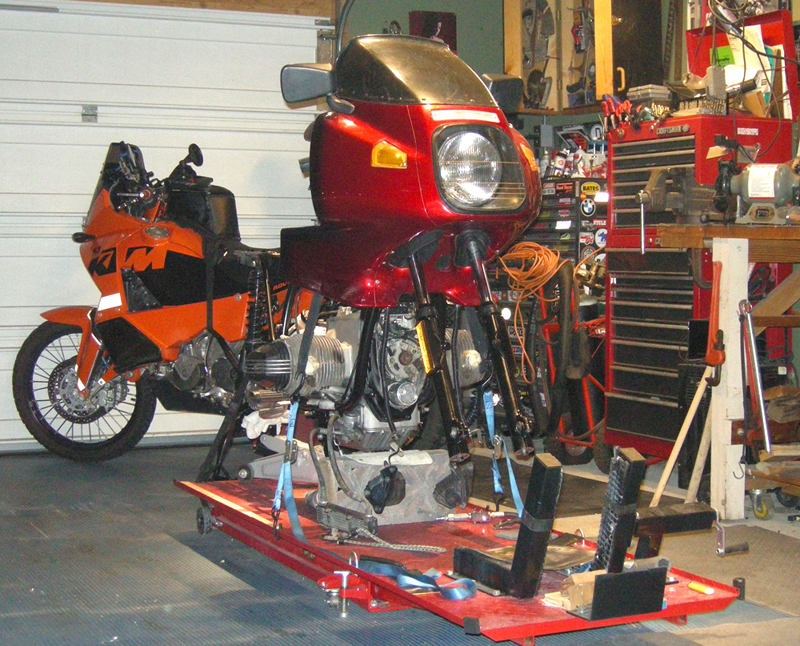
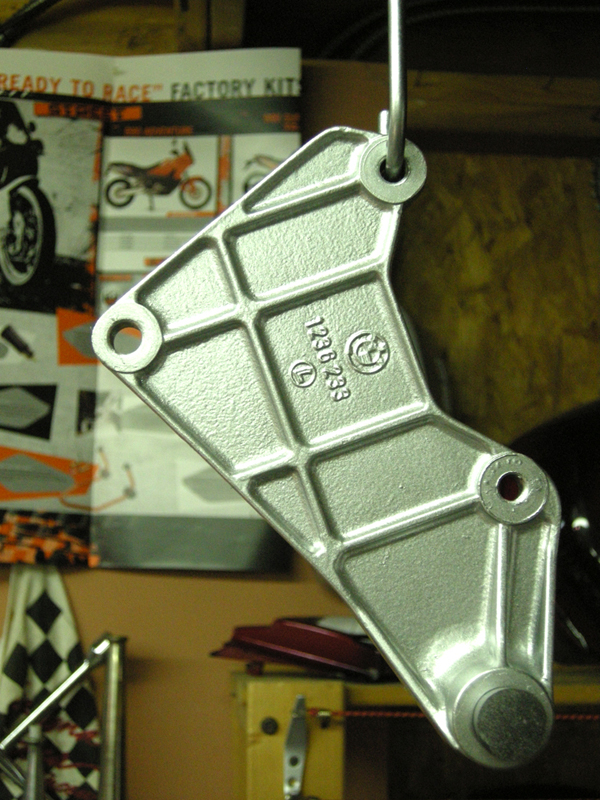
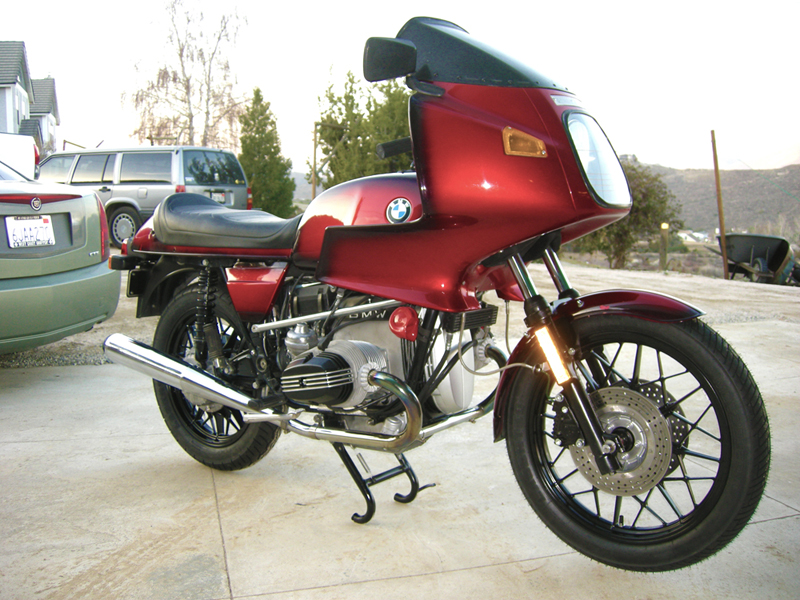
1981 R100RS Refurb...a Turkey Day turkey? :) - Decembre' 2010
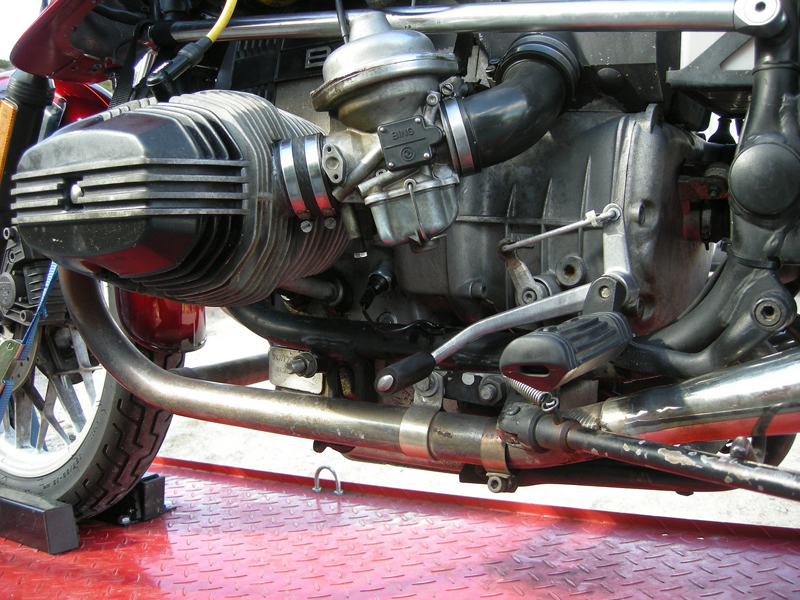
The R100RS we see here had a failure to communicate...advertised as 'all gone through' by a fellow ADV inmate showed that he had got a Barn Find that had been sitting 6 years with an electrical problem. Got it cheap with 44K miles therabouts.
The inmate whom we'll call 'Mr. White' did a pretty good job of tearing the bike down with help from a friend in a 2-3 week timespan and getting it roadworthy again. Replaced all the rubber, head bearings, fasteners, ICU, bean can, new seat, cables and a tune up and some quick and dirty touch-up. Then he rode it across the country. Whilst back east the right side head started to suck a valve. The Airhead community came to the rescue with a 'serviceable' donor head to get him back across the map to Nor Cal. I don't think he rode it much after that as it showed so much road grime and wear. Evidently about 9-11K mikles worth. It now has 55K and needs a facelift...
Thanksgiving Day we ran up to Santa Rosa to take a peek. After looking it over and taking a short spin (very short) I was discouraged enough to state my resignation and decided to head back for the turkey and stuffin'. But Mr. White insisted and we cut a deal, so BMR.White's 'Red Runner' was loaded up and brought on down to the ranchito. The cleaning alone will not be something I'm looking forward to...
11-28-10
Home and on the lift immediately...
Ooookie!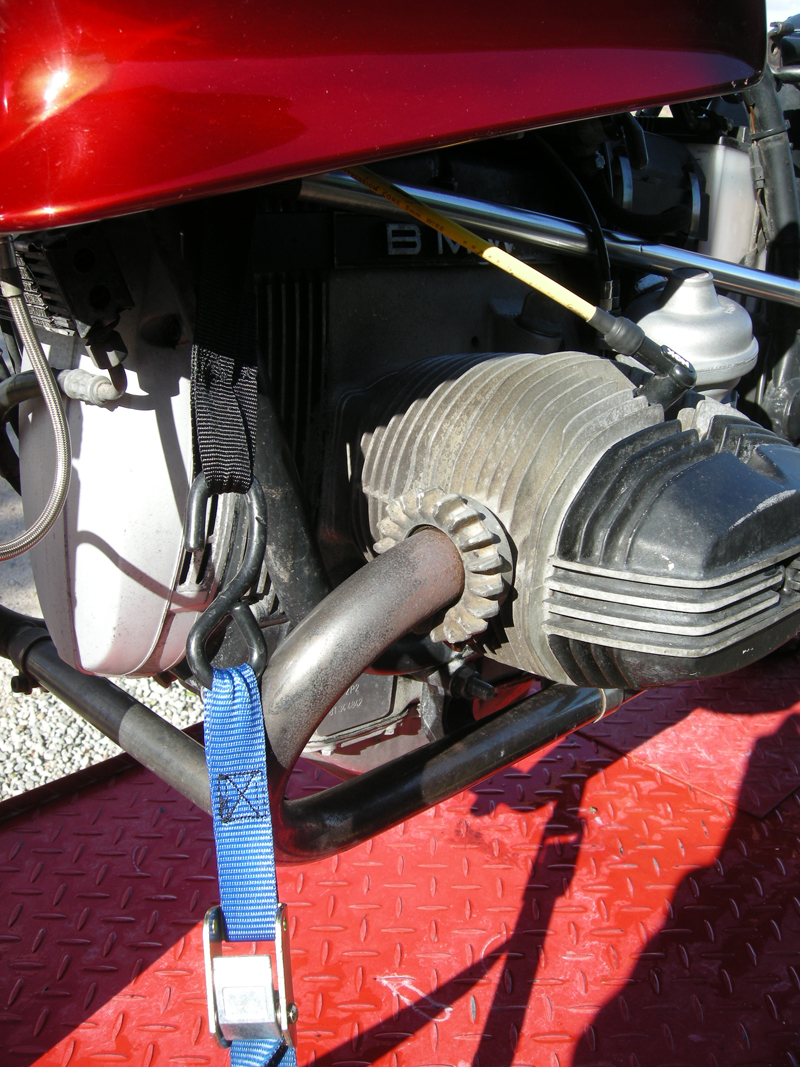
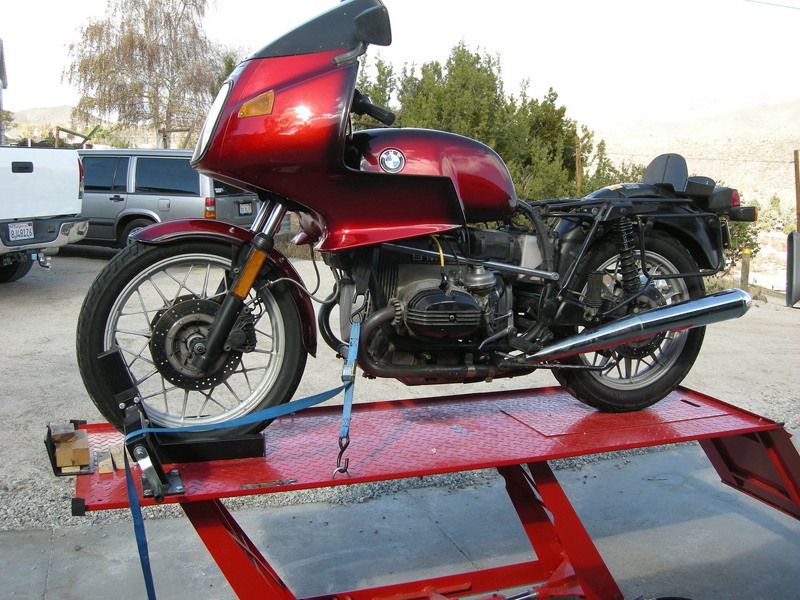
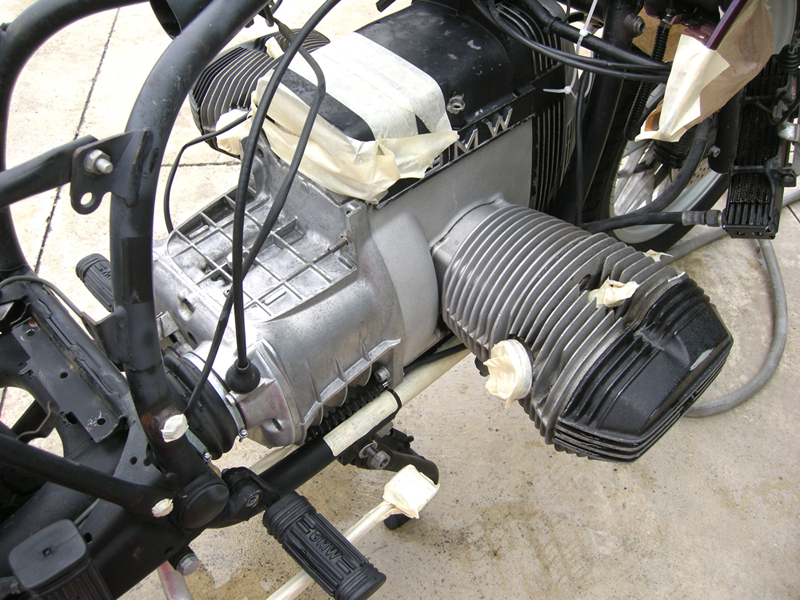
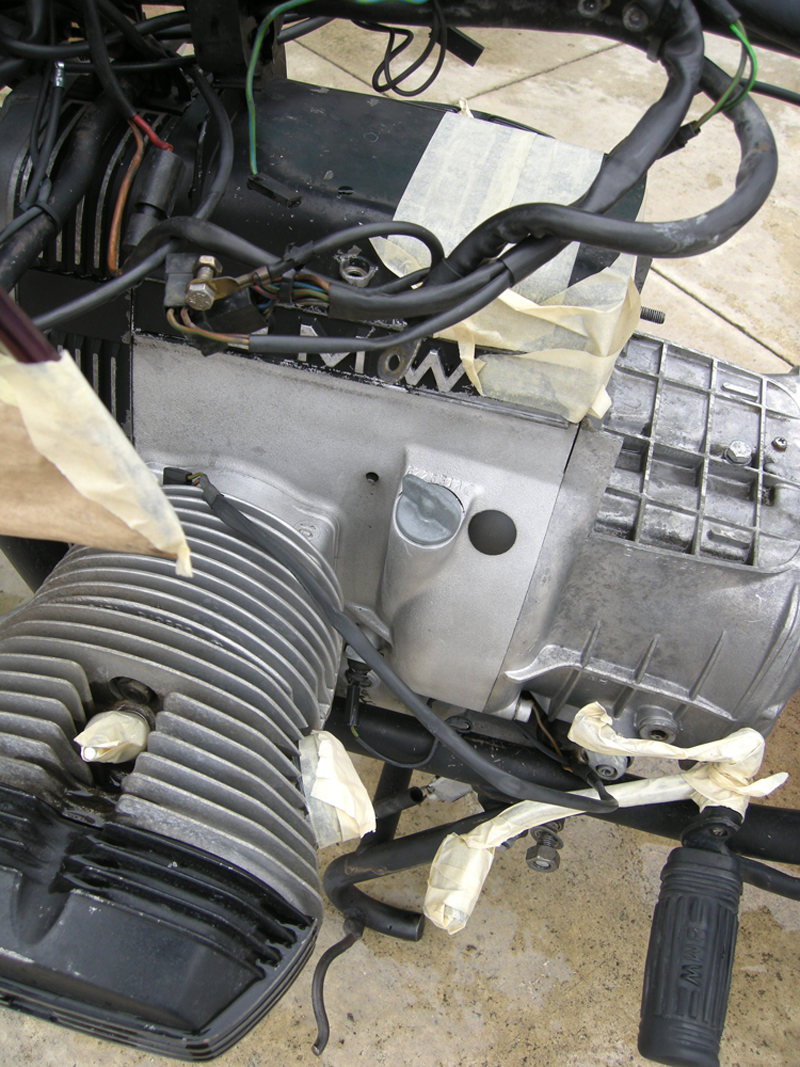
Outside of the mechanical work I know needed to be done, valves, some sort of electrical demon, and tires, the bike is in pretty decent shape.
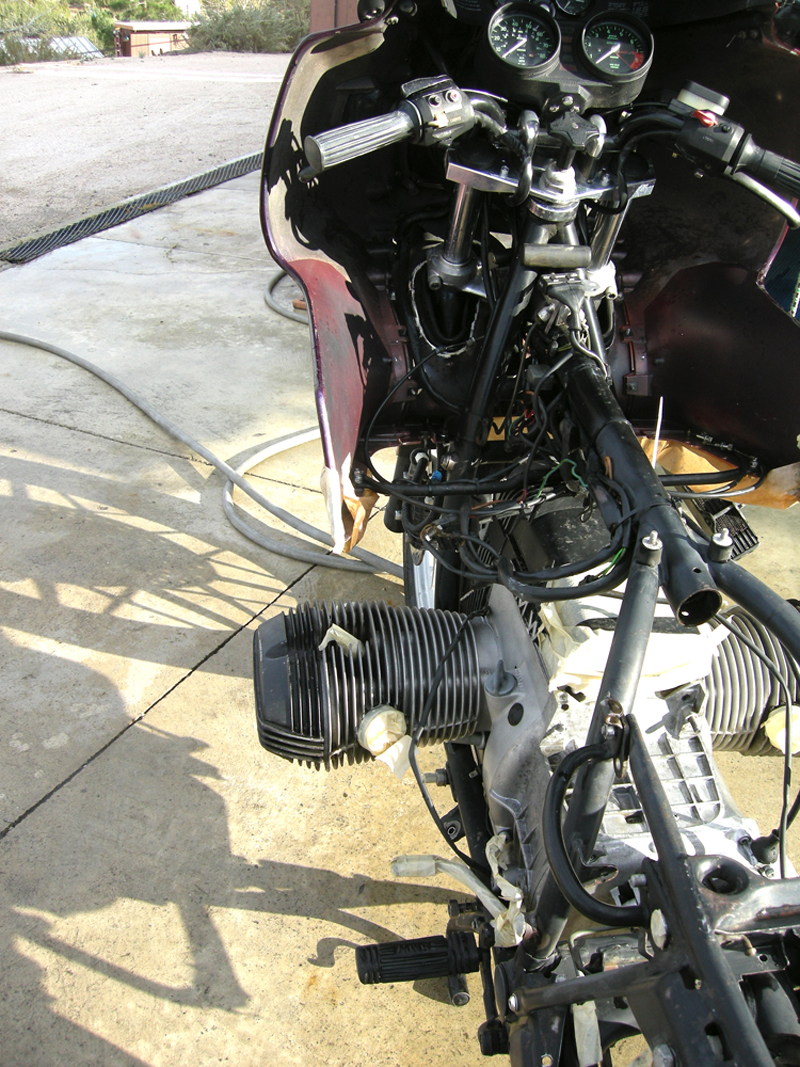
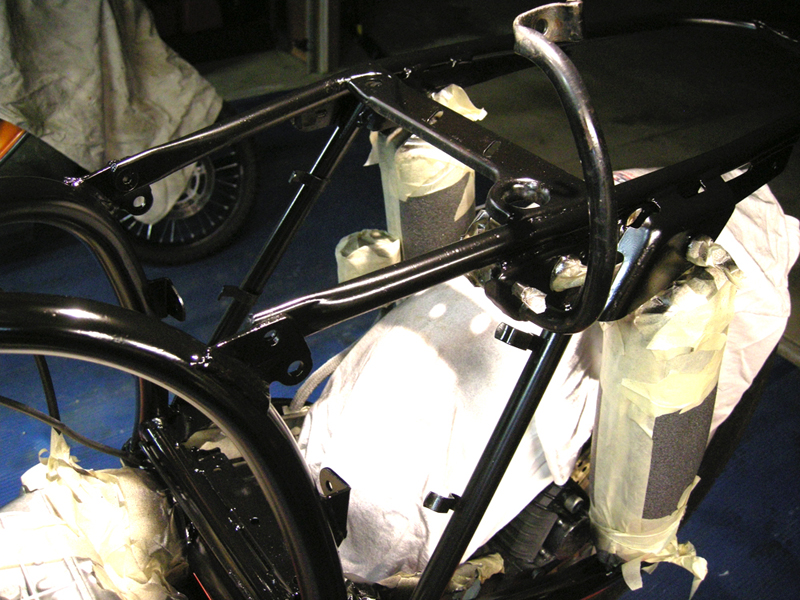
A slightly rusty frame, lots of corrosion on the motor, a leaky pushrod tube...all stuff I can fix with elbow grease and what's left of my lungs.
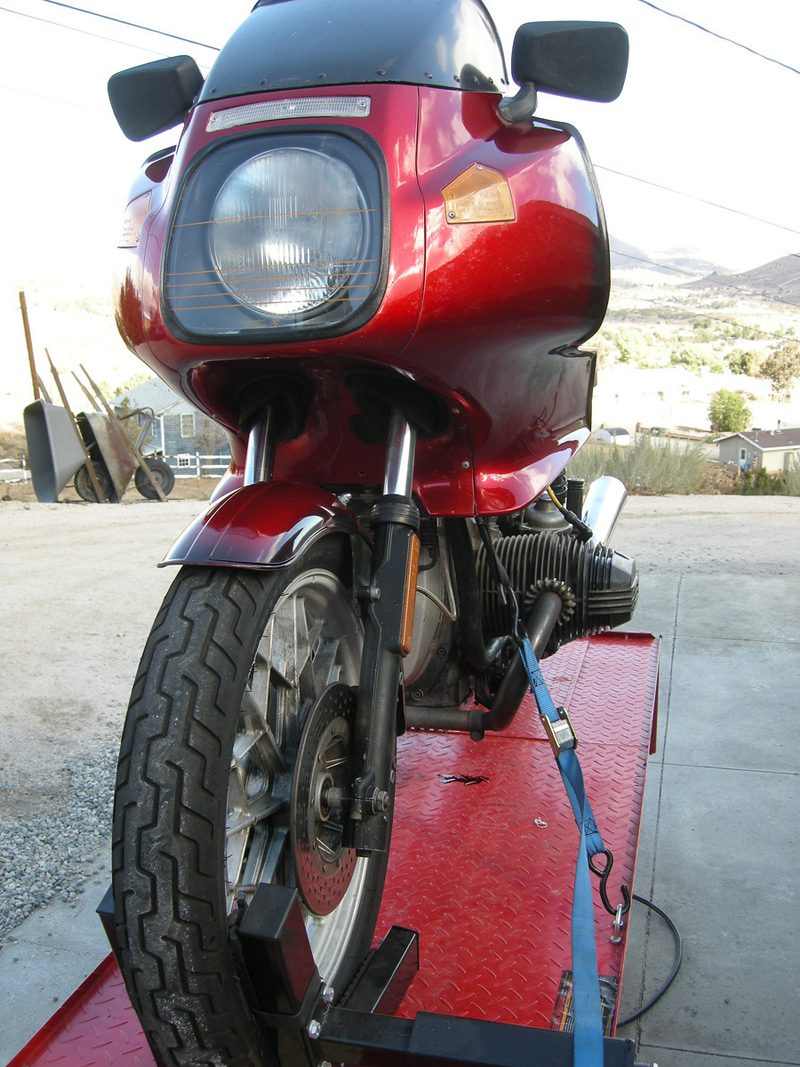
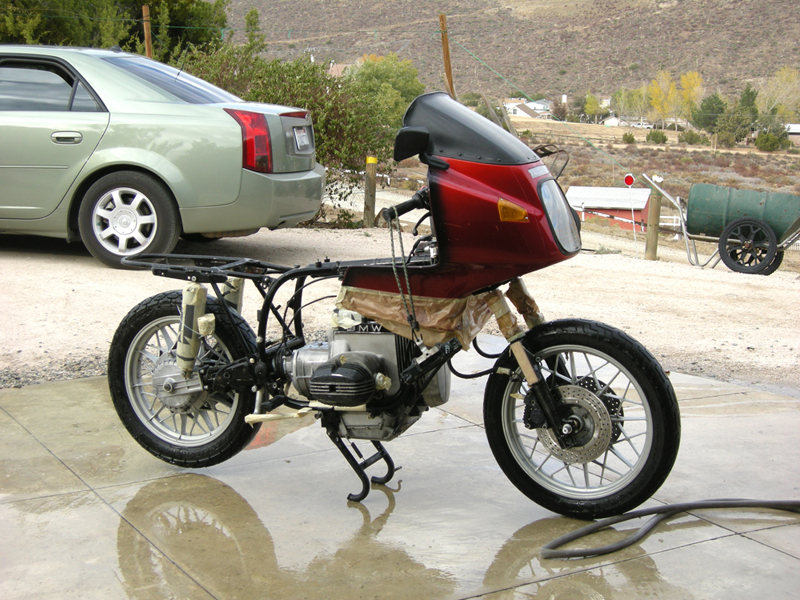
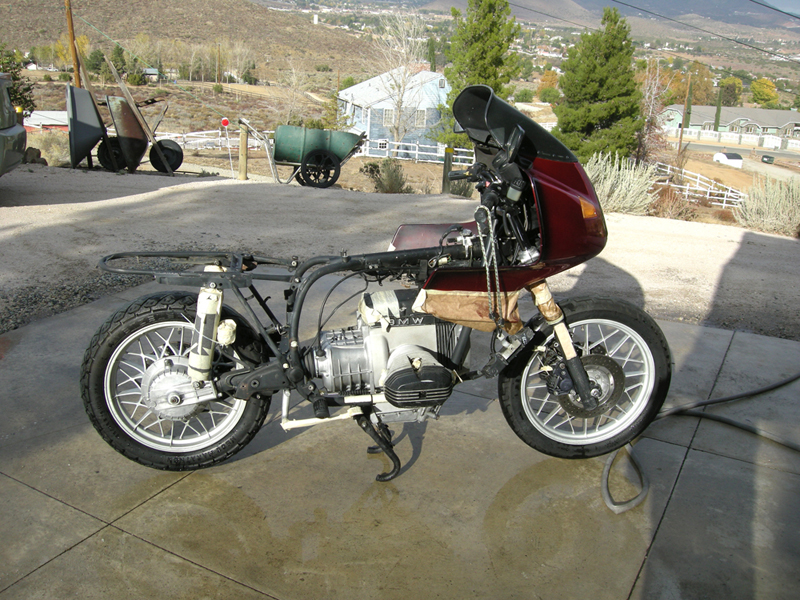
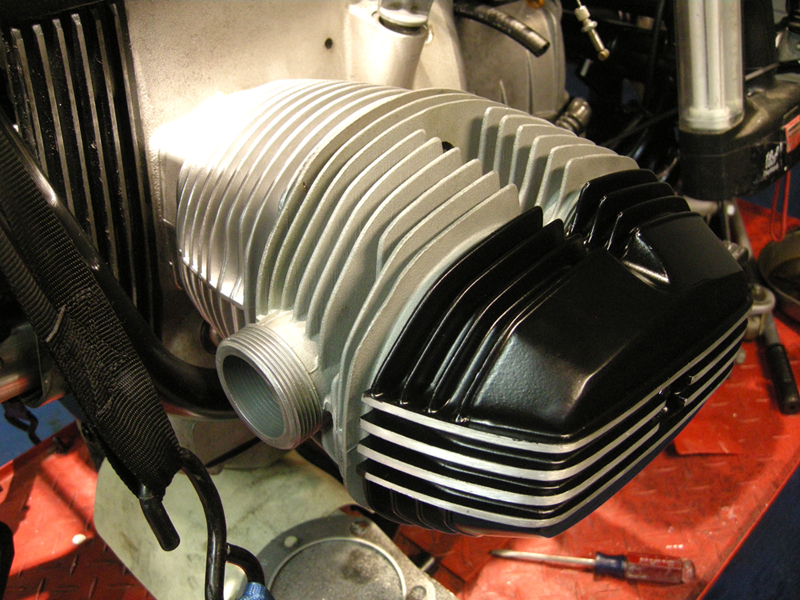
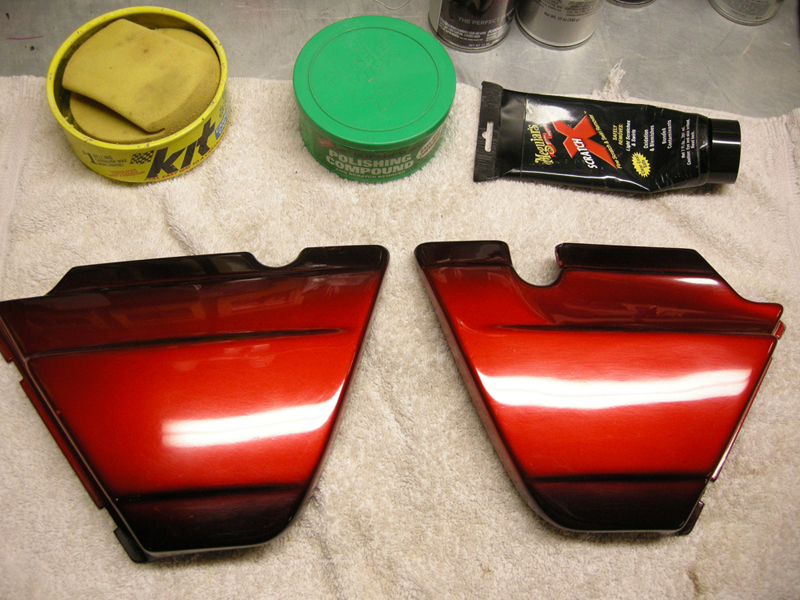
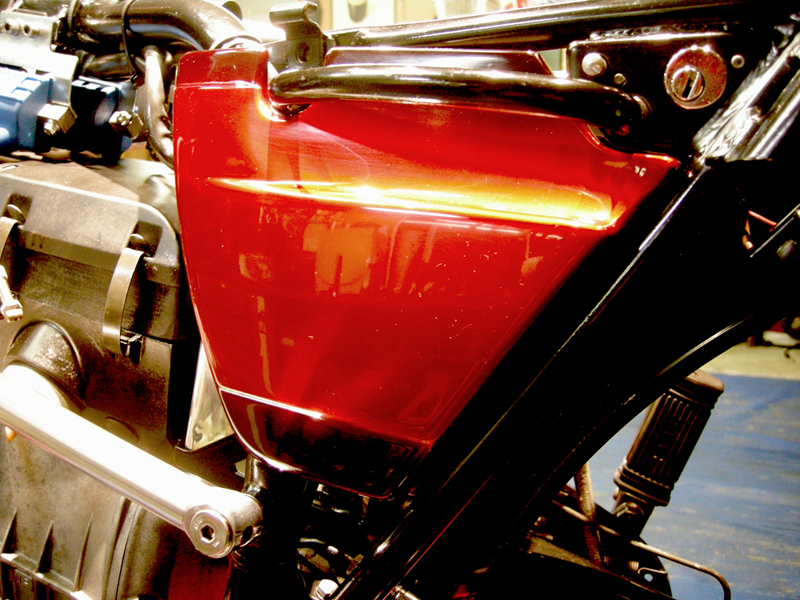
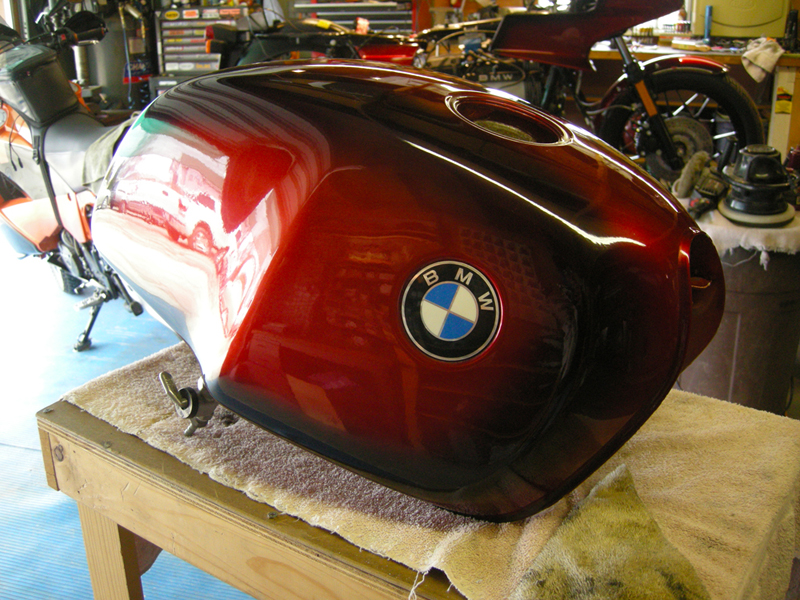
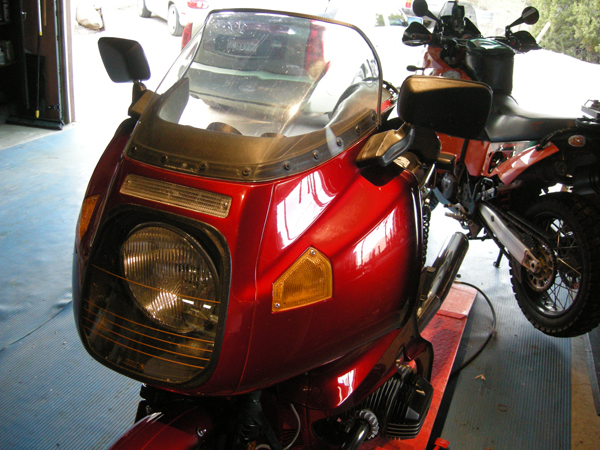
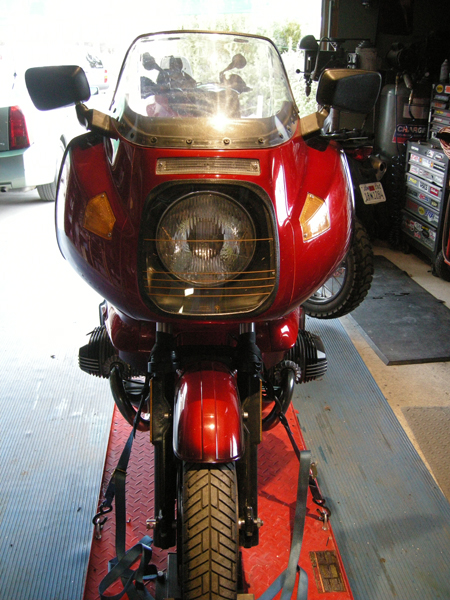
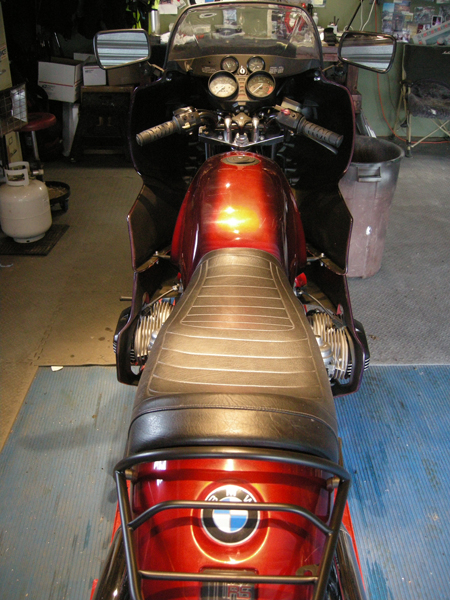
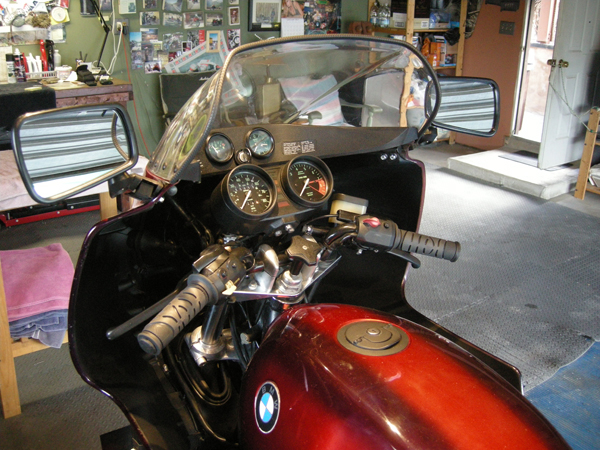
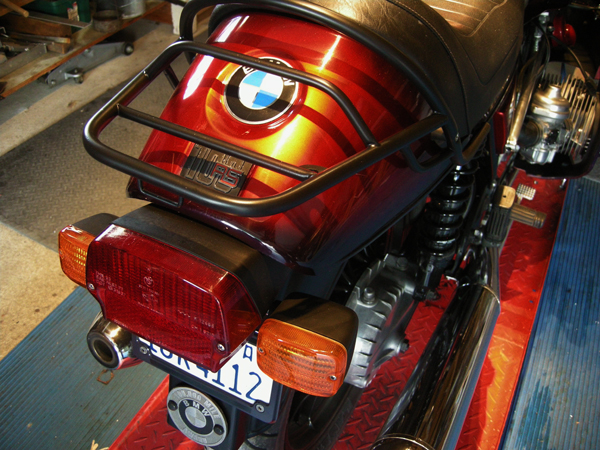
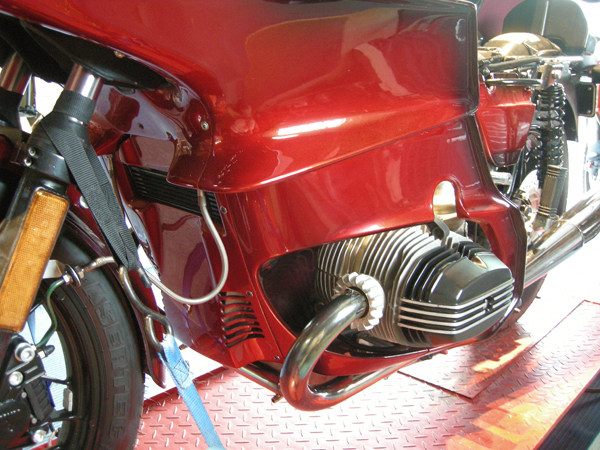
Heads can be sent out and done. Parts can be ordered. Paint and cleaners can be bought. The nice part other than a few nicks and scratches, the paint is too good to paint over (for now). A very nice Lava Red which is close to Candy Apple, with a purplish blue smoke.
After an initial scrub so that I can see where the oil leak(s) are, I statrted it up, synched the carbs with the Twinmax and went for a short 40 degree test ride on my shortest of loops.
Well, not even that. After a few miles it started to bog and and rumble like running out of gas. Since weekend time is a premium, it was back onto the lift for this old bird...
Now, to get started with the low budget frame-on restoration.
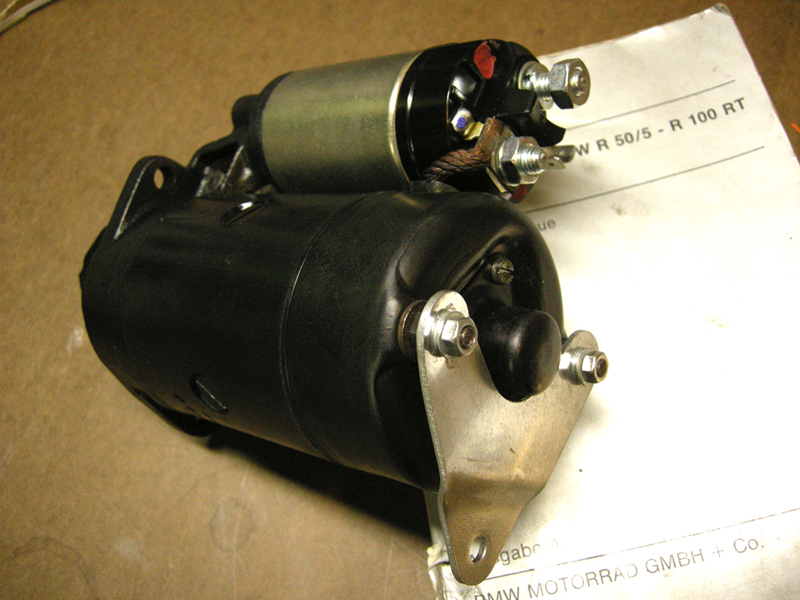
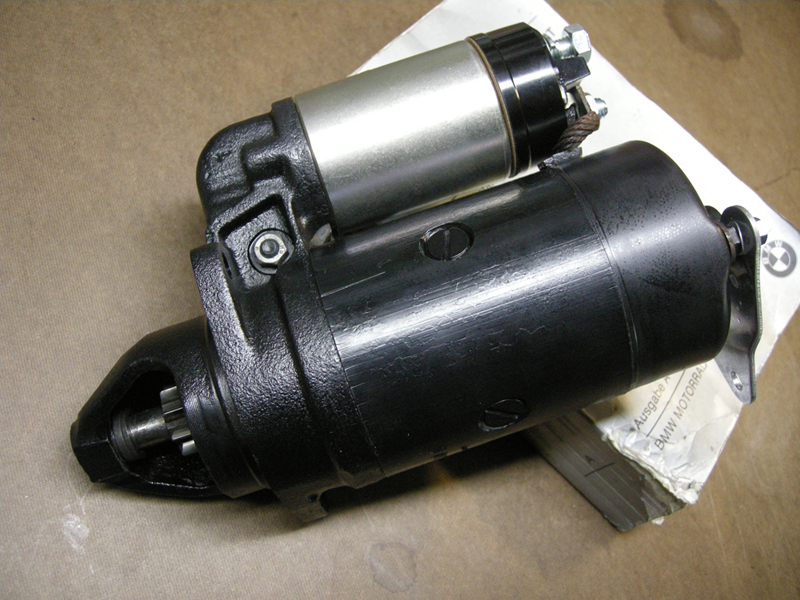
Yanked the carbs (gently dear!), airbox, pipes, fenders and stowed the cables and loose wires up on top of the frame. Pulled the starter and out to the local shop for a serviceing.
General crude has been scrubbed down after a good 3-4 hours out on the lift with degreasers, engine cleaner, 3M pads.
The first layer of grime is gone..
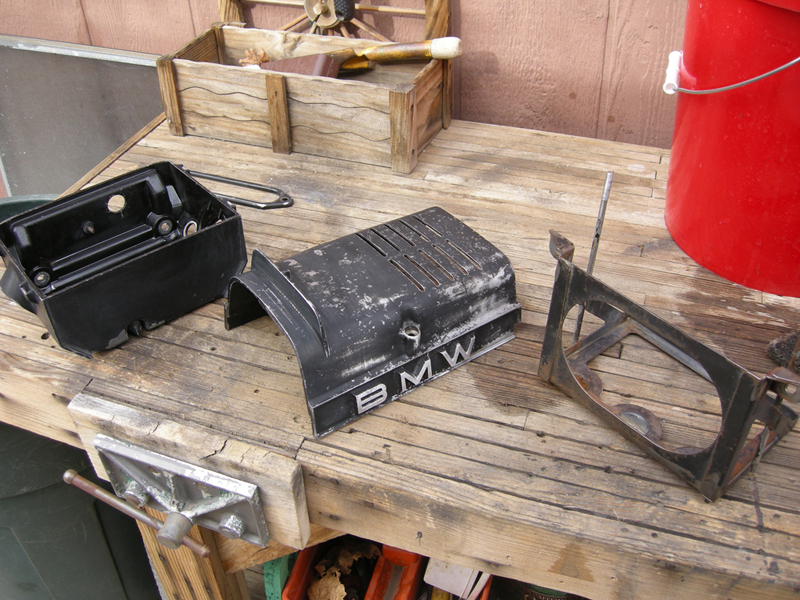
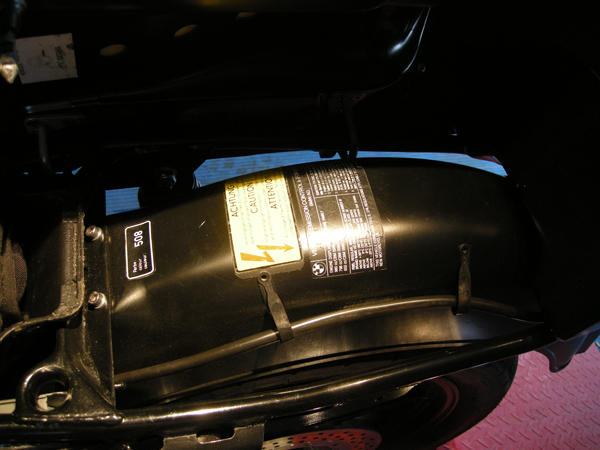
Regular ol' battery box.

...corrosion abides...
Day Two it's prep for a sodablast, and time allowing, blasting the second layer of crude and oxidation off. I spent a couple hours masking and sealing everything off to minimize soda getting into the internals and parts like the new shocks Mr. Ken had put on. After the blasting is done compressed air cleans out the white stuff (always wanted to say 'white stuff').
Too bad I didn't mask off my buttcrack...
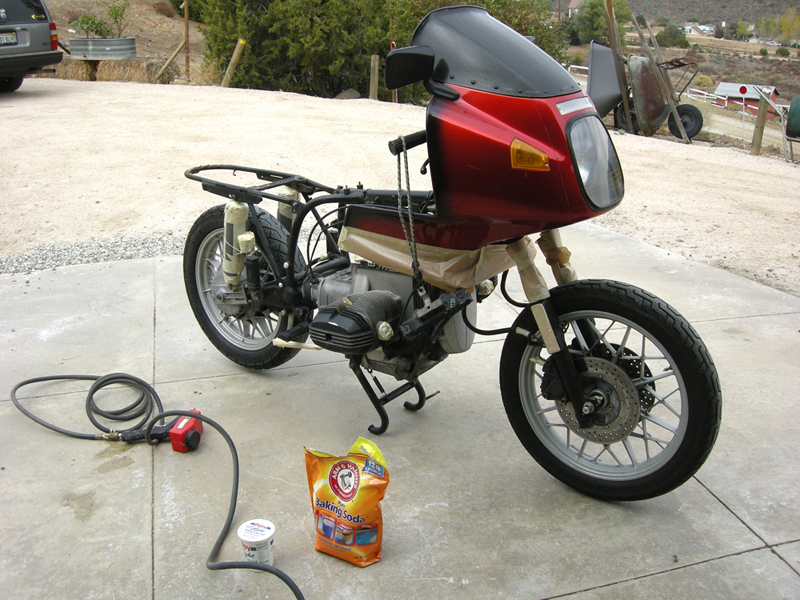
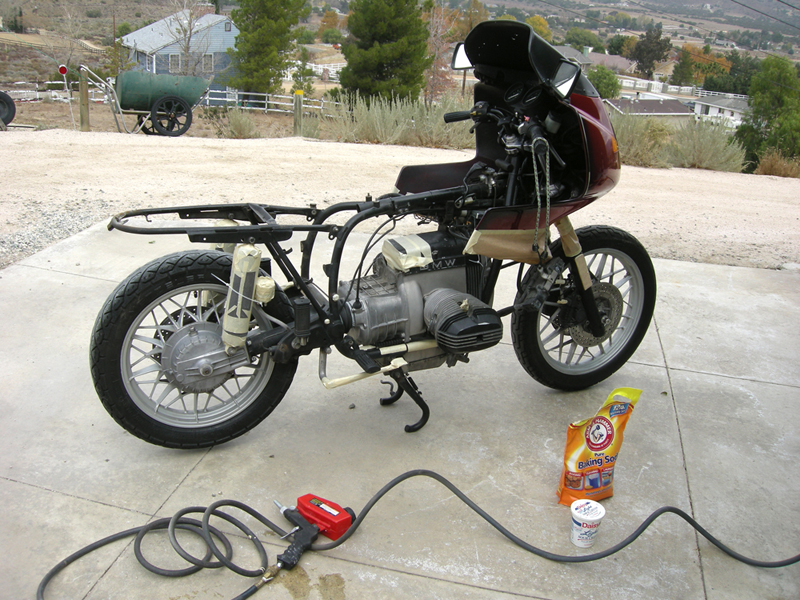
Post sodablast, about 5 lbs of baking soda and a 100lbs of weak compressor pressure skins off layer two. Best part is it cleans the aluminum without any acid etching chemicals.
Makes a helluva mess though so don't try this in your home garage on the cul-de-sac. I looked like a dust monkey when it was done.
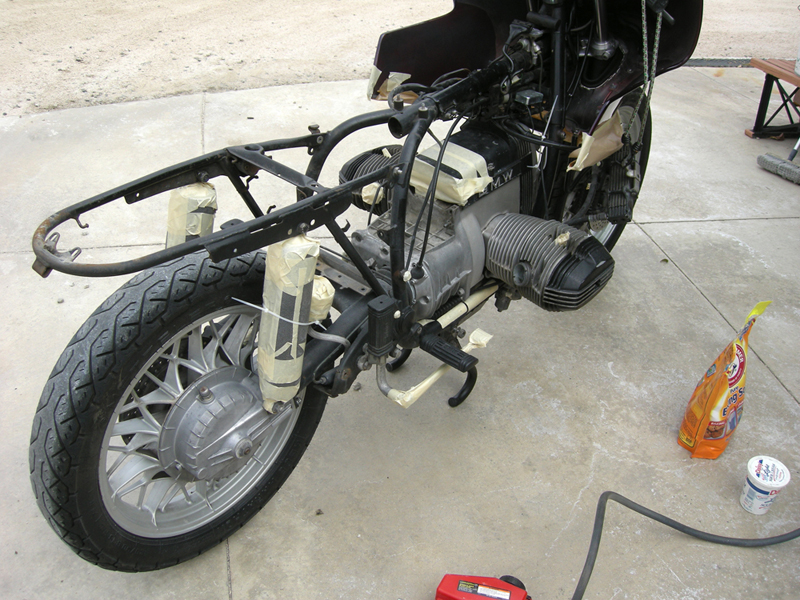
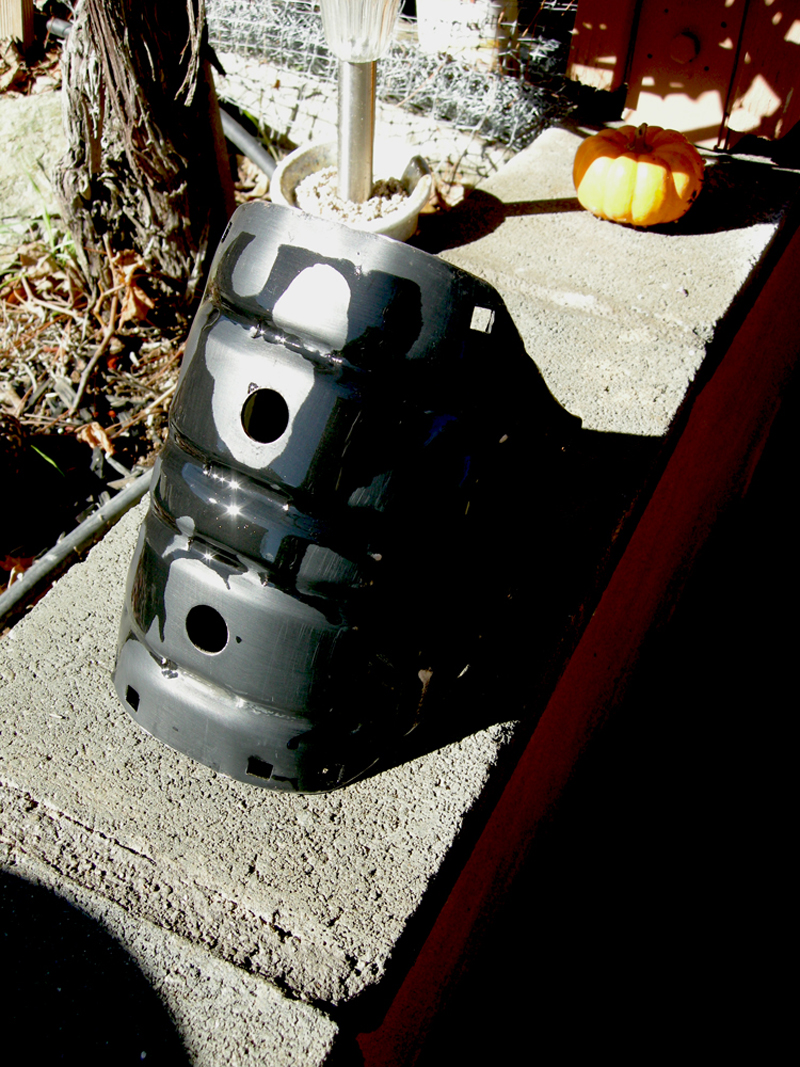
...due to my failing compressor not all the crude got removed. Painting the wheels to come.
.Another washy downy so we can see whassup....
...and then the sun came out and Dog looked down upon what he had created...
Minimal damage to the crudeniks but another layer diminished...
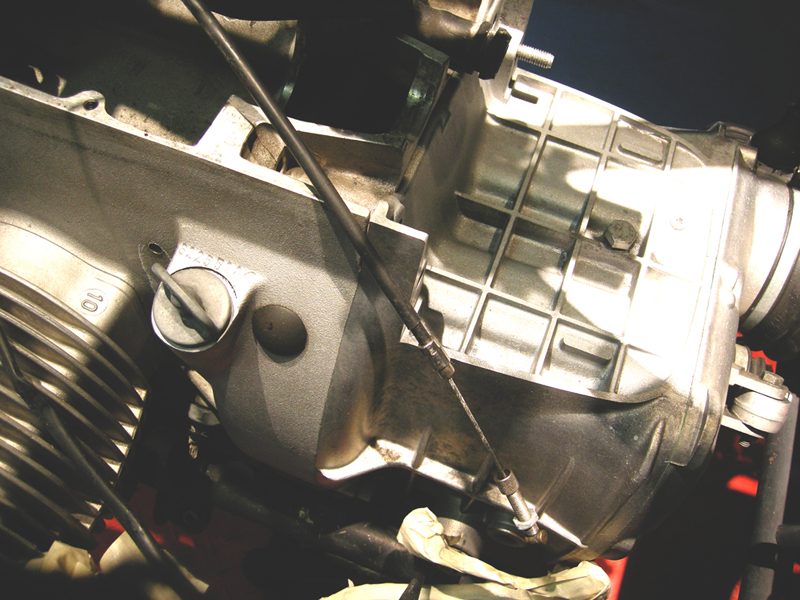
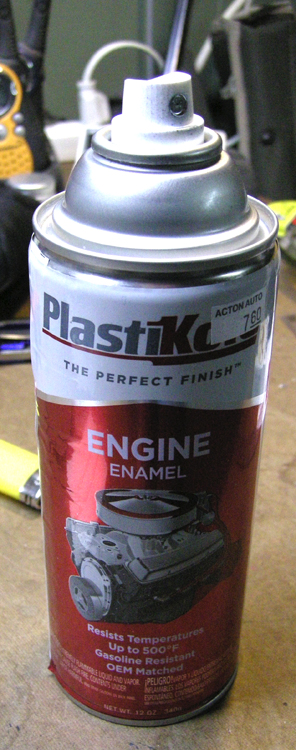
...drama shot, I tried a little Plasticoat Cast Aluminum paint on the top of the tranny t test. Looks like a new casting...but it is still just paint.
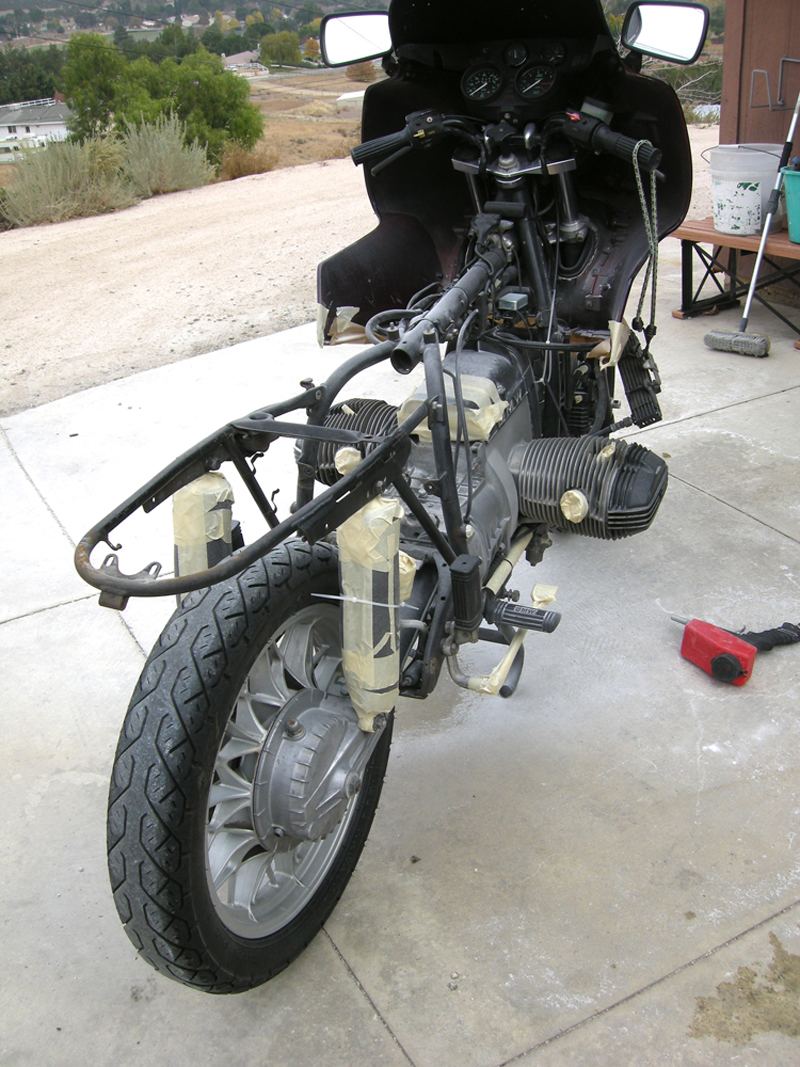
Now the funnierest stuff starts, more cleaning and masking, prepping for the El Cheapo detail...learned it all from working on car lots in my yout'...
while it was outside I used synthetic steel wool scrubbies and 400 grit wet n dry sandpaper to get the real cruddy, rusty stuff back to a paintabble surface.
A roll of quality masking tape and some 'easy mask' from Pep Boys comes in handy.
...in the meantime we (I and myself are multi-tasking here) prep the parts off the bike for paint. More 400 grit, and some Duplicolor prep spray on the battery box and airbox.
Some pinstripping tape works on the parts we don't want paint on, works great on valvecover fins, etc.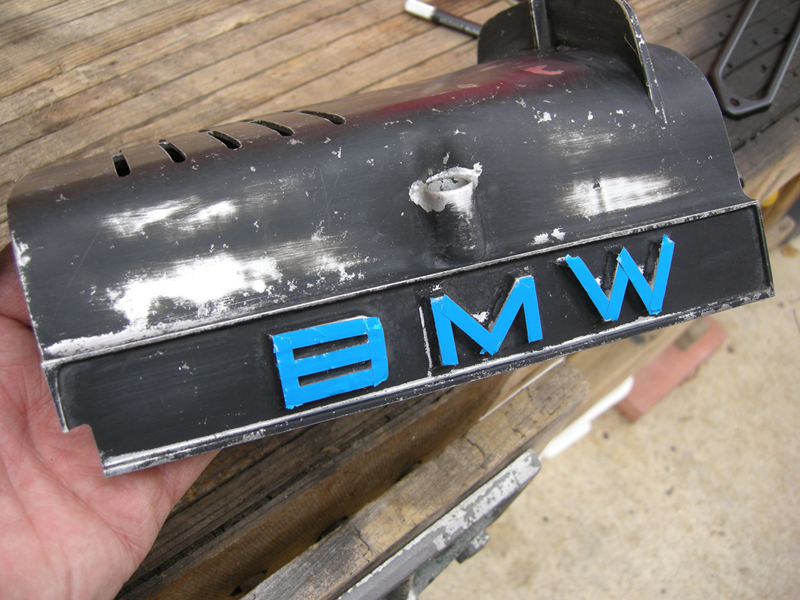 .
.

Satin black or semi gloss for the frame and the timing chain over.
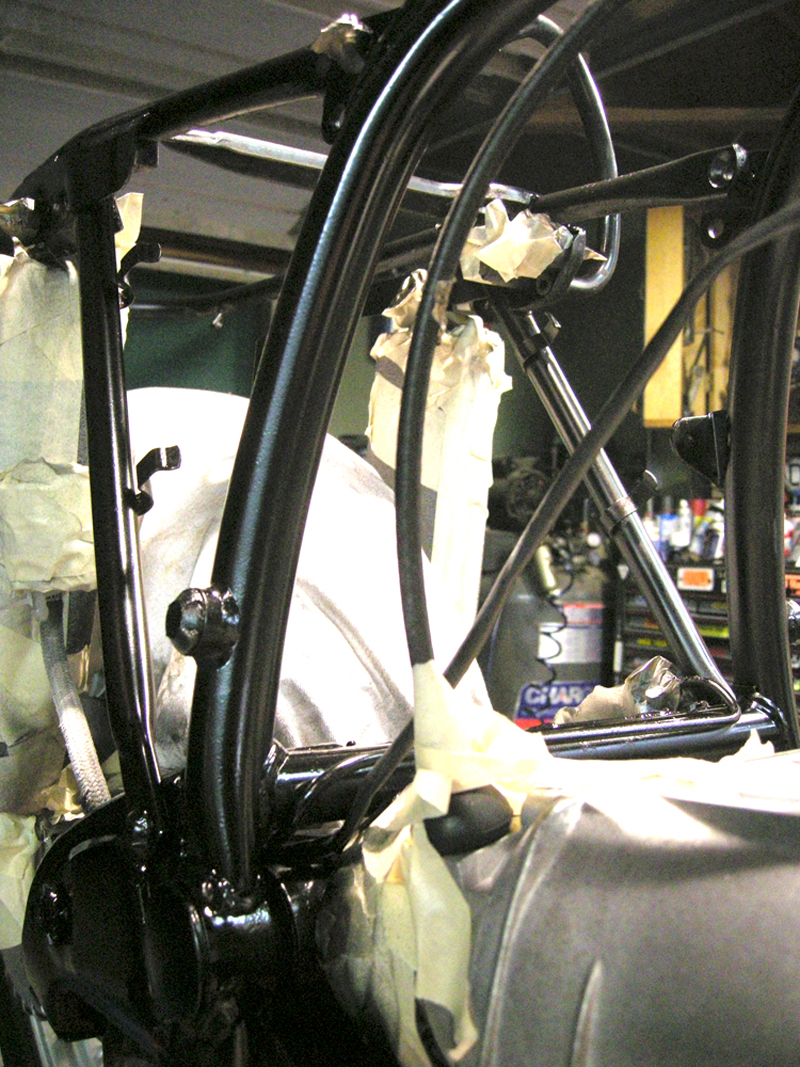

How much time I got in this project already, afterr Day Twa' it's a good 20 hours of wash/scrub/mask/blast/wash/mask/paint...
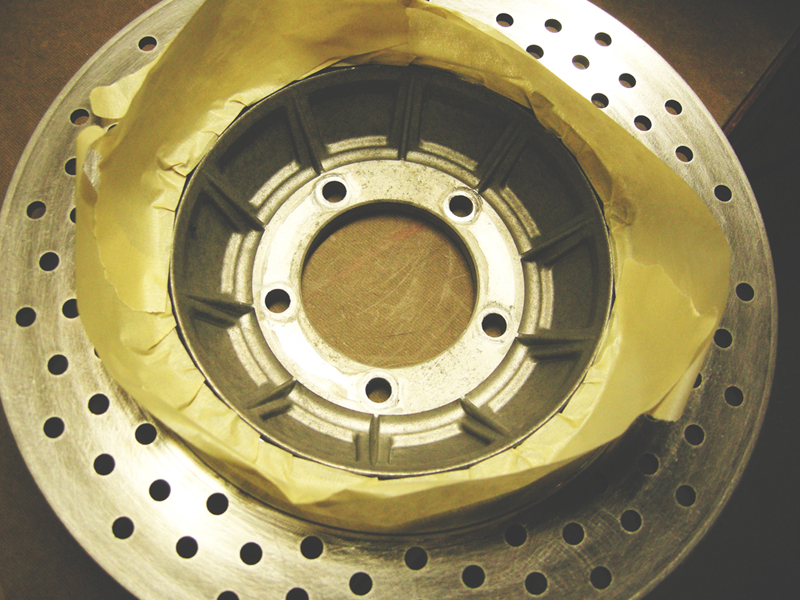
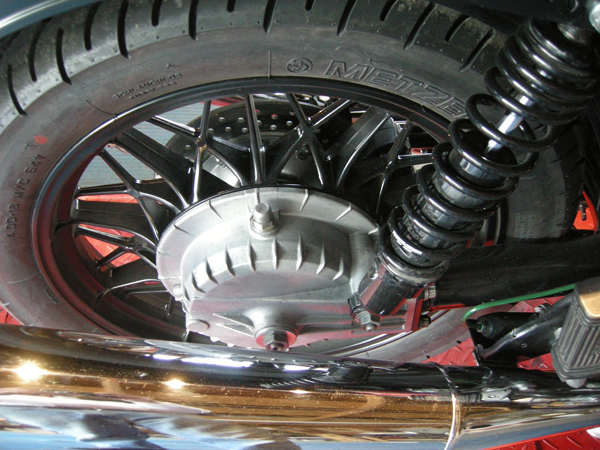
Finally, I tackle the wheels. I'll bust the tires off later and take a look at the trueness, then decide weather to powdercoat or just use the DupliColor wheel coating to freshen them up.
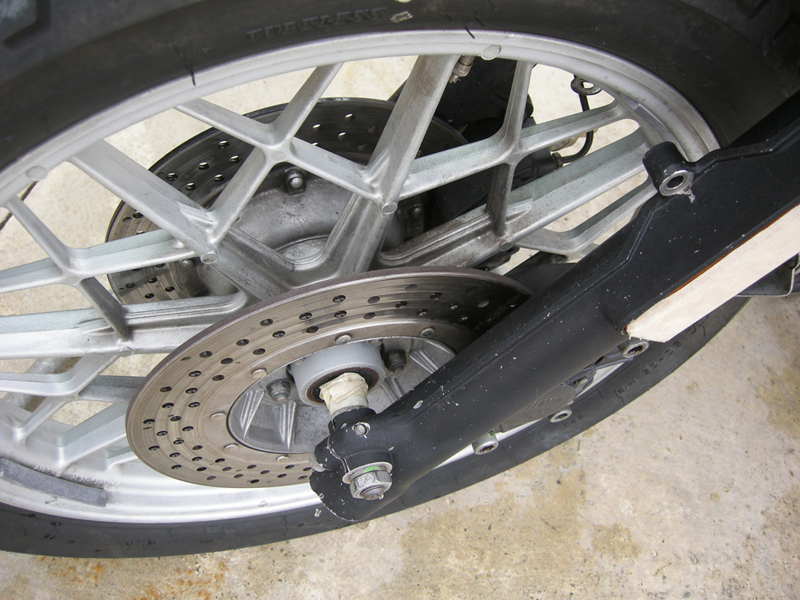
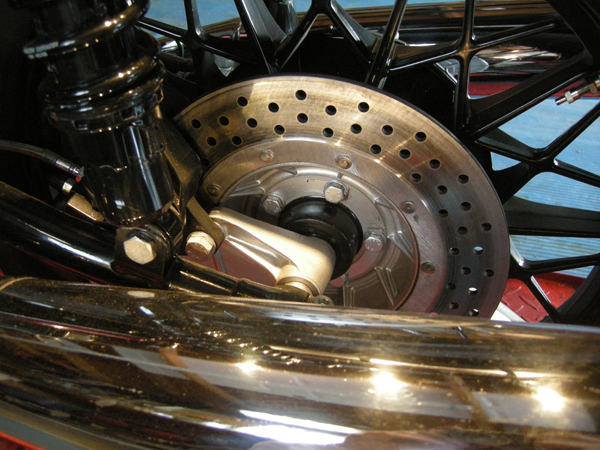
Brake rotors off and Duplicolored. Sanded down the disks which are in fair shape, 'within spec' according to Mr. Ken.
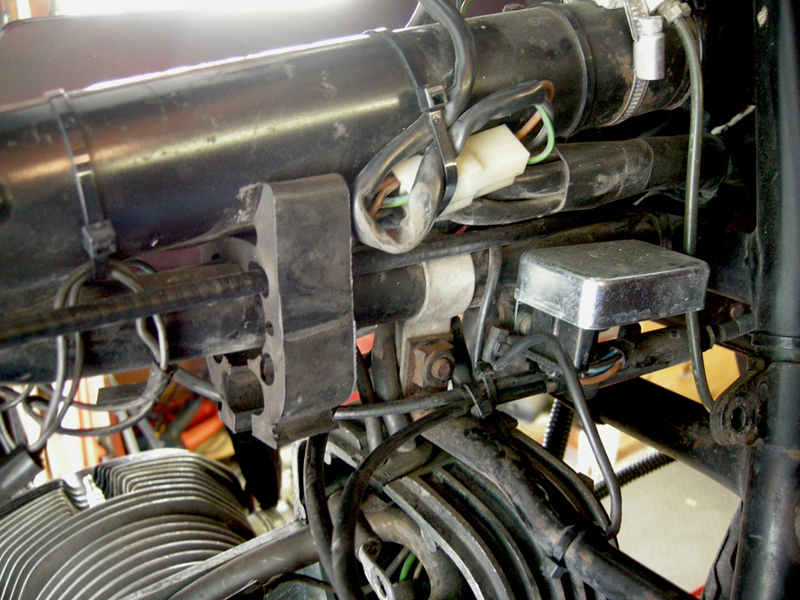
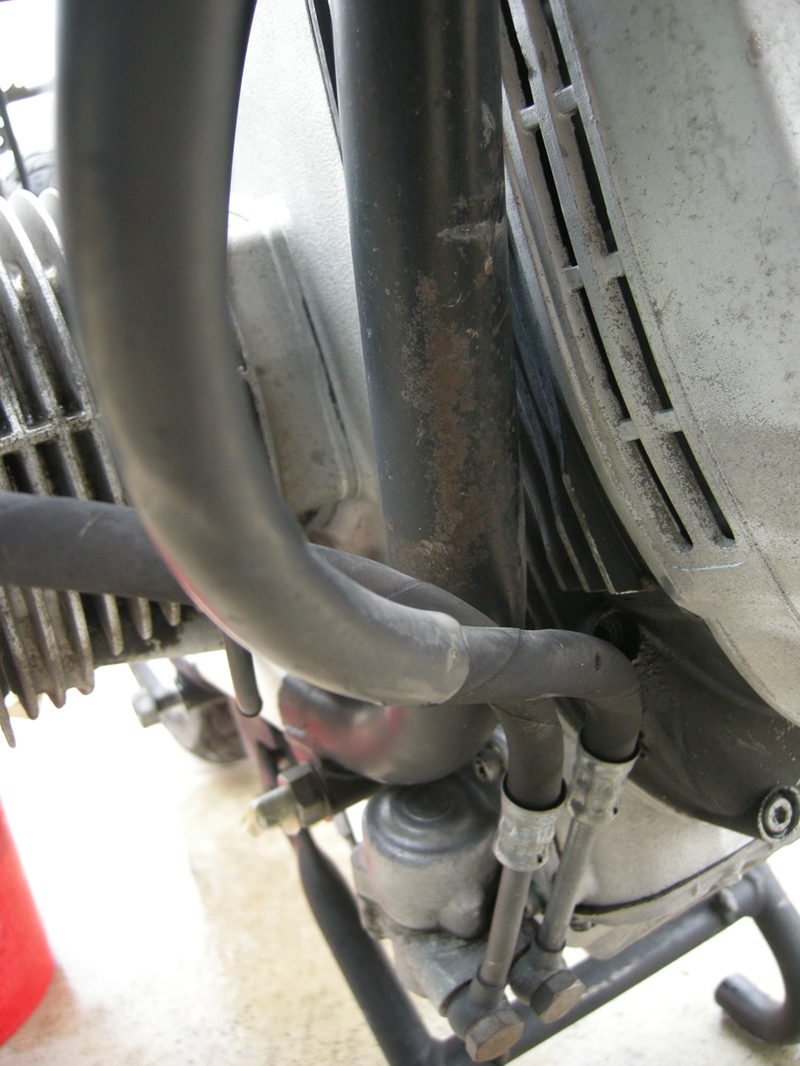
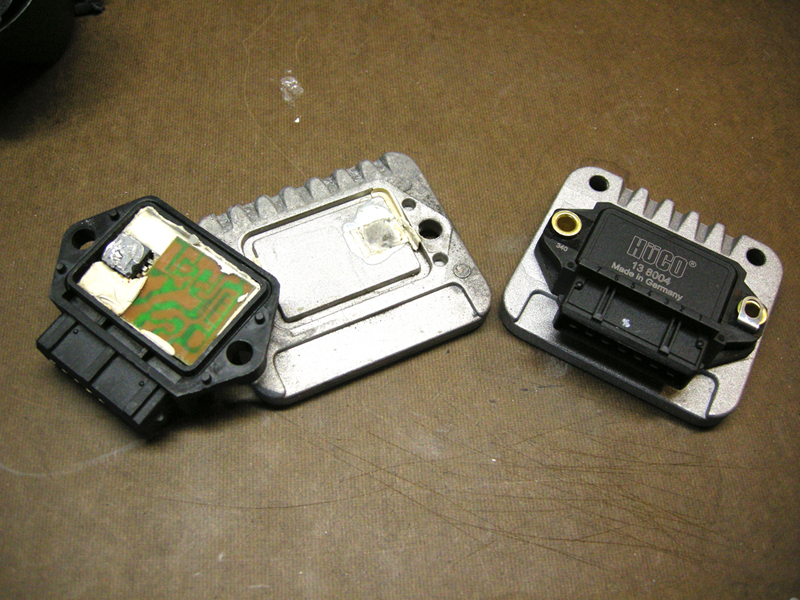
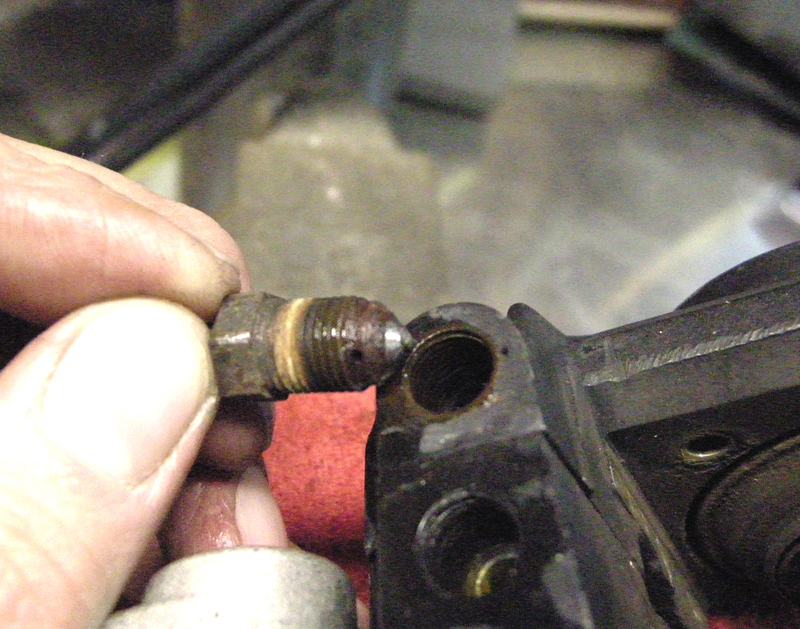
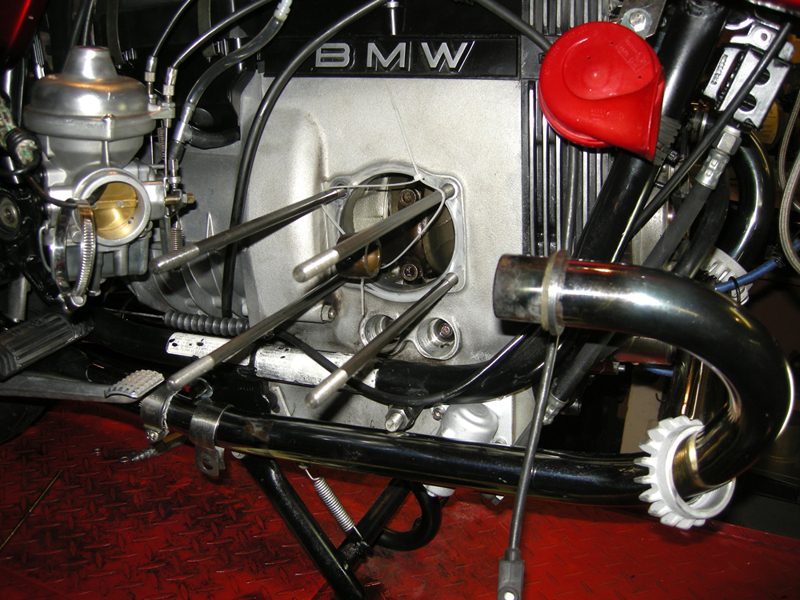
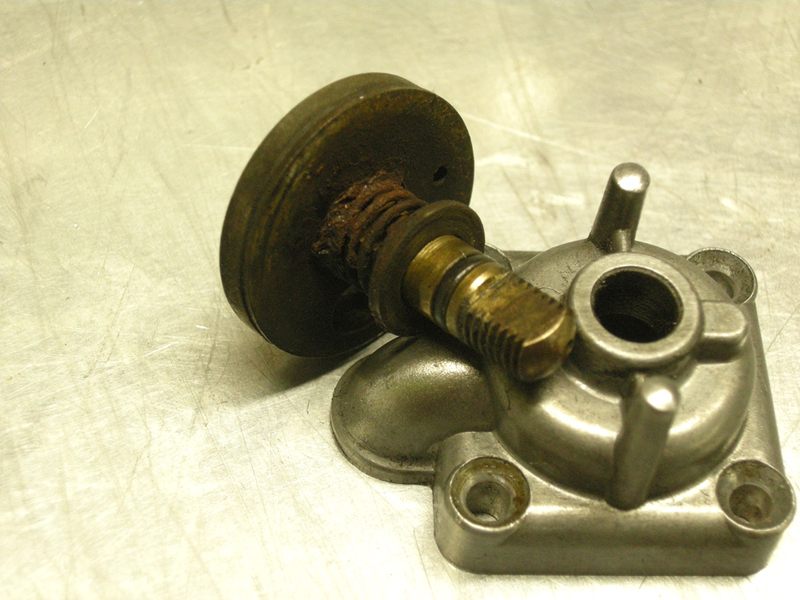
...meantime back at the bank...parts start arriving. The ICU was somehow delaminated from the heatsink or screwed around with by someone from the looks of it. Hard to tell if the seal was just gone or if it got hot enough to melt. The chip was stuck to the heatrsink, and it looks like melted solder, but could be heat sink apaste. At any rate, I had my NASA tech buddy take a close look and he said it was corroded. No wonder on the test ride at home it bogged down and acted like it had a cylinder going down. Probably got wet after the first douching.
The new ICU is all crisp and new! This be a common Volswagen part when crossreferenced, about $39 shipped.
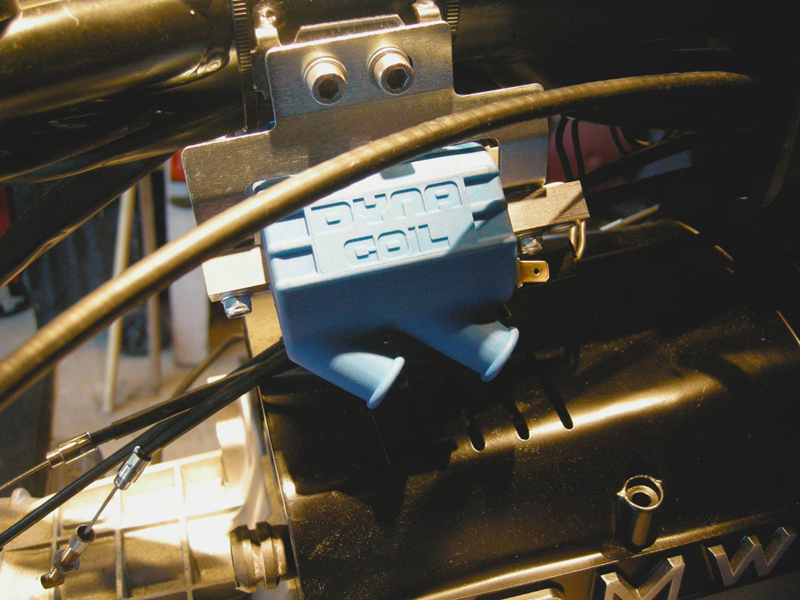
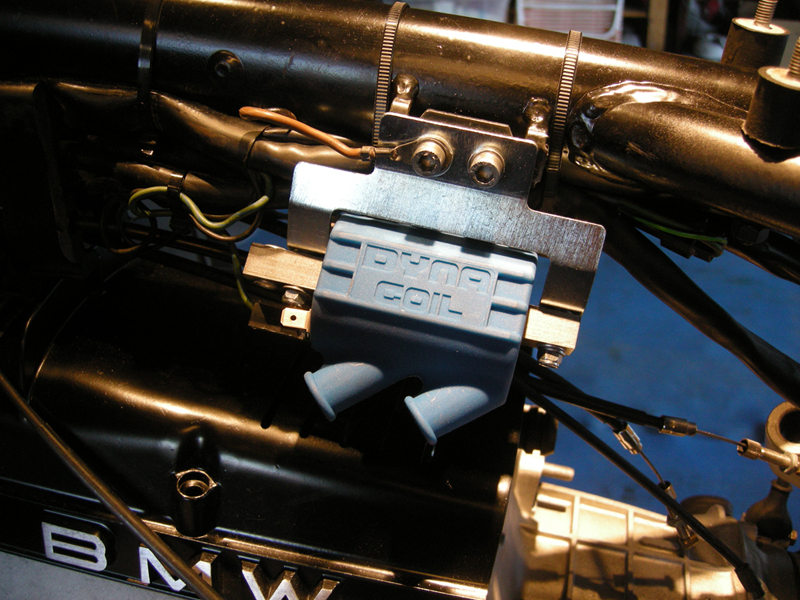
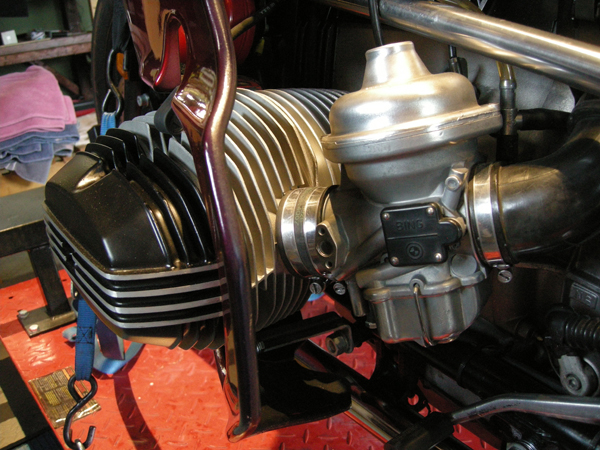
Got in the new plugs and plugwires for the dual plugging, Dyna dual plug coils coming (.7 ohm) and a load of misc parts
from ($$$!) MAX BMW for a top-end rebuild.
I sourced a pair of '77RS heads that have beean rebuilt with new valves, guides, and dual plugged. Can't wait.
Now that all the dirty work is done and the paint touchup is basically finished I can concentrate on the mecahnical stuff.
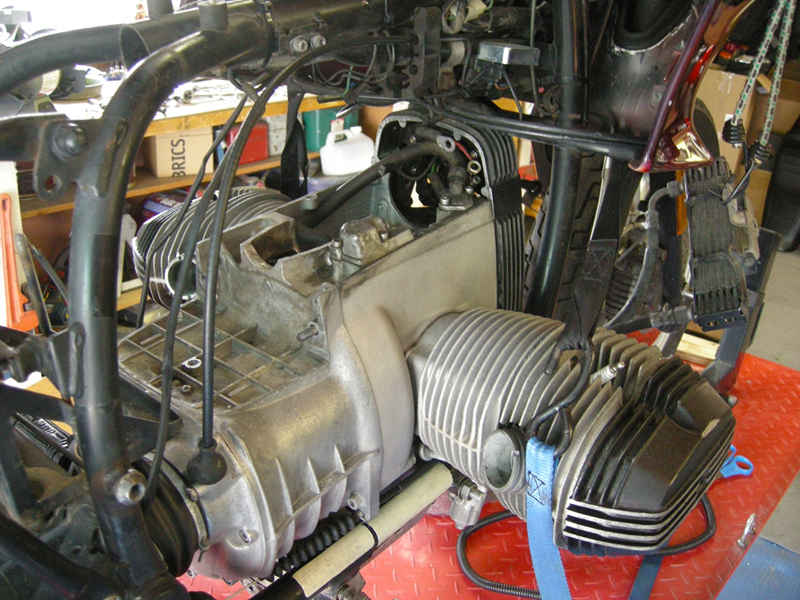
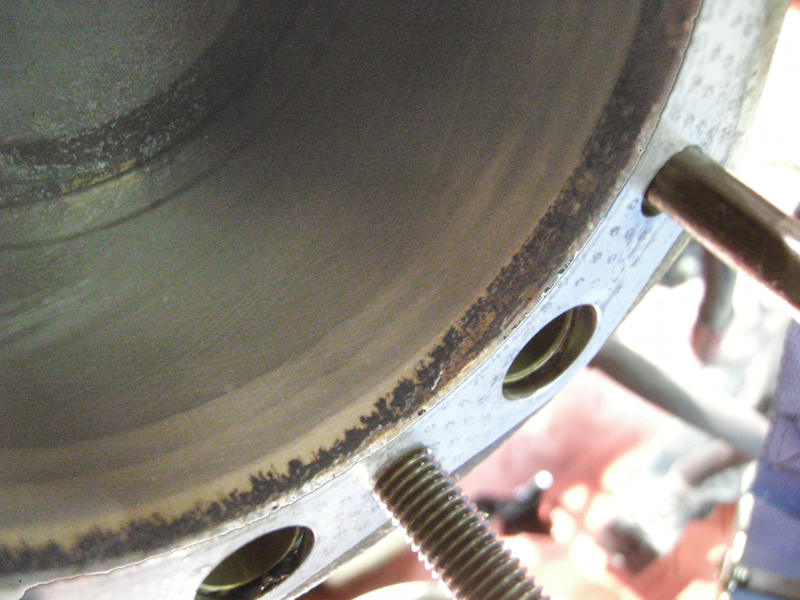
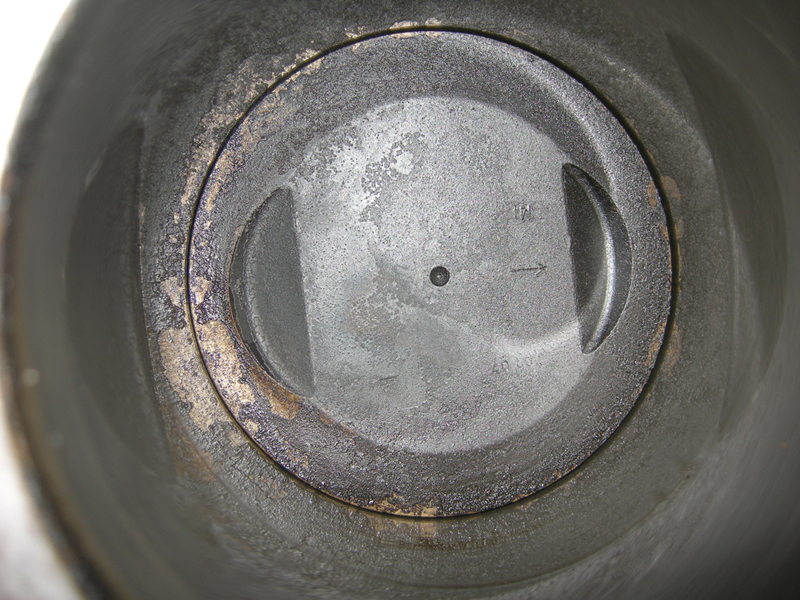
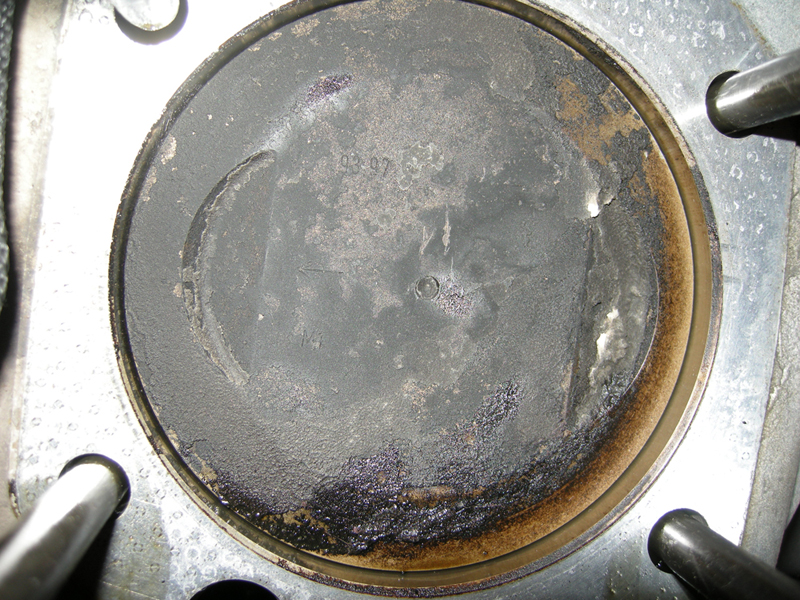
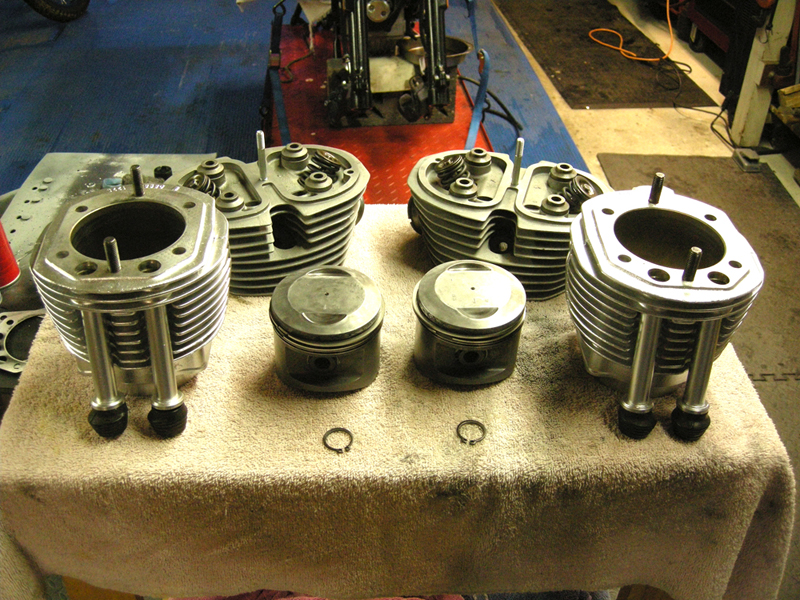
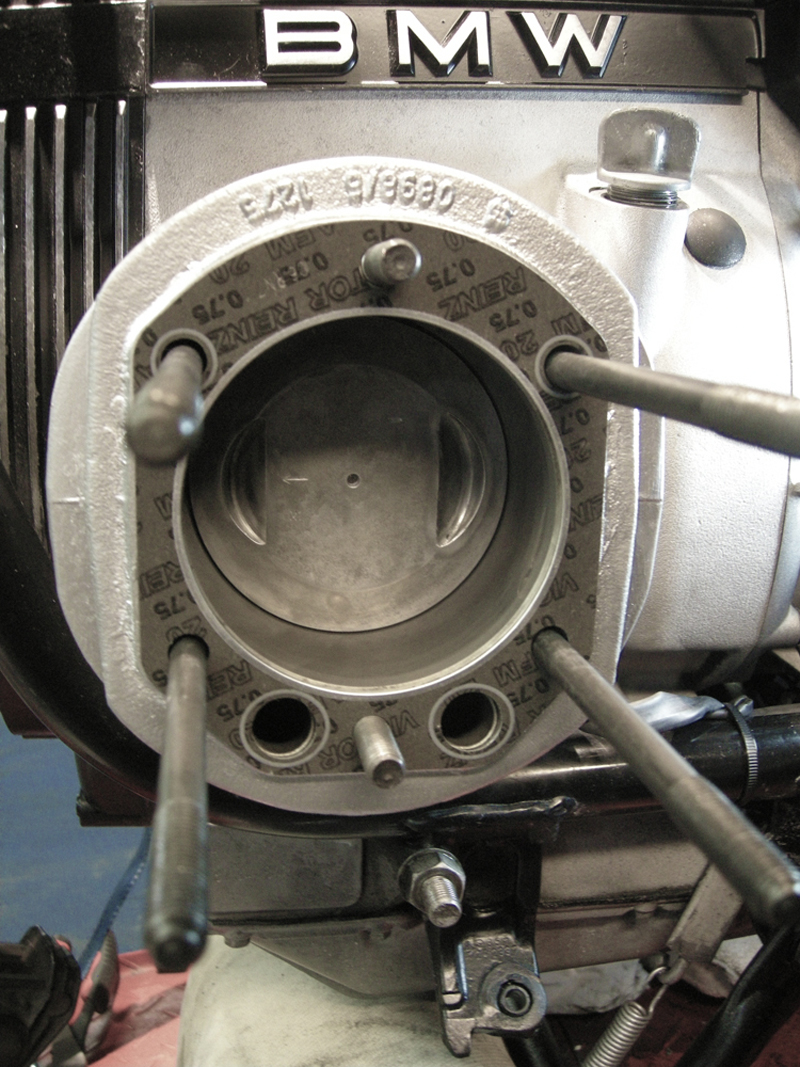
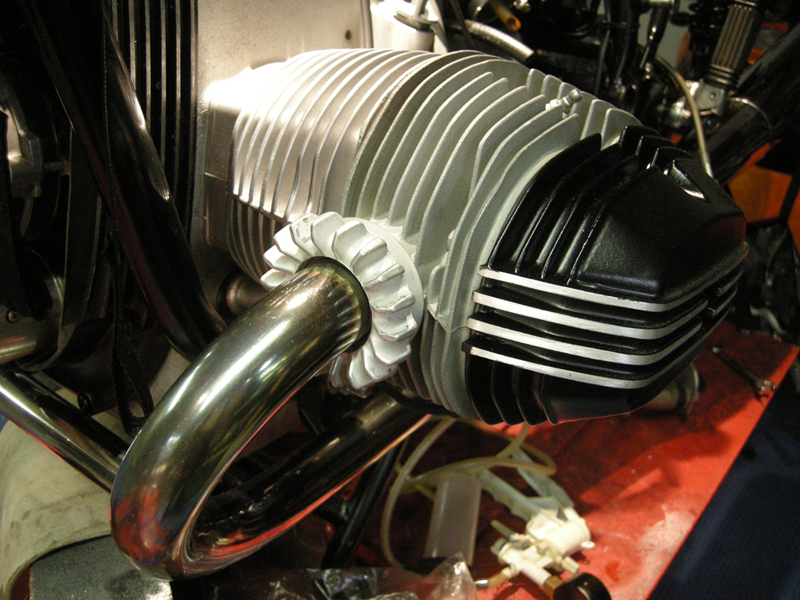
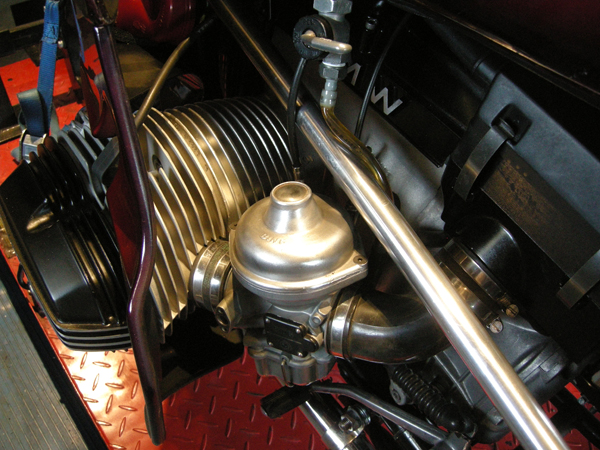
Heads and Barrels/Pistons
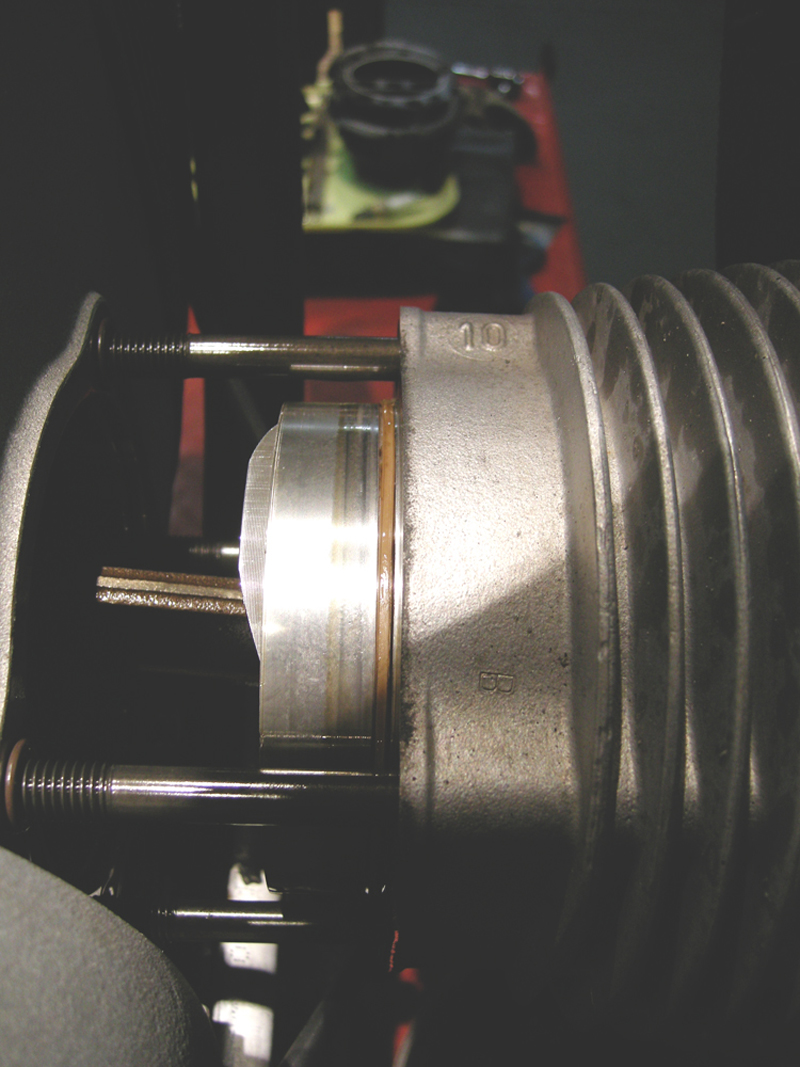
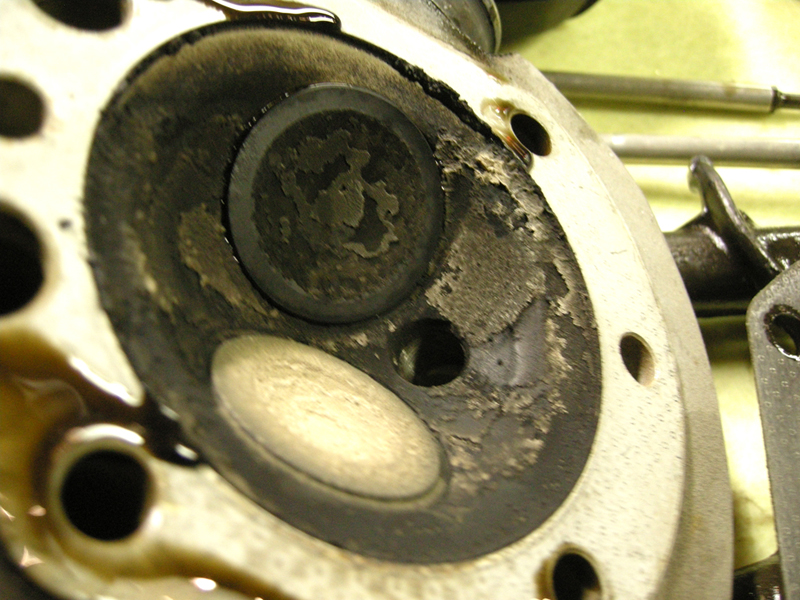
Pulled the heads off as I know the new ones are on their way. The barrel seals prove to be very fresh looking.
Right side is seated, the donor head.
Still not sure that these are the same as the '77 heads I'm getting. The squishbands appear the same but I won't know for sure until I get the new heads.
At any rate, it's been confirmed by Robert Fliescher that they will work.
'77 RS heads coming Friday...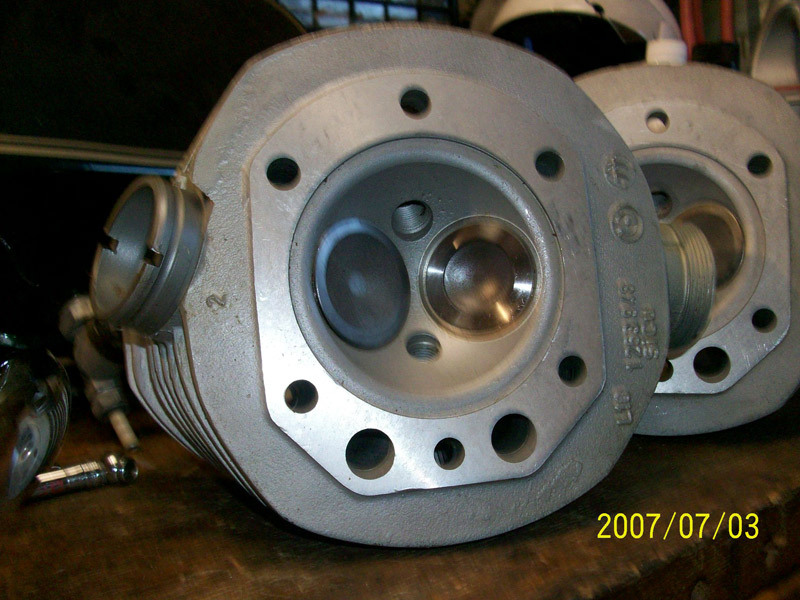
Left side is the original head, looking pretty scummy...
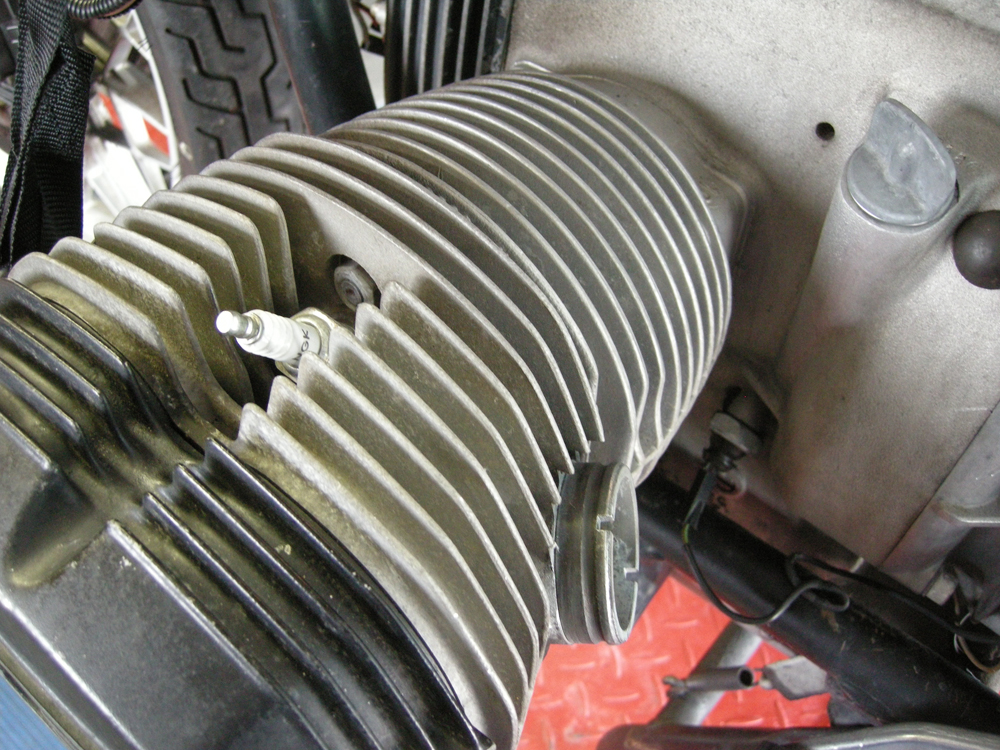
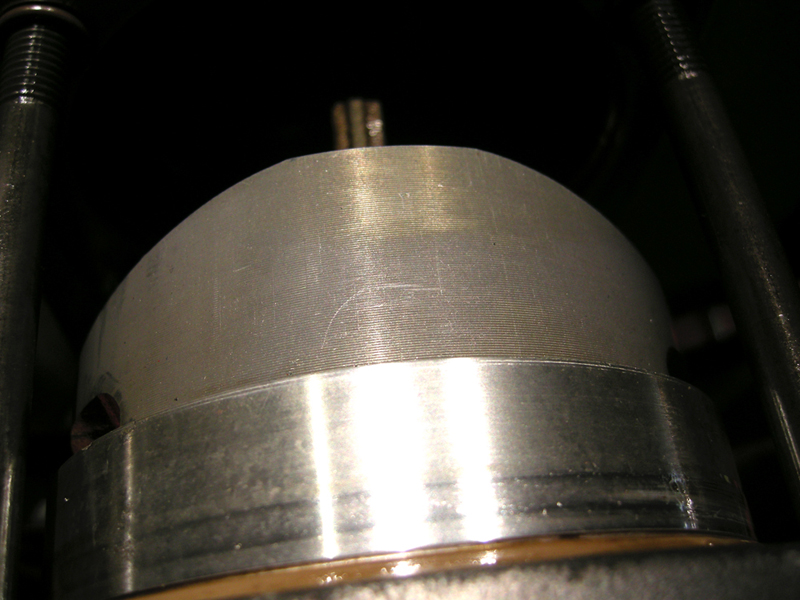
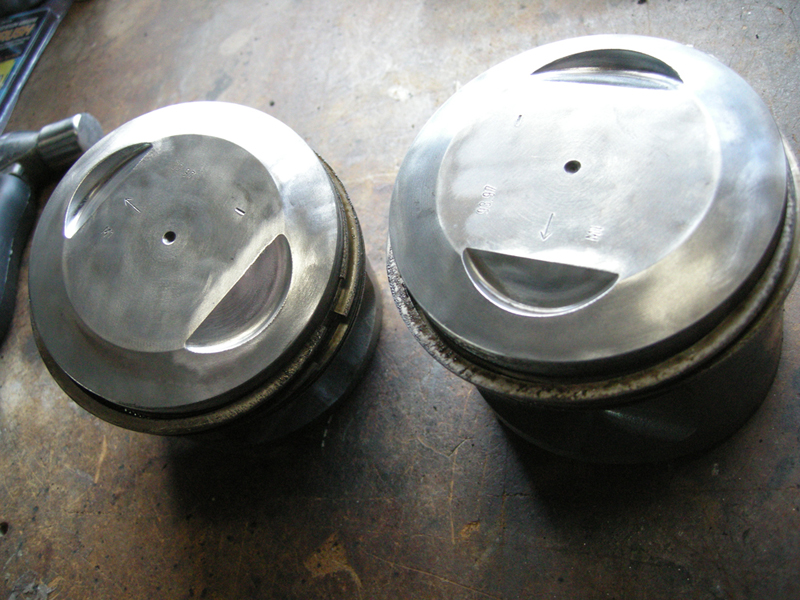
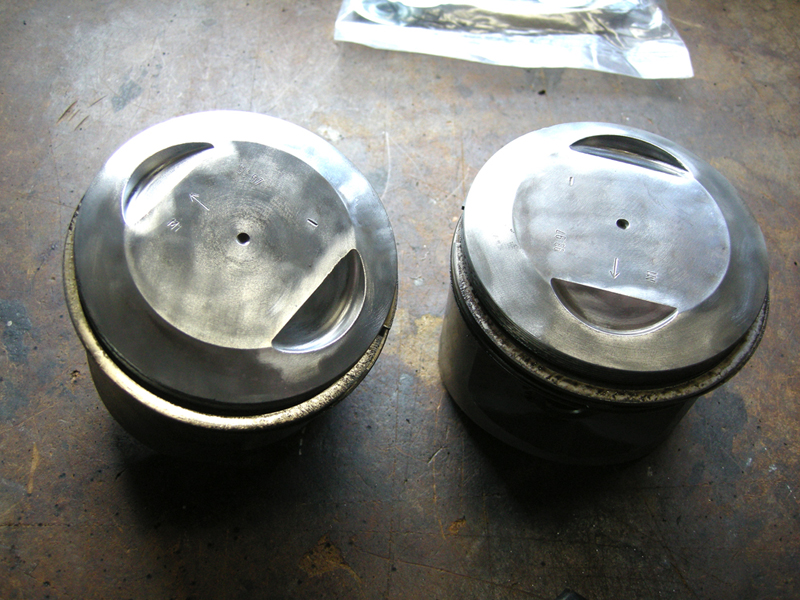
The barrels and pistons look in great shape. A few slight scores on the piston skirts, but there is no ridge whatsoever on the barrels!
It actually looks like they've already been re-ringged. You can see hone marks on the cylinders.
I'm thinking I'll just replace the pushrod seals and button them up. Also confirmed that it's about a 50/50 chance there will be improvement with new rings
and these Nikasil barrels. So they saty as is.
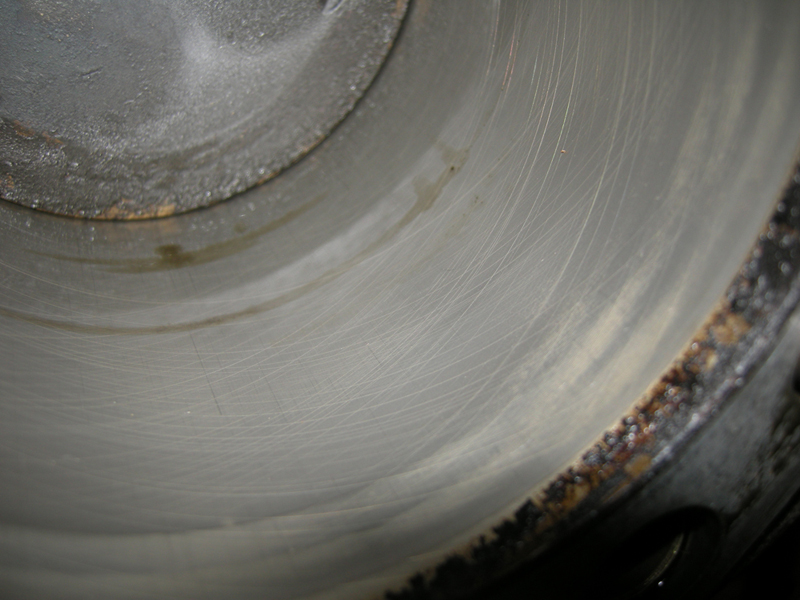
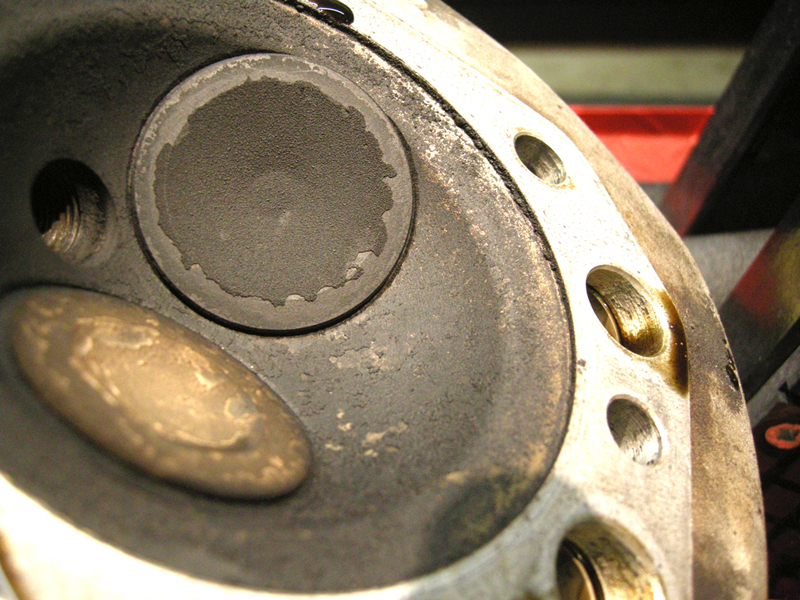
Piston tops are remarkably clean for a 55K bike...possibly the topend was done before...?
12-14
After much pomp and blather expelled over at ADVRider when I asked inmates what they thought of the 77RS heads and the look of the cylinders etc.,
well, I took the heads into the local engine shop Adam's Metallizing that my dad used for 65+ years and had the heads blessed.
They are ready to bolt on after an easy clearance test which I'll do when it comes time to reassemble.
Over the 3 day weekend I had the wheel bearings pulled and took the wheels in for powdercoating (satin/semigloss black or 70%).
(ref: Looking back I should have stuck with the Duplcolor silver plan. Between the powdercoatings and$$$ spent on R&R the wheel bearings/seals (New $$$)
I added about $450 to the cost of the bike...not in the original El Cheapo vision...)
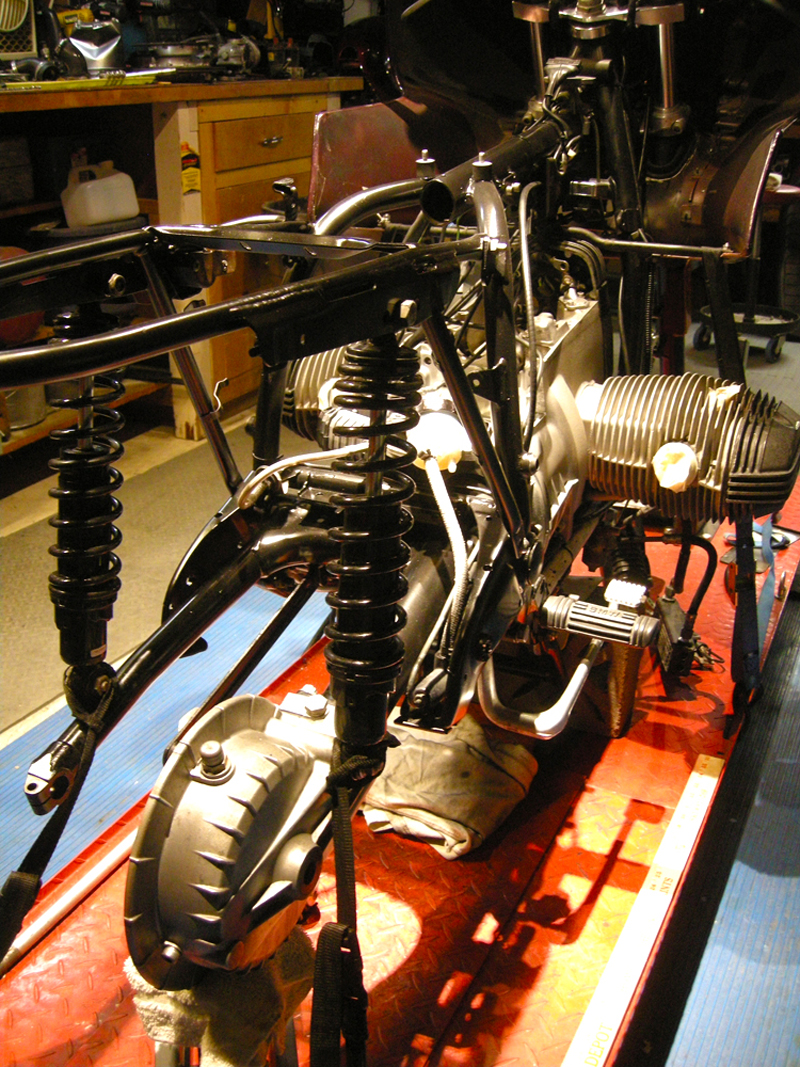
Work continued for another 12-18 hours painting small parts, removed the oil cooler, drained all the fluids.
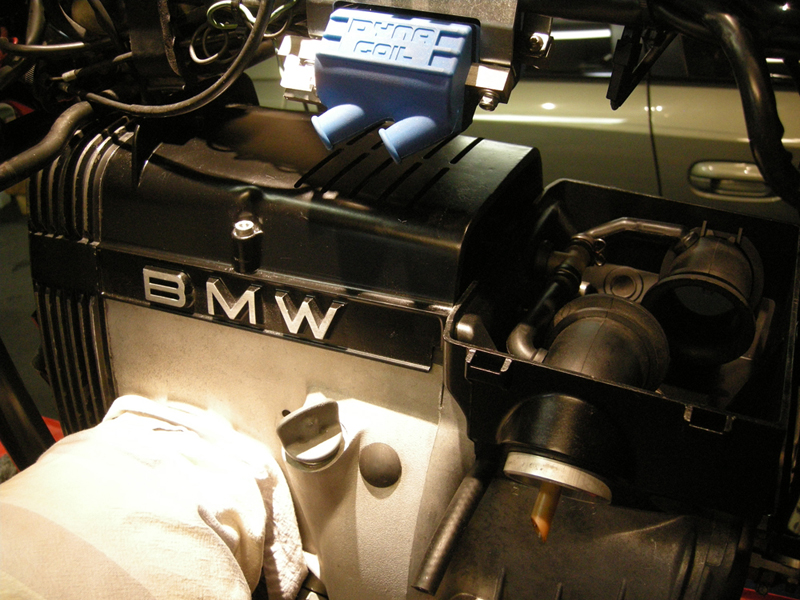
New Dyna 1.5 ohm dual-plug coils! Blue...I like Blue...confirmed by Motorrad Elekrik as the correct coils for an '81 dual plug.
Starter rebuilt and installed...oh yeah! Now first, clean and inspect the box for the kitty!
Clean paint scrub, prep, paint, drink, scrub s'more...
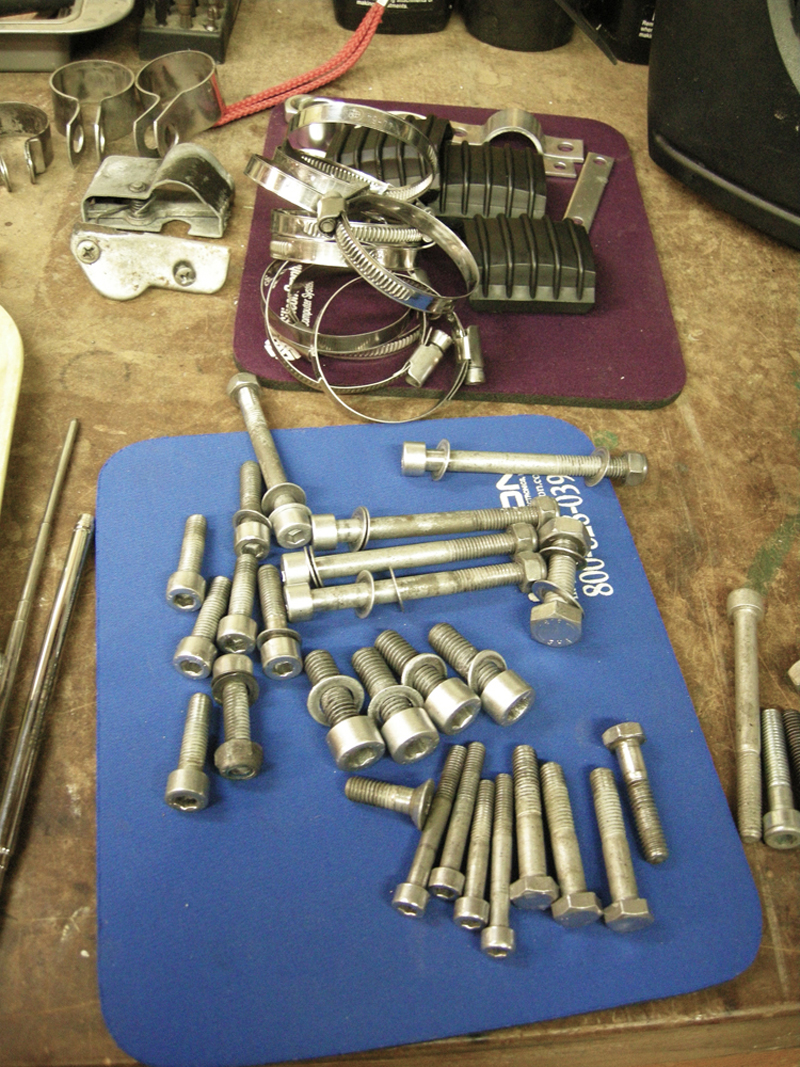
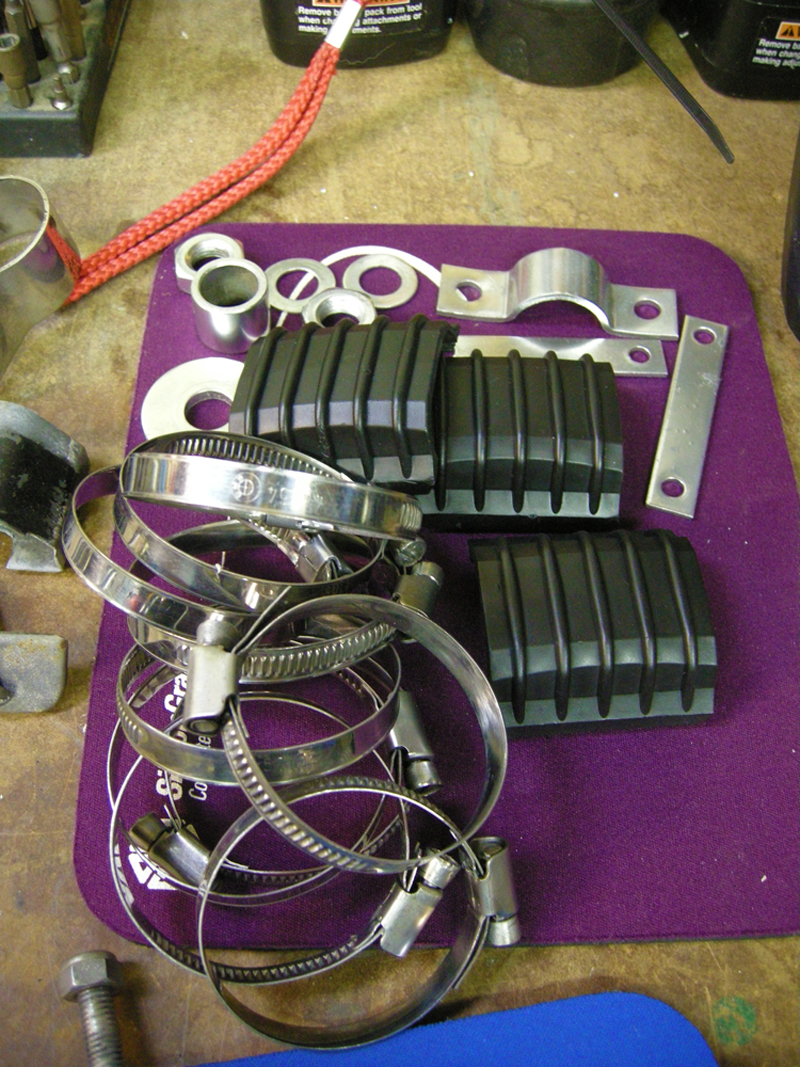
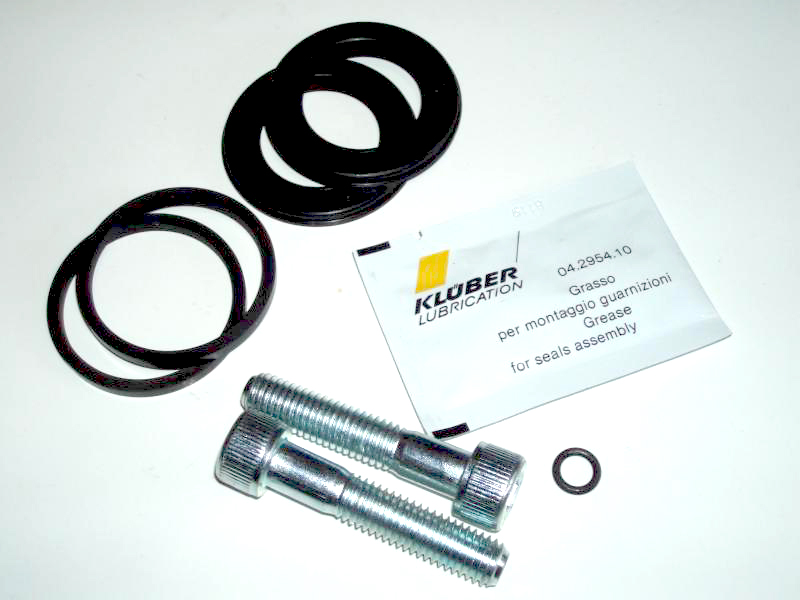
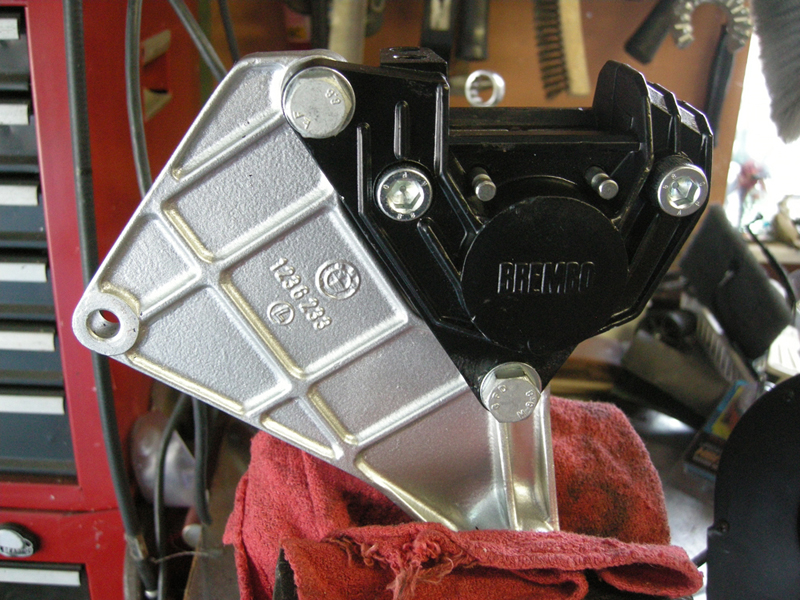
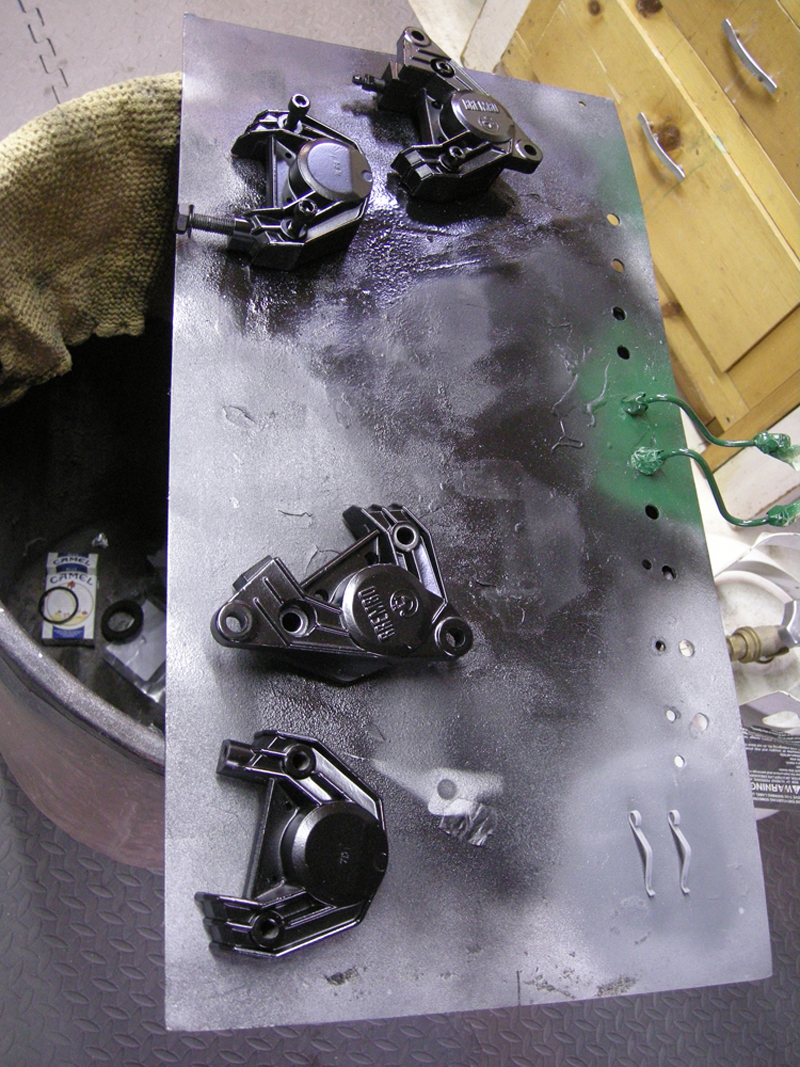
One more thing to tackle, order the parts for caliper rebuild. ($$$!) These things can saty the way they are...rust and crust.
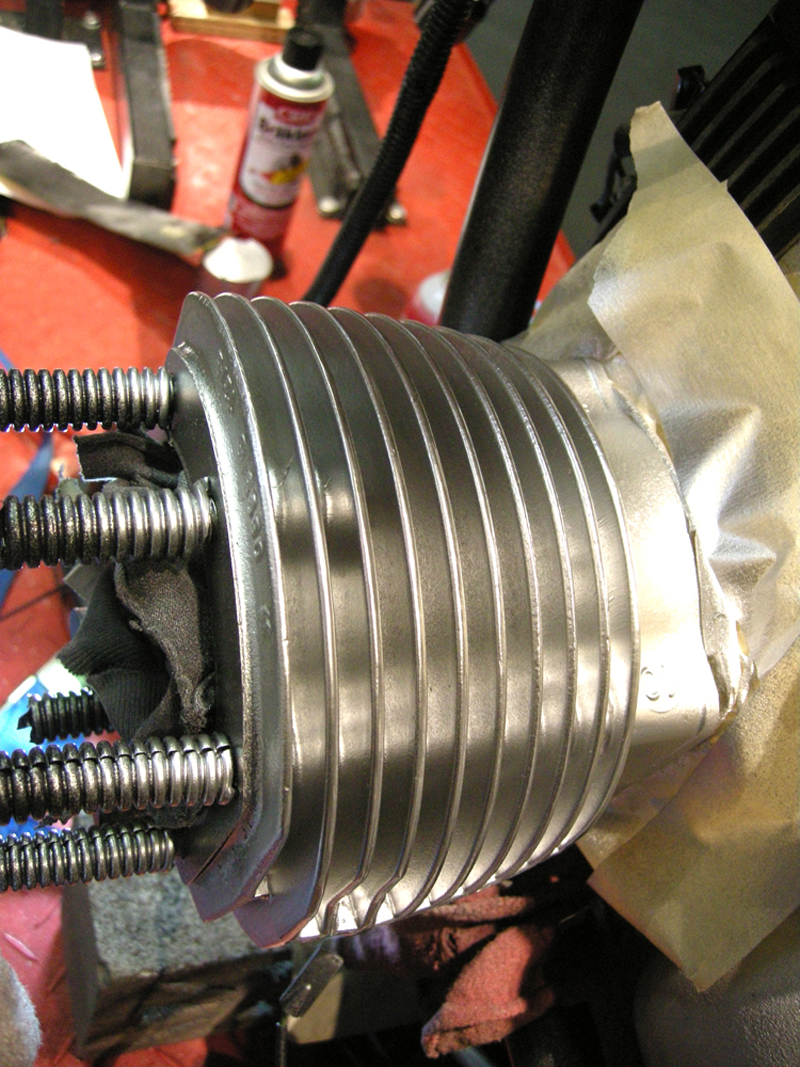
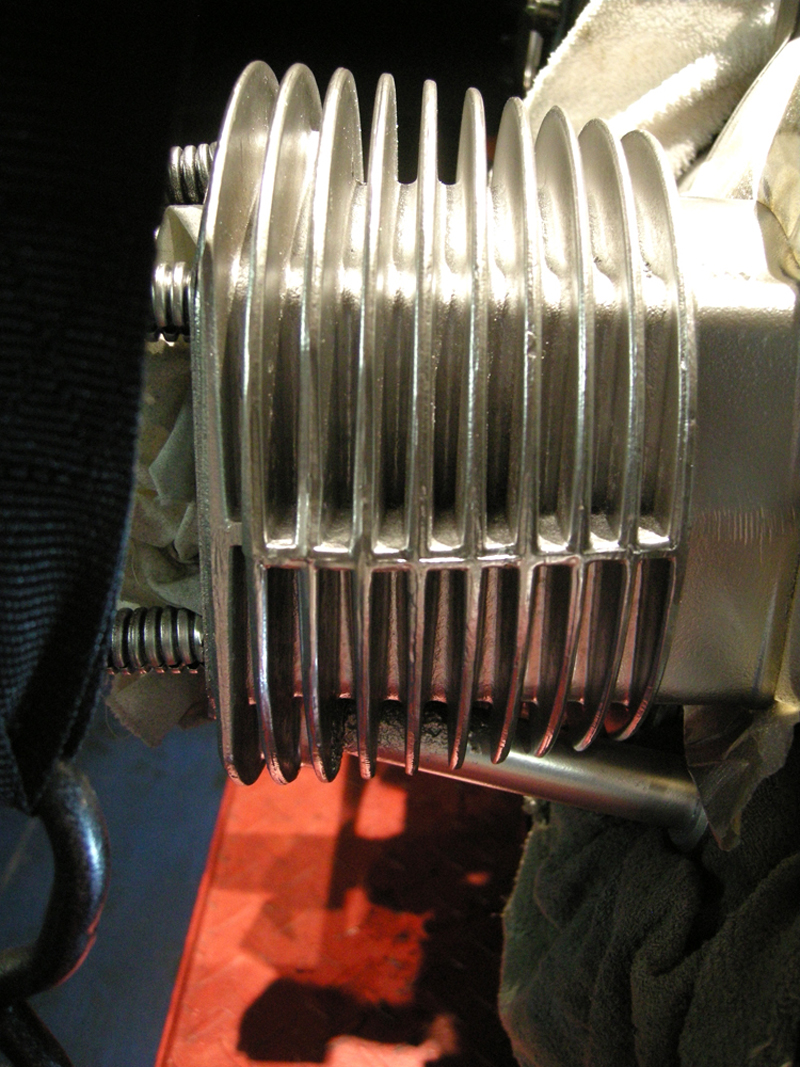
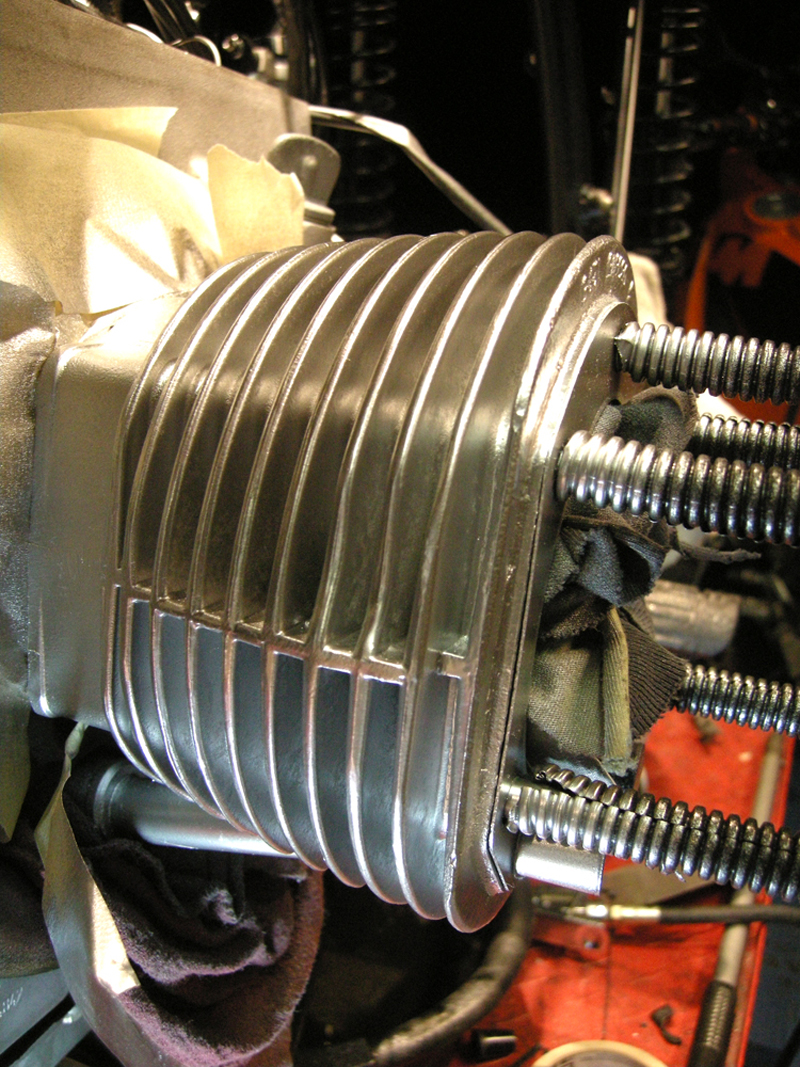
In the Sunday night delerium there was some creative masking done, touched up the cylinders with Plastikote Engine Paint, covered up the road sppooge pretty nicely.
I also managed to overspray on the frame thanks to the bench fan being on.... Nice work. Moretouch up to do.
Note to self. Paint silver parts first, then black parts...rattlecan reasoning.
Meantime, I got all my parts in from MAXBMW and got the wheels, battery box, and valve covers back from Pacific Powder Coating.
Brandon at PPC did a great job on the wheels. Pics soon come...
12-18
Making some progress, actually quite abit. Two days in the garage with a storm outside, perfect!
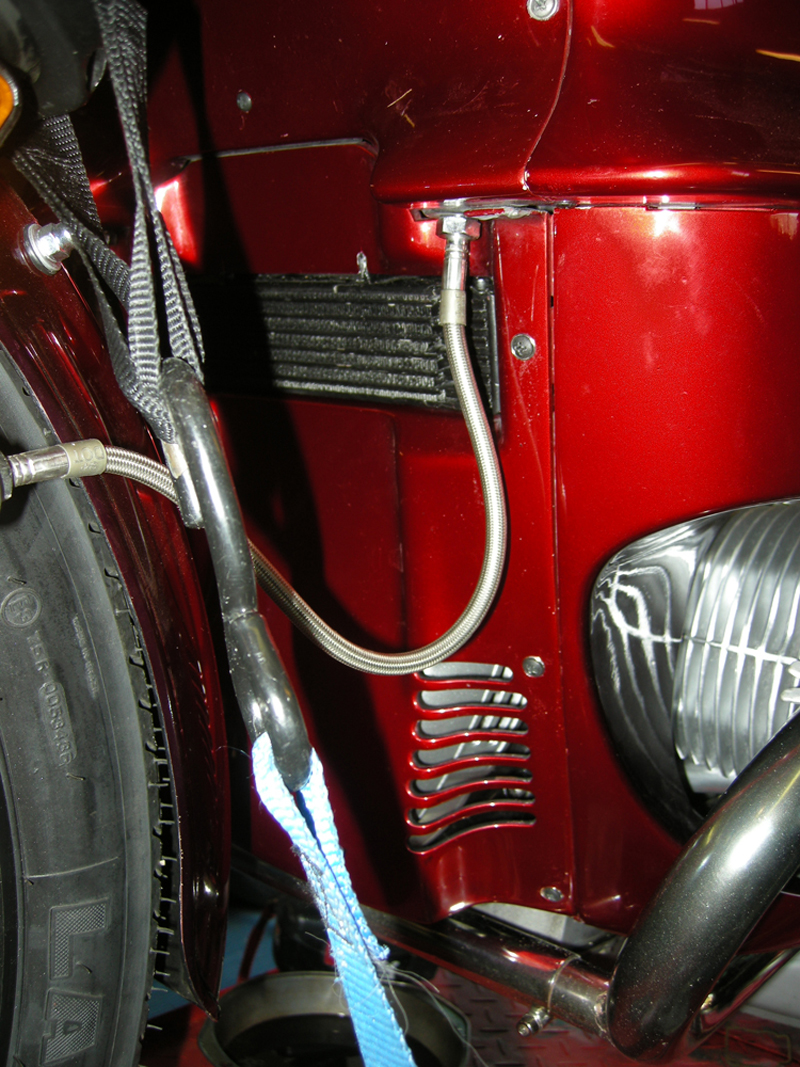
After draining all the fluids last week, (tranny and rear-end where clean looking, motor oil was appauling!), I pulled theoil cooler and cleaned and painted it as well as the oil sending unit.
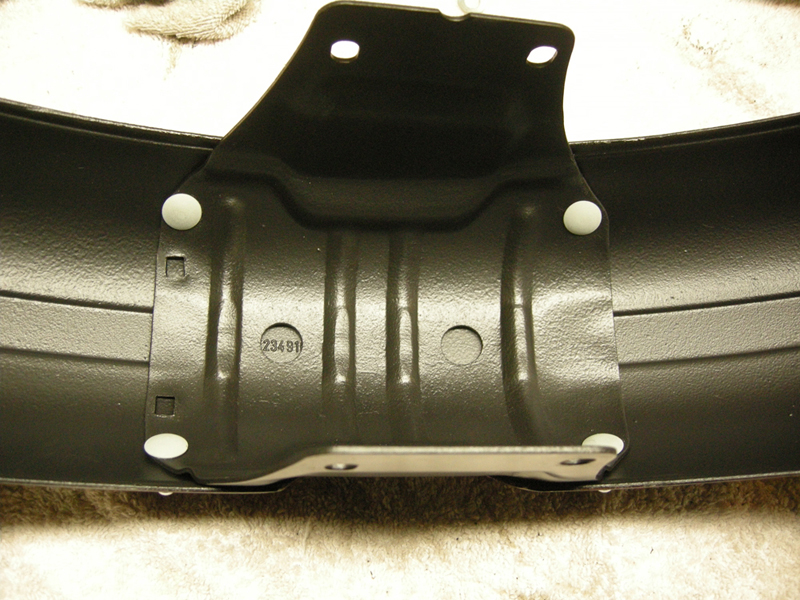
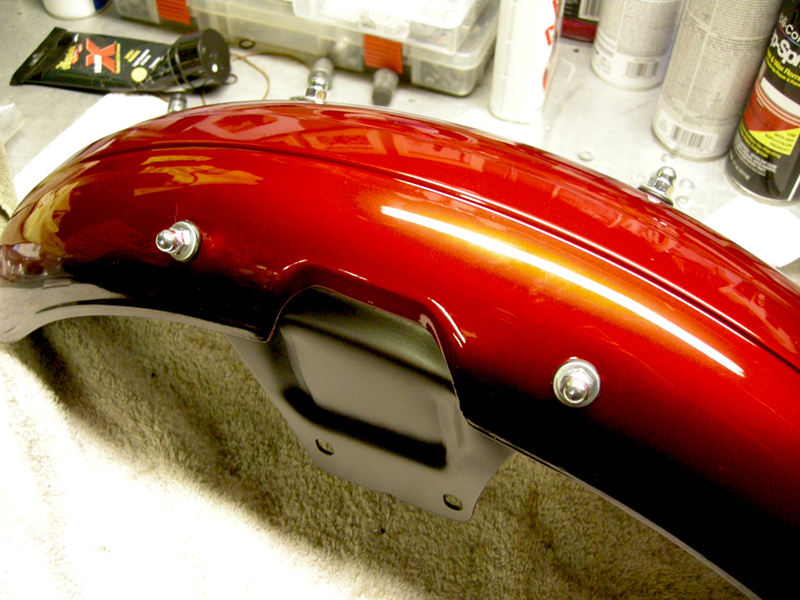
Disassembled the rear fender and tailights down to the last bolt. Coat of paint wasn't going on too well I guess due to the weather, so a second coat of satin black went on.
Not quite OEM but looks cleaner.
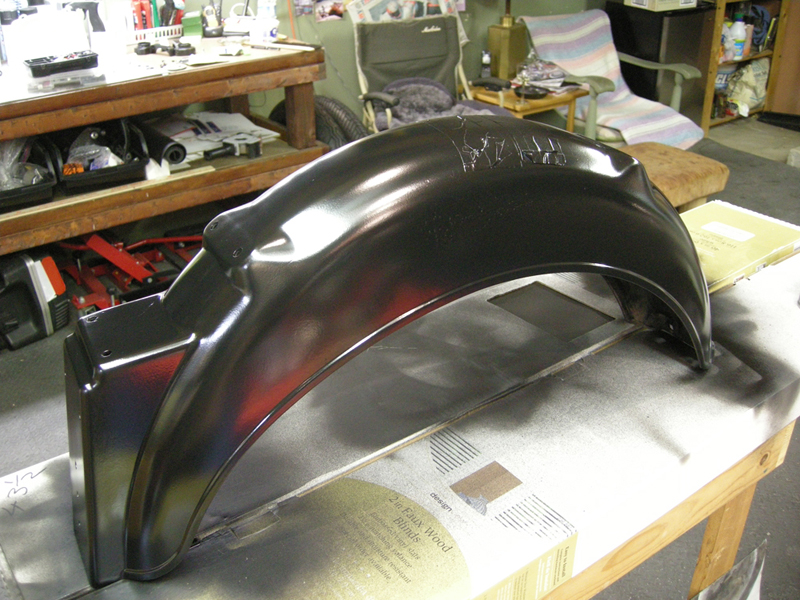
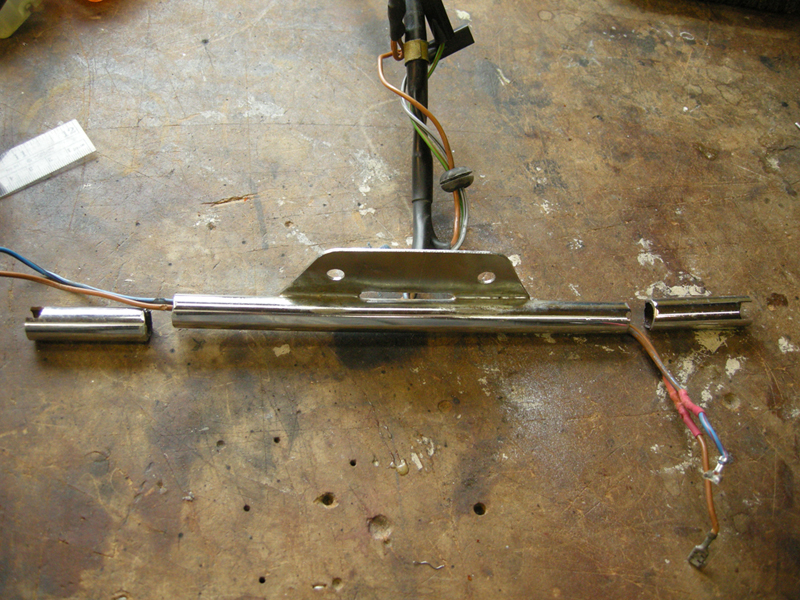
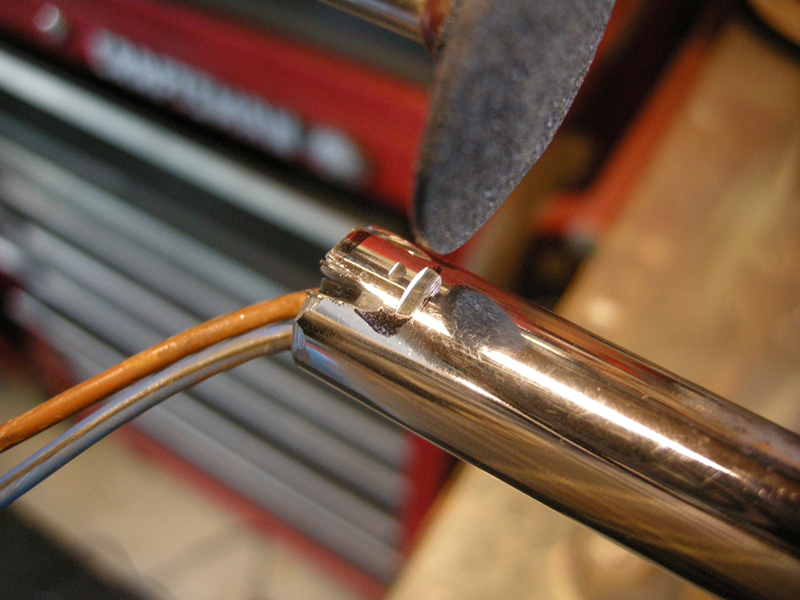
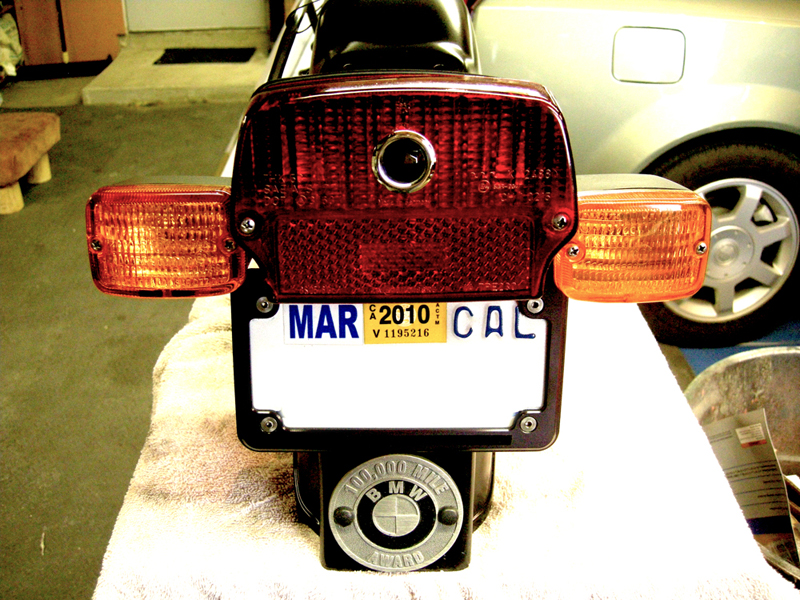
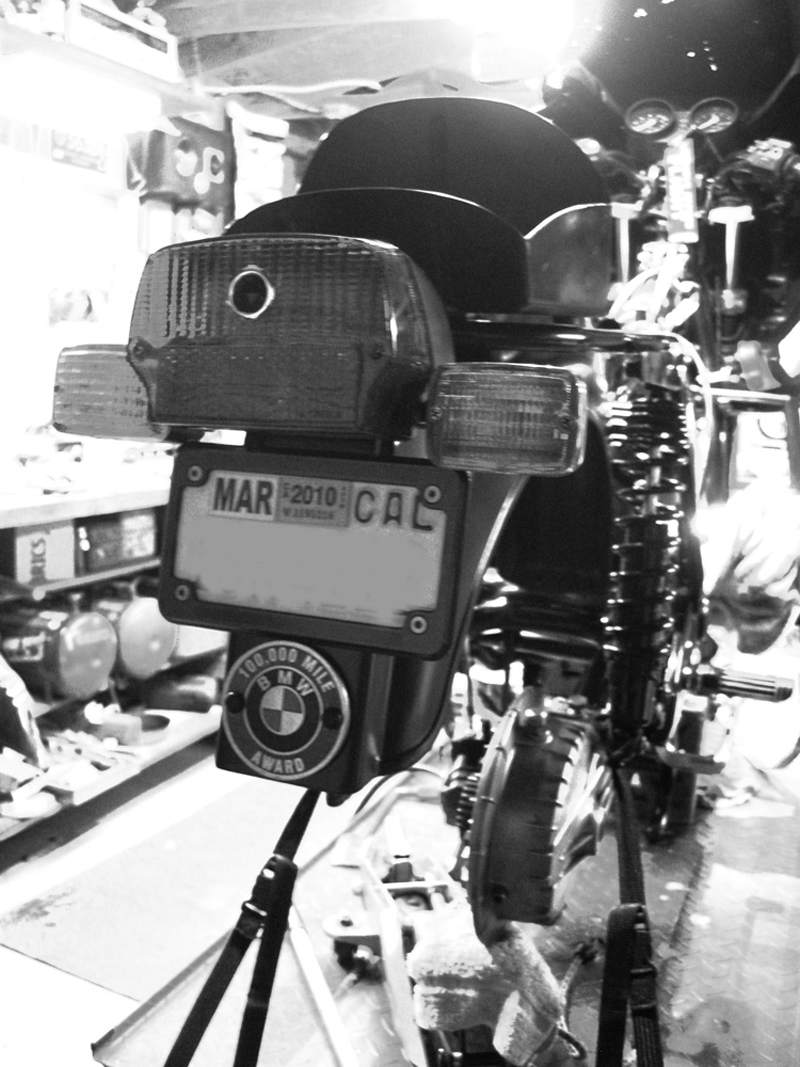
Tailight all apart, cleaned up the wiring and did my little turnsignal mod to tidy up the rearend.
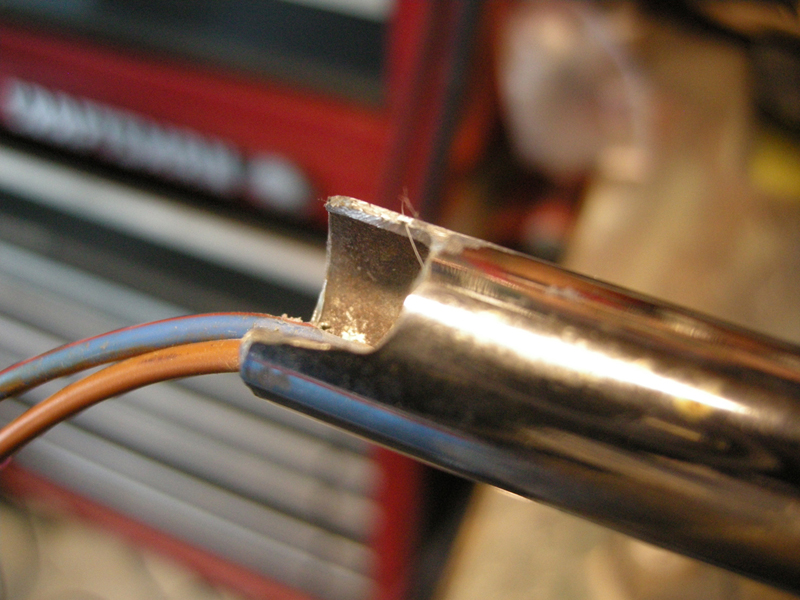
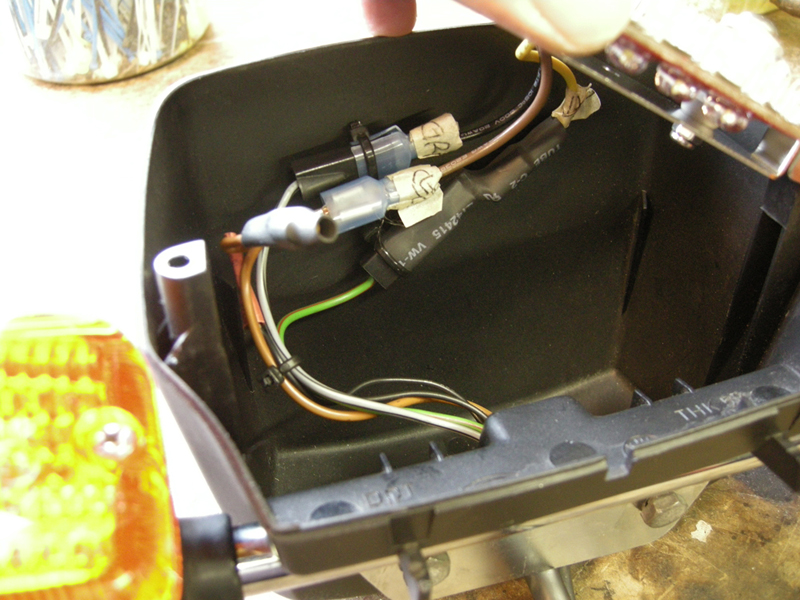
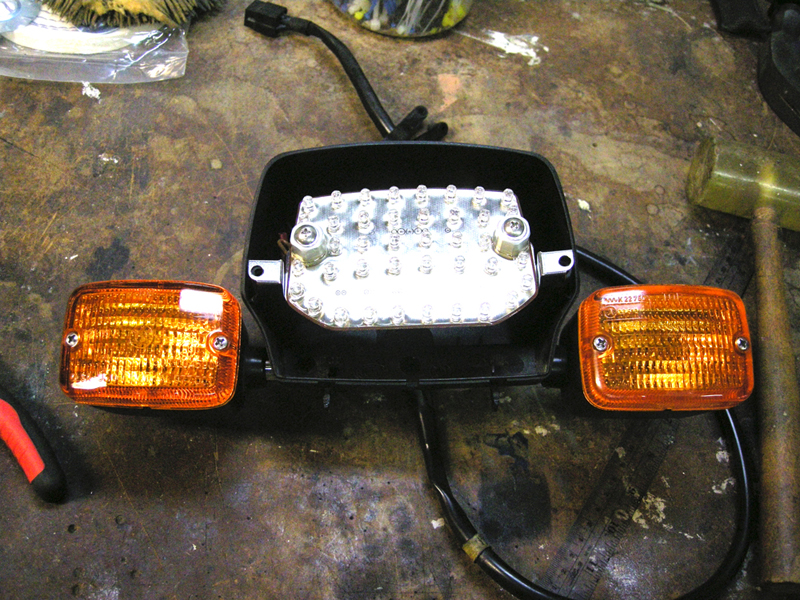
The final look with my black billet license and modded signals. Ofcourse the blue diamong tailight lense is cracked at the screw hole...jeez...
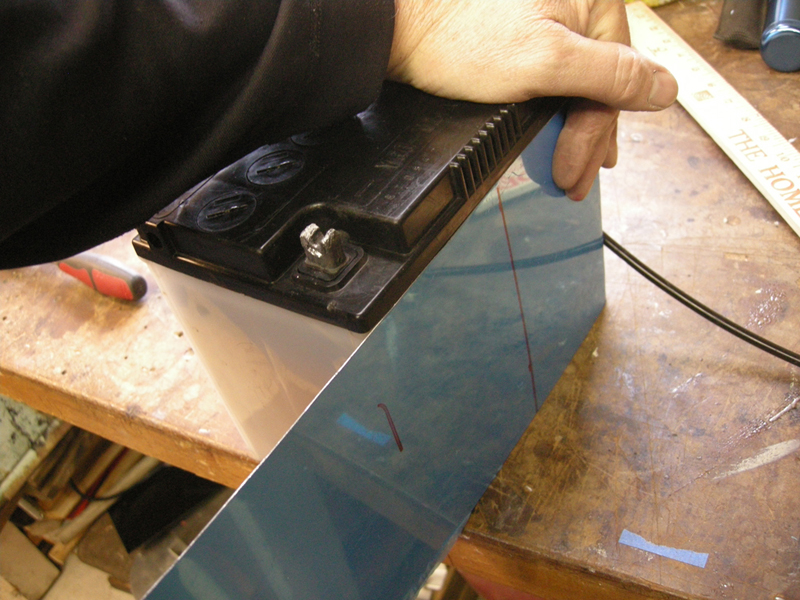
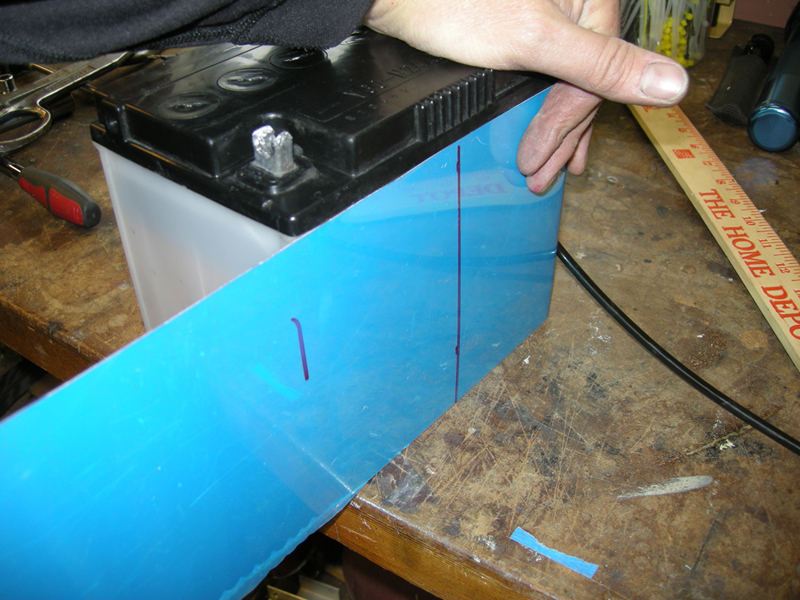
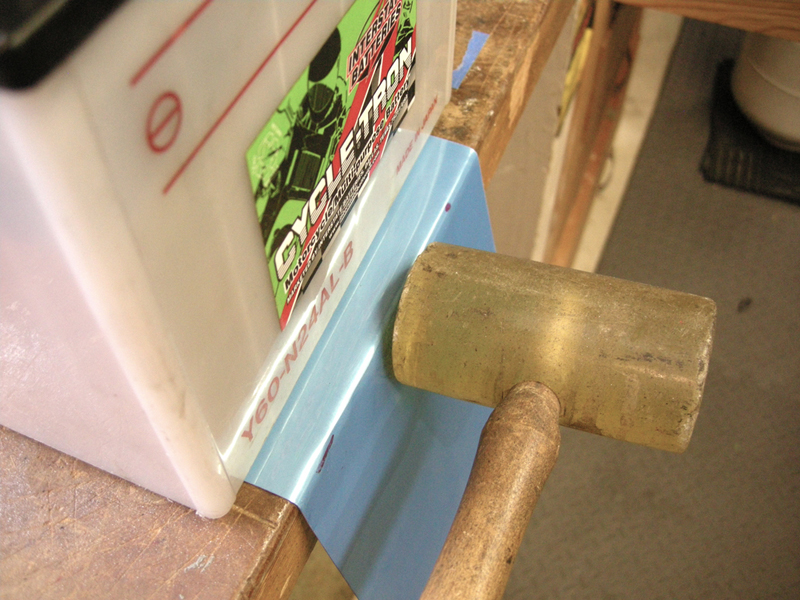
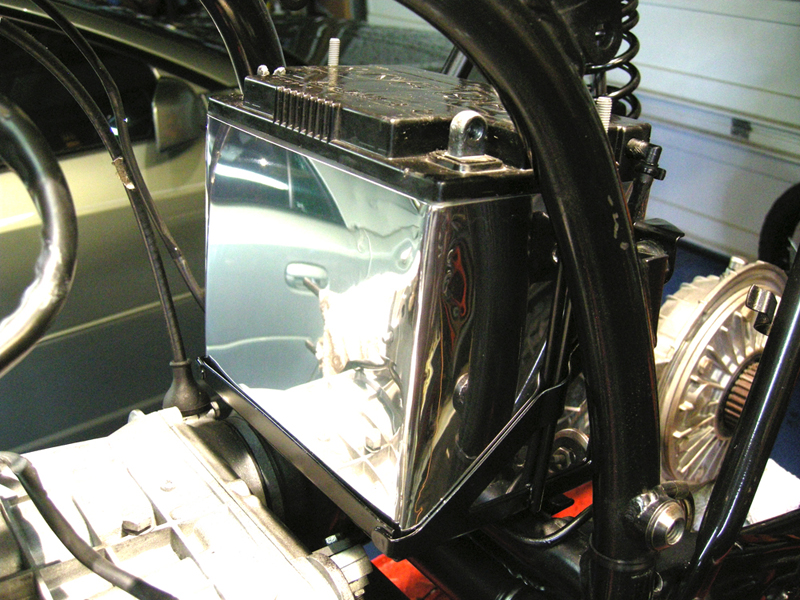
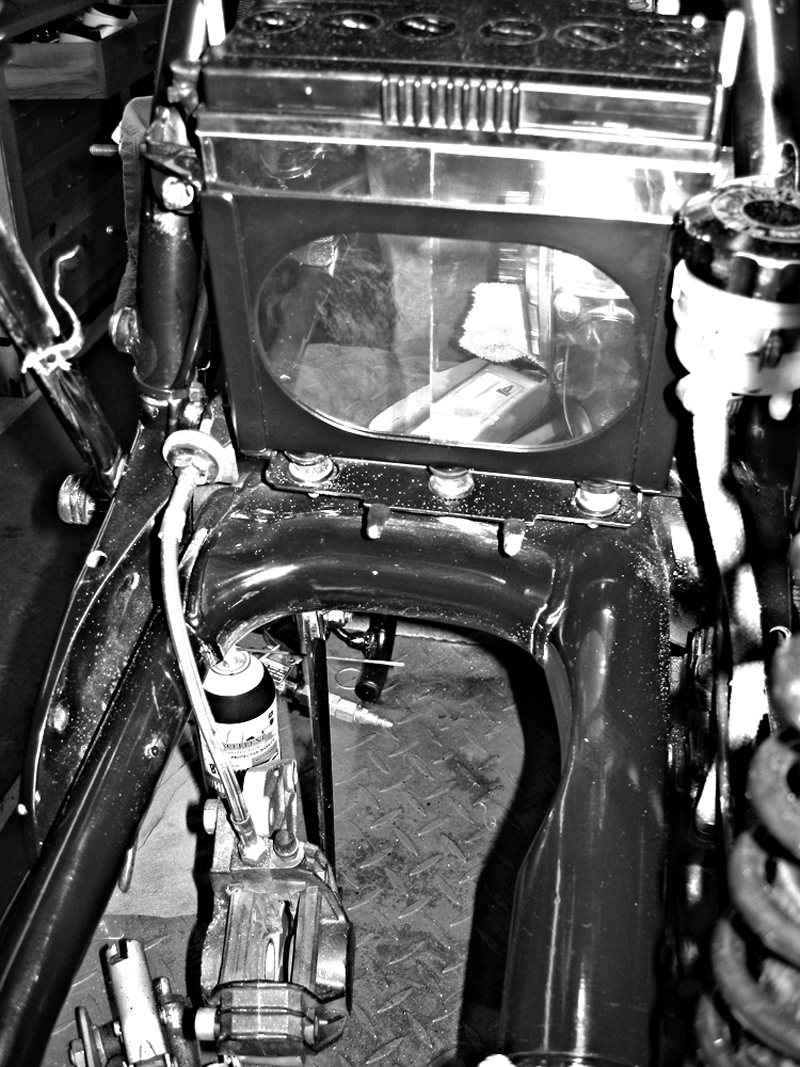
Next to get the battery box installed. All new hardware, battery box is powdercoated. Cut a piece of tol drawer liner to place in the bottomy of the tray
and made a cover for the battery out of some thin aluminum reflector sheet um, copped from my, er, last job.
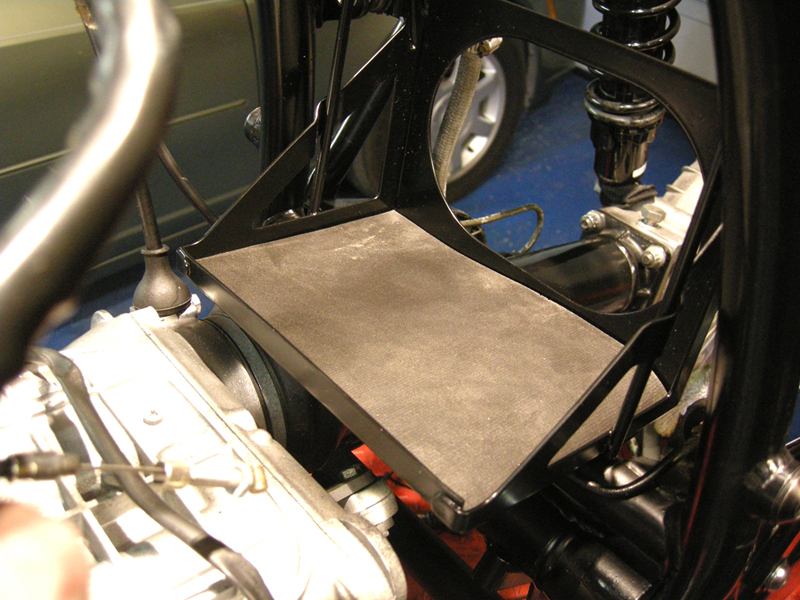
Ohhh, sooo shiney beast!
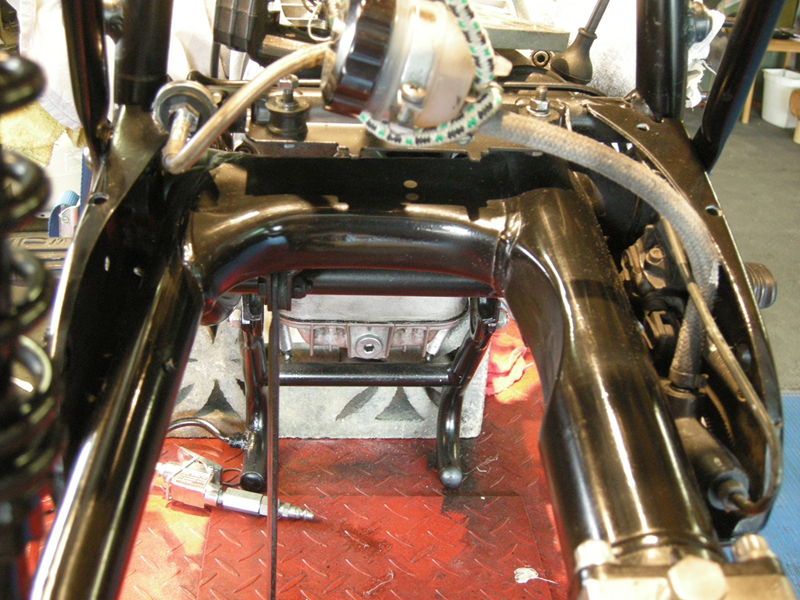
One last bit of spit n shine on the frame before stuff starts going together. I'm tring a mild off the shelf rubbing compound and a buffing wheel.
Man, I'm surprised what a sheen it put on the black. This is old school in the true sense of the word.
Back before my time laquer was the paint of choice for rodders, hand rubbed between coats.
Works for enamel too. Evidently it works for rattlecan acrylic enamal as well. A final coat of pastewax while the wheels are off finishes the frame.
The bike's patina is coming together nicely. Appears to be a well cared for '81 airhead...well it is one now...

Battery in, then rear fender assembly on and I'm working on ziptieing the wires up in a cleaner fashion. I'm taking an educated gamble that all my wiring
under the starter cover is done correctly. I'm gonna be pissed if I have to take all this apart. But desire overcomes patience.
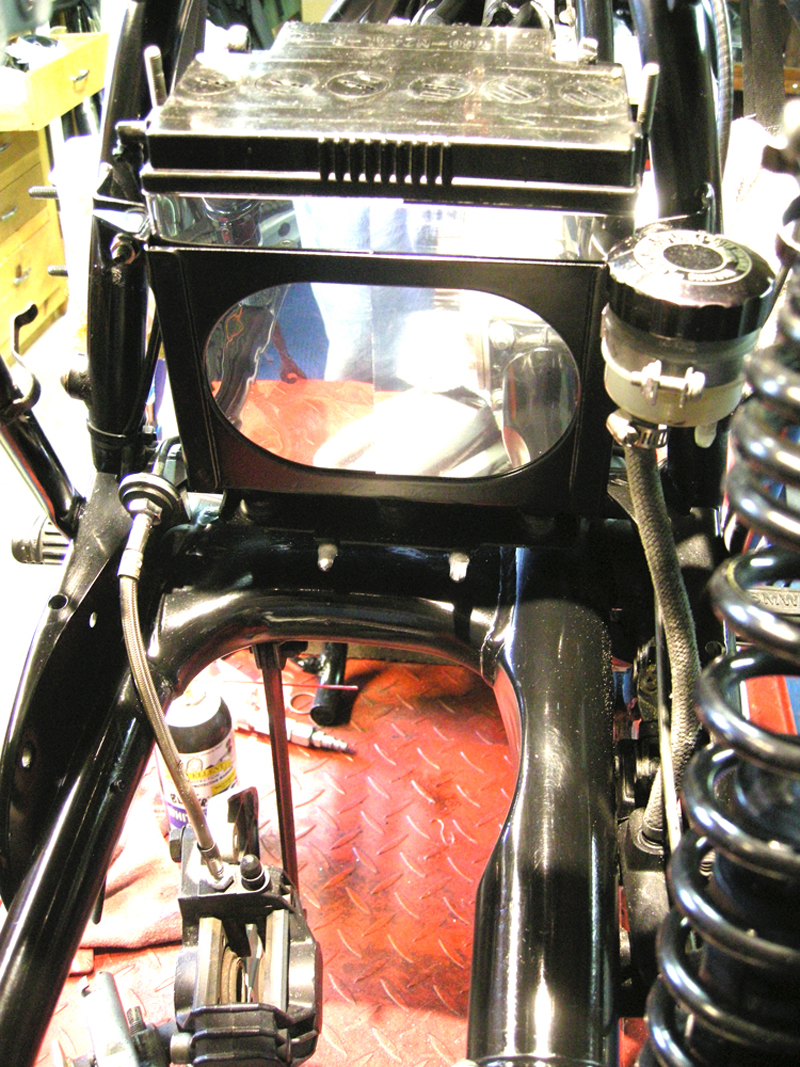
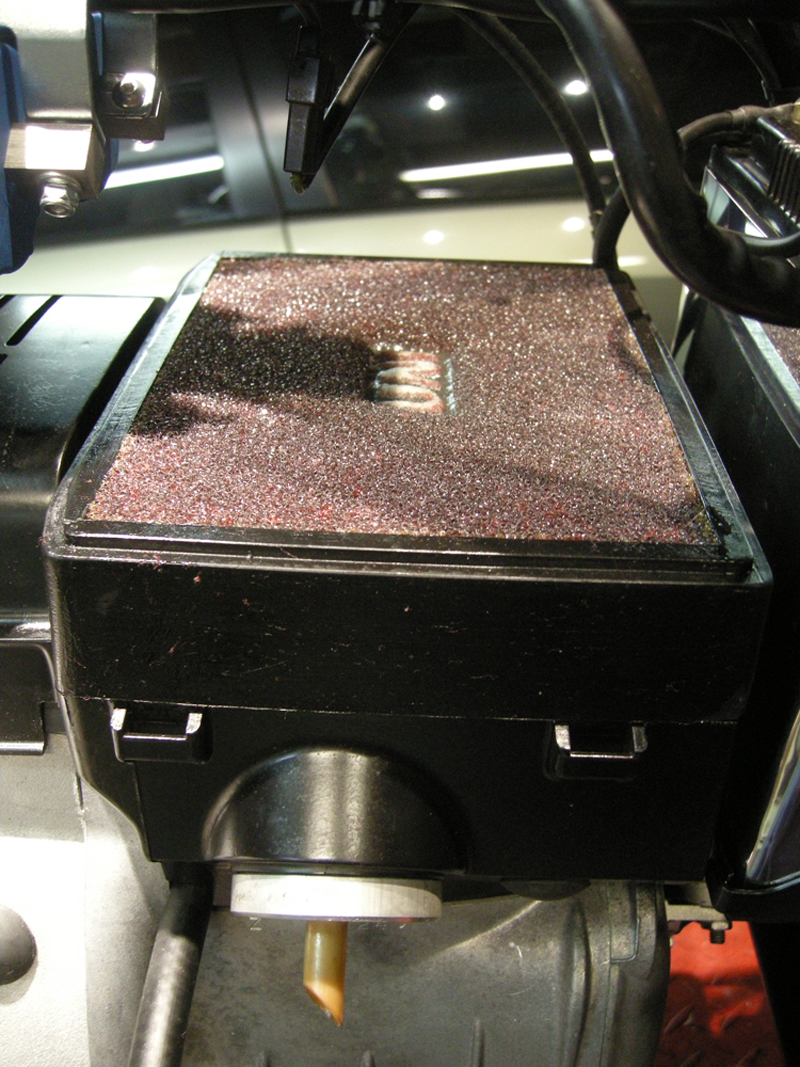
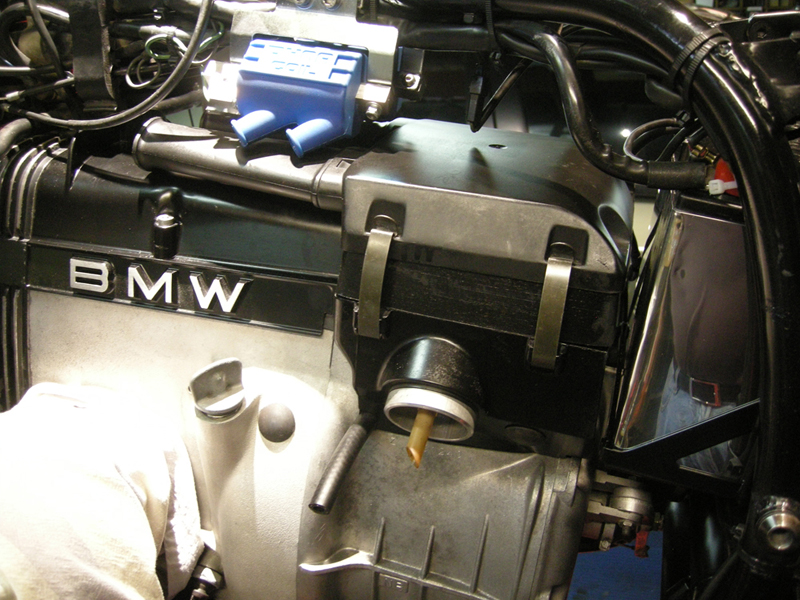
Airbox in.
Plumbing all in place. A new UNI filter I came across cheap on ebay goes in. I've had good luck with these on the KTM.
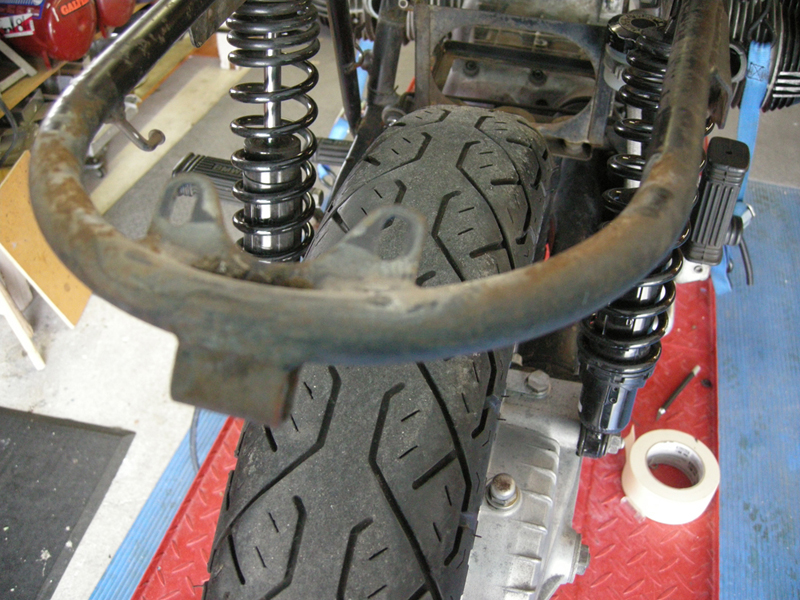
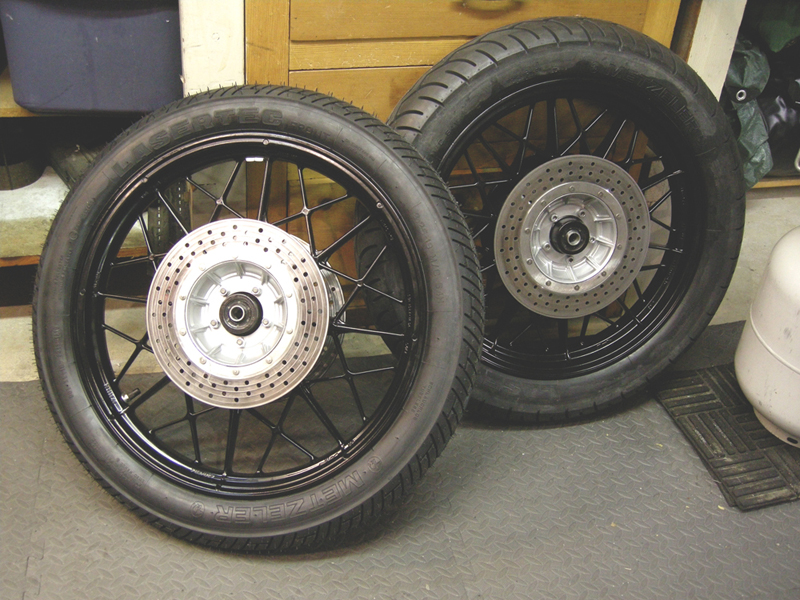
All in all looking good. I ran to the local moto shop twice this weekend to drop off and pick up the wheels to have the new bearaings and seals installed.
That took some figuring. Between the parts fische online and a good 45 minutes trying to 'splain what I know and don'y know for sure to the shop wrench, I think we got it figured out.
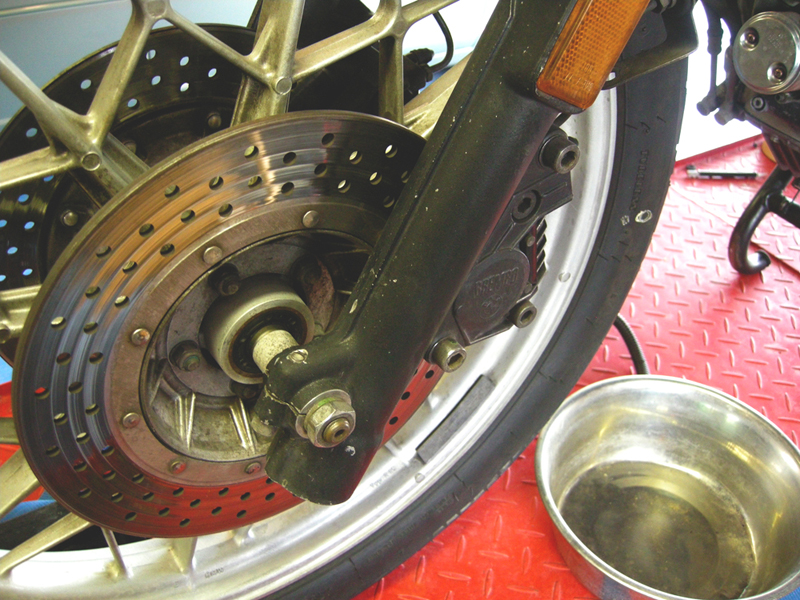
Bearings in new Metzeler Lasers installed, and a 1/2 hour to ge the rotors on and all tidied up.... I've already been blastphemated by some for going with black but what the hell...
That is the only over budget thing I've done. Planned to use silver Duplicolor wheel coating but figured nawww! Life's too short, always wanted some black snowflakes!
Sha-wing!
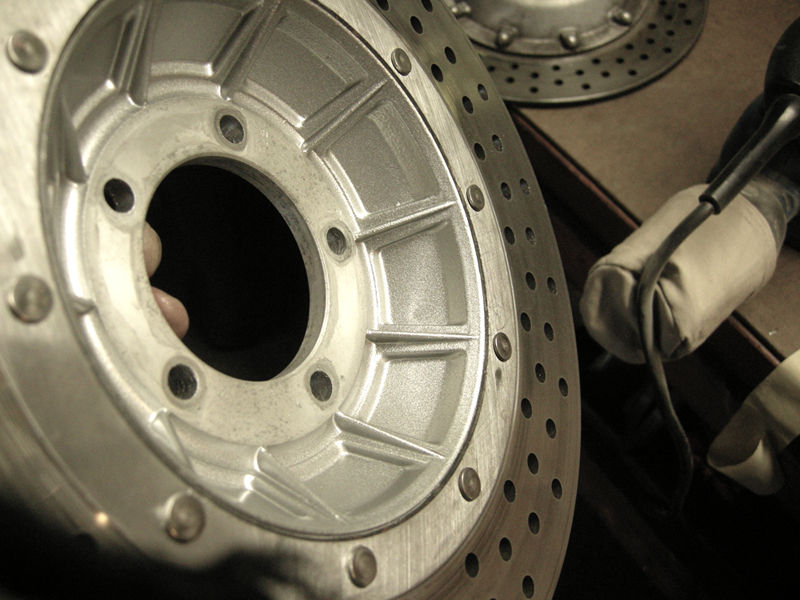
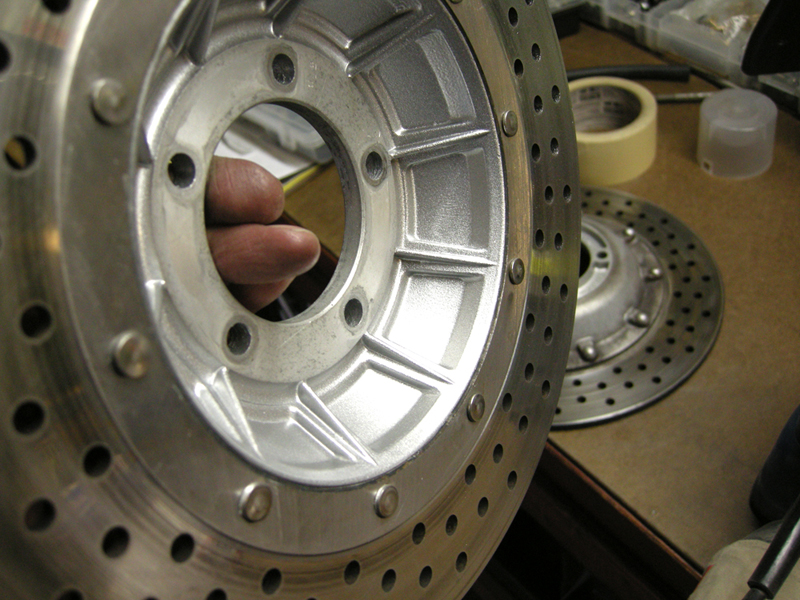
The other thing that worked out for me was the shop guy manged to pull the inlet port form the old head to install on one of the new ones that was missing a port.
No heat involved. He used some supahshitz Joker 440 from Motorex that penetrated and made the ports come of with a tap of the drift.
The first shop tried a torch, got all sweaty and gave up...
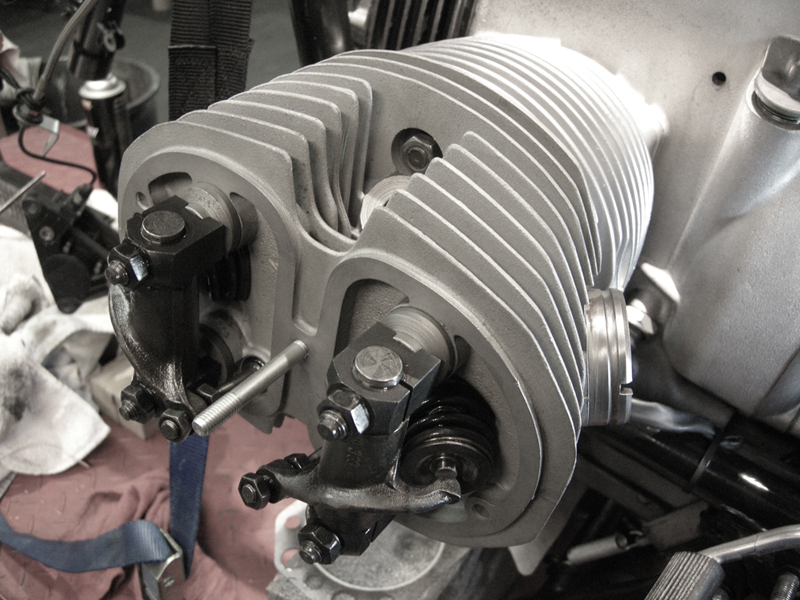
All ready to go...new studs...heads be dualplugged, new valves, guides, seals, seats...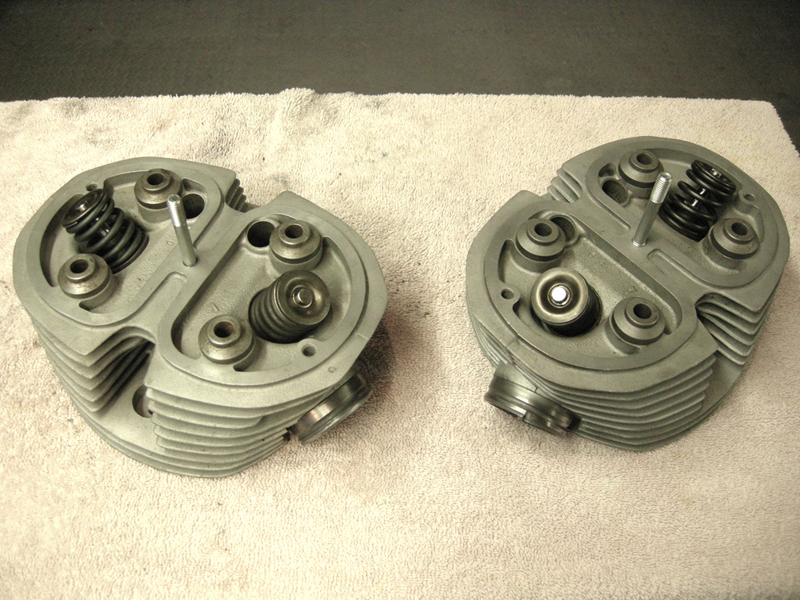
I sourced a nice used OEM exhaust, windshield, and tail lens forom my new pal John Nickerson which are on the way. I can ditch that crappy old exhaust and nasty windshield!
Next up, Gettin' down to mechanics...
12-23-10
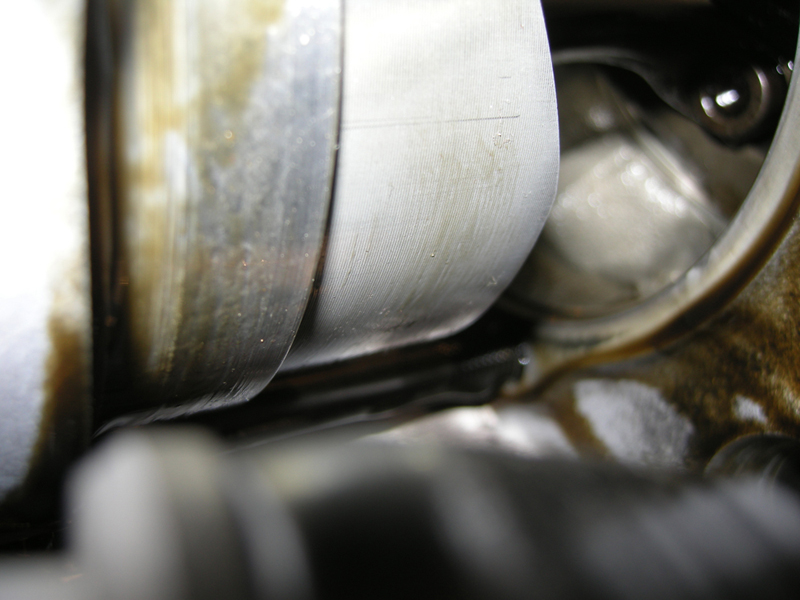
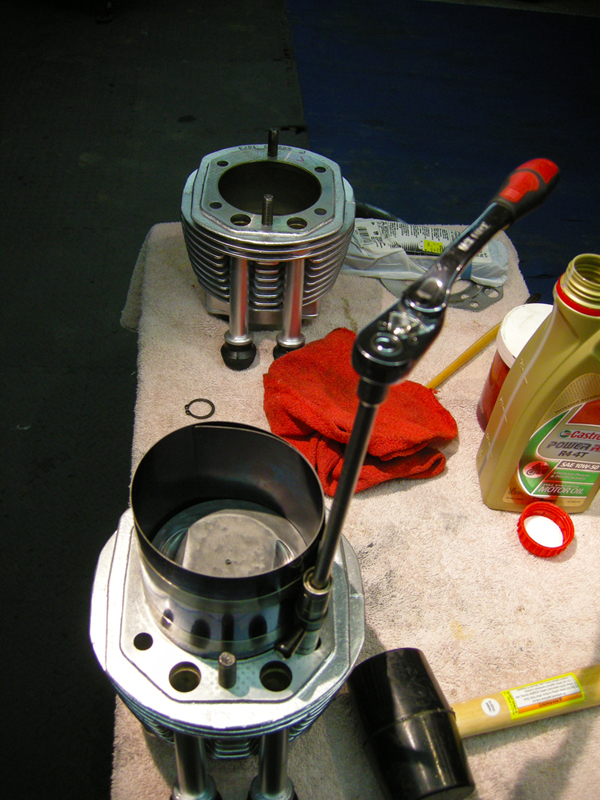
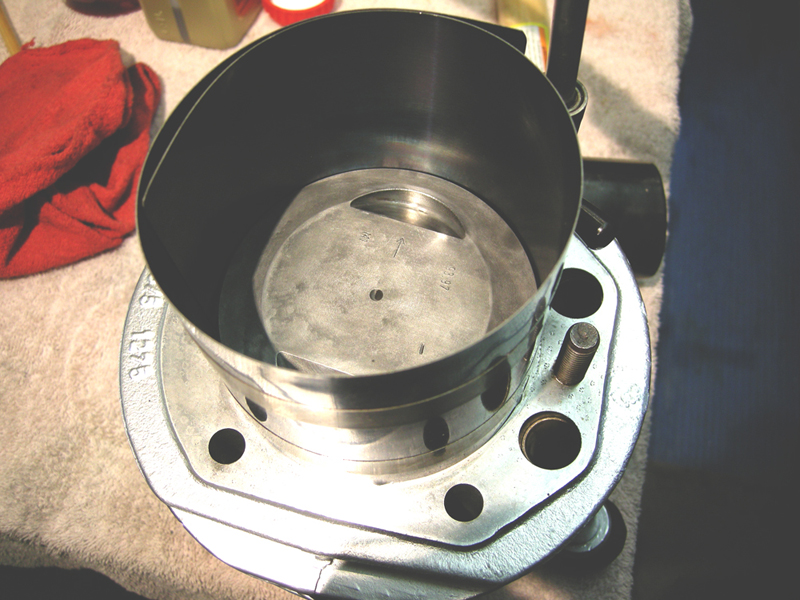
Extra day off for the holidays, I can live with that. I pulled the top-end completely off since I have all the fresh seals.
Didn't intend to bother the rings but the left side oil ring slipped out of the barrel so screwit. Pulled both pistons out and washed and decoked them.
The wrist pins are nice and tight.
Inside it looks pretty darned good.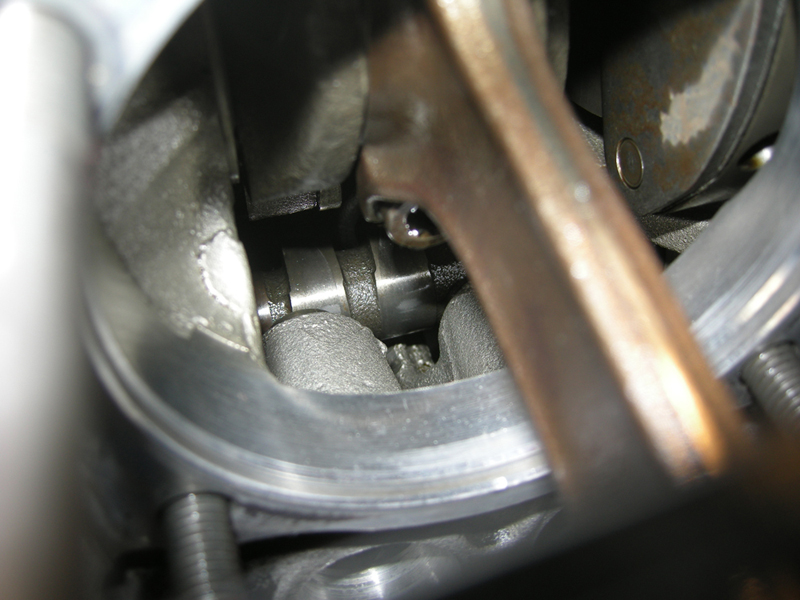
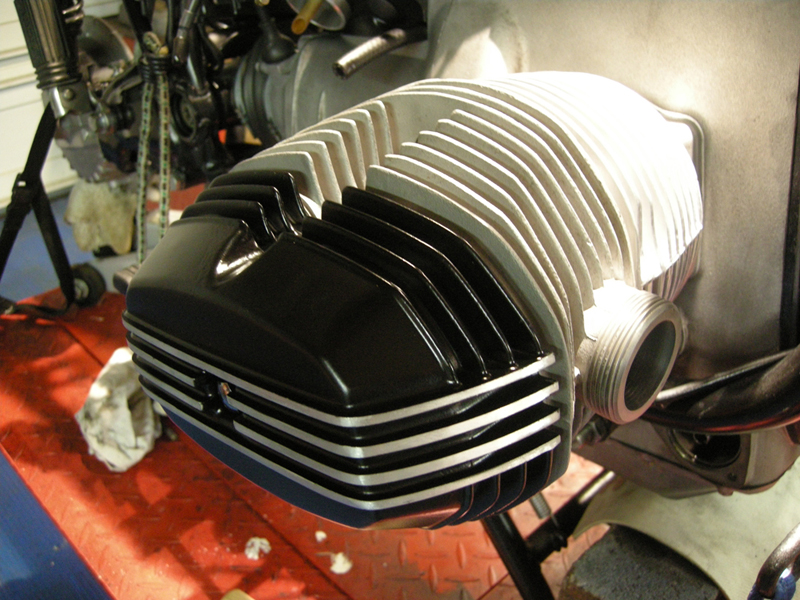
Since the barrels are off I cleaned up the crud hiding under the tubes and touched them up with Plastikote Engine Hi Heat Aluminum..
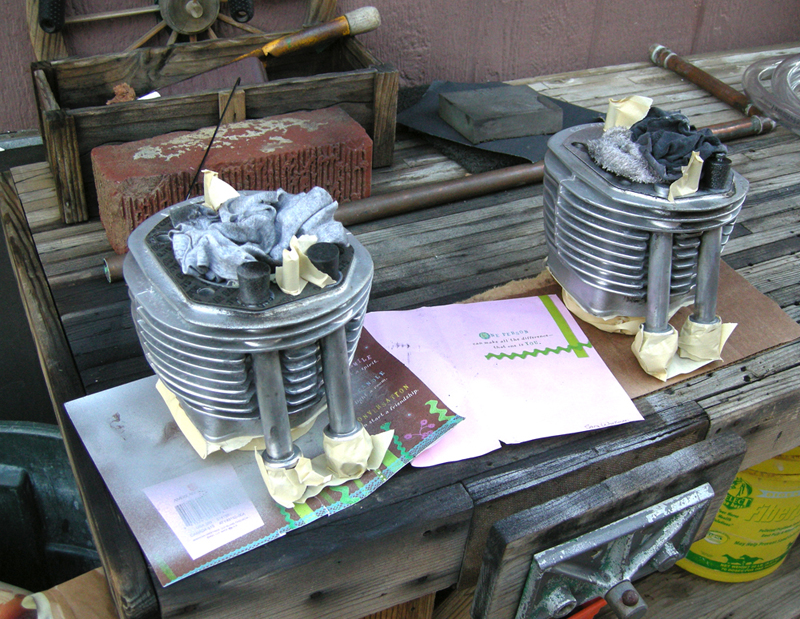
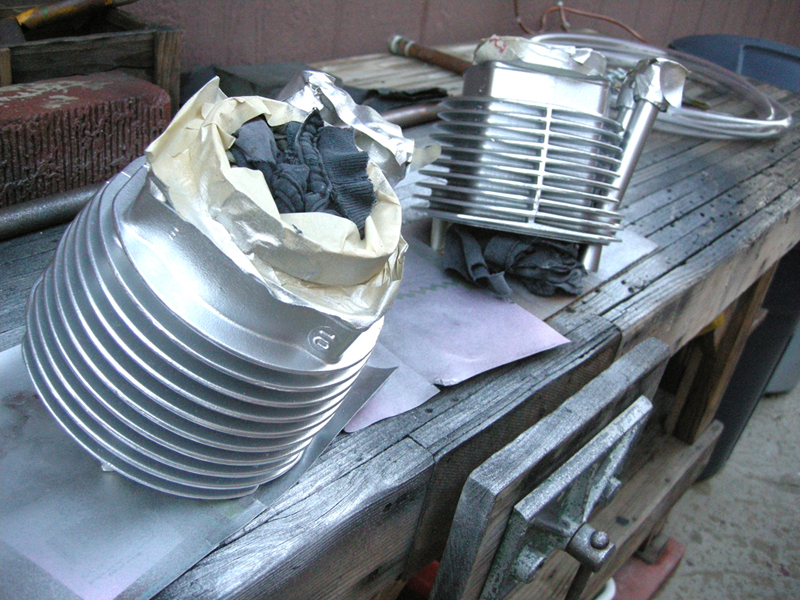
I've got plenty experience cleaning up these tipover covers. I had them blasted so some sanding and dressing with a file takes care of the worst of the damage.
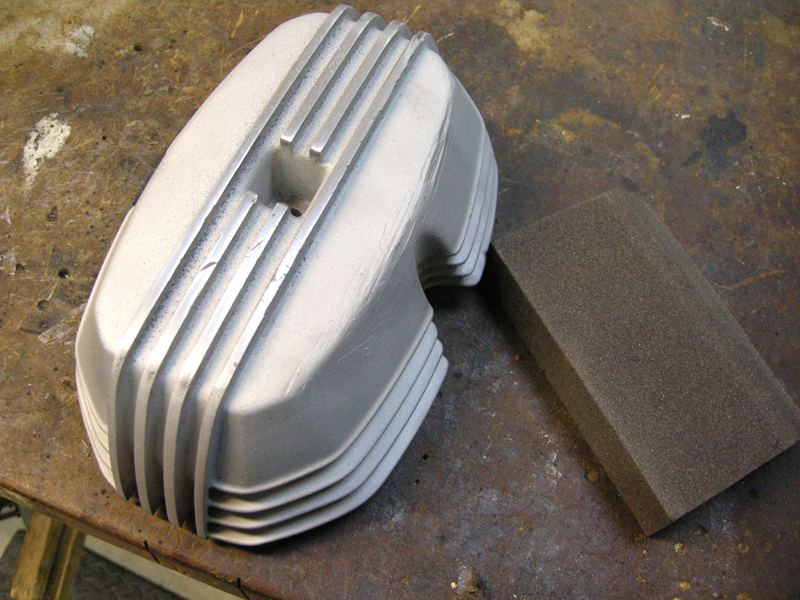
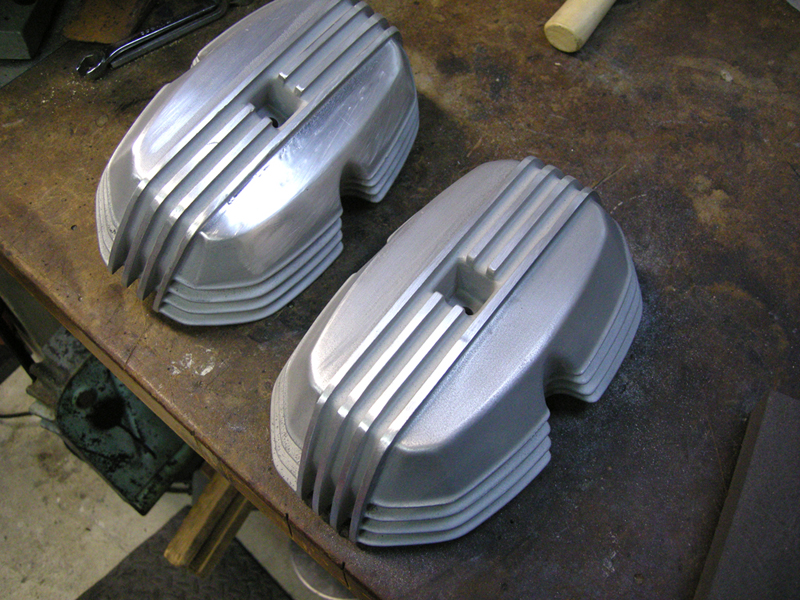
A used gasket comes in handy. Pinstriping tape to cover the fins.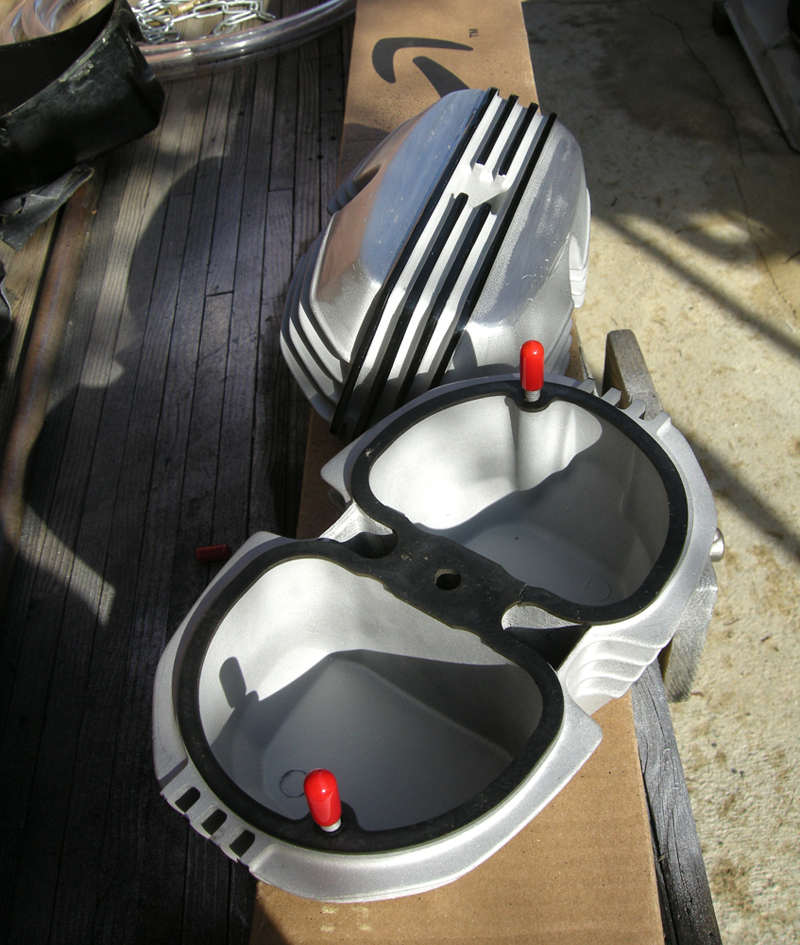
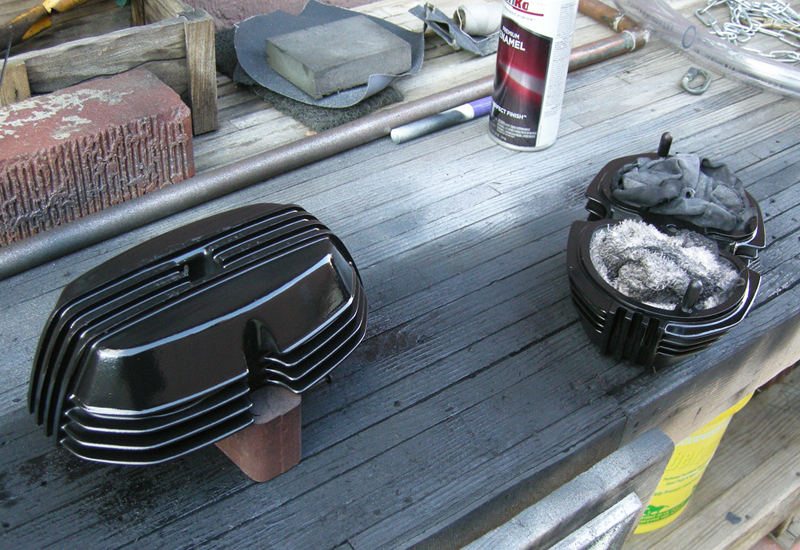
Since these are bare I'll use black hot rod primer then the satin black and a touchup with the sanding block surfaces the fins.
While all that's drying Grampa Al's air grinder comes in handy for cleaning the pistons.
I can pretend I'm, like, Ed Iskenderian  or sumpin' like that...
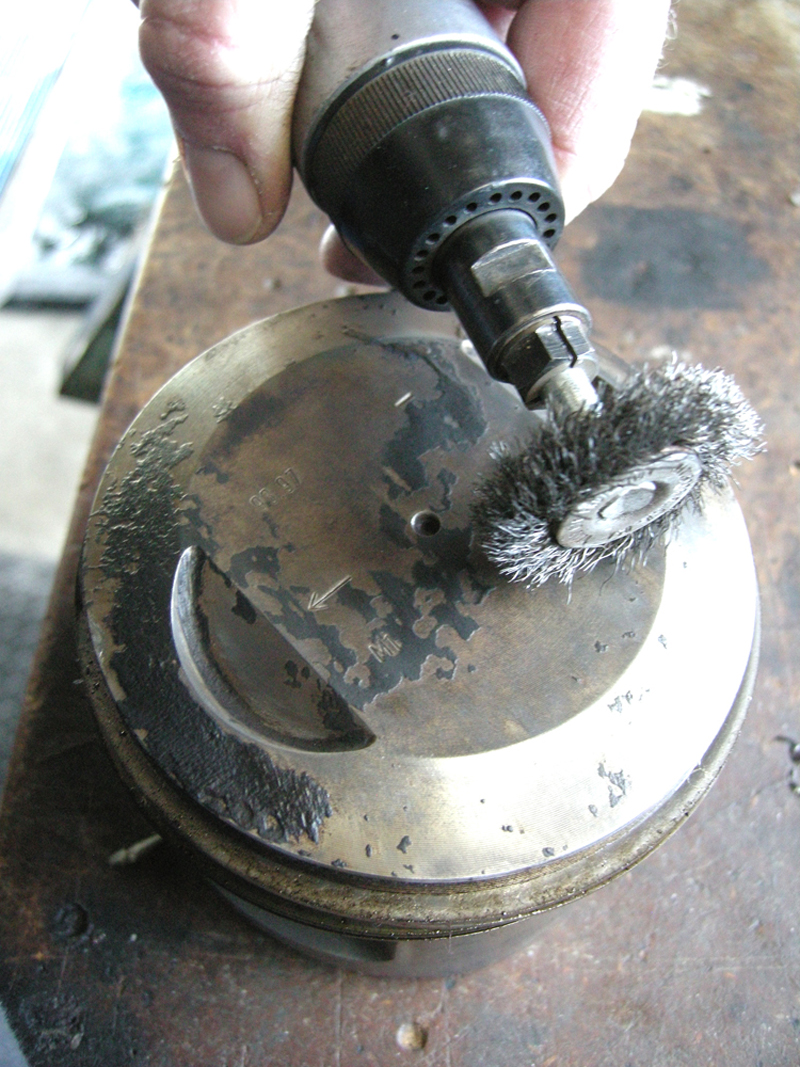
All my children are gathered here today...
All prettied up nice. Clean clean, shiney shiney. Now dat we all clean, we put de lil' pumpers back in dey barrels...
12-24-10 - Xmas Eve
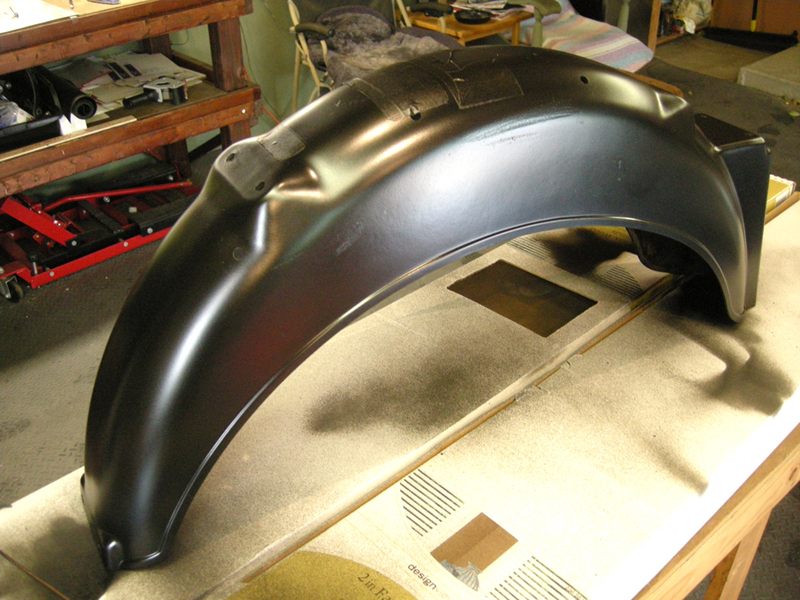
A few things to paint remain before re-assembly. I'm disassembling the front fender first. I'd like to have the brace powder coated but no time, Duplicolor truck liner works well on the underside which will act like an undercoating. Shoulda done it to the rear fender as well...maybe later.
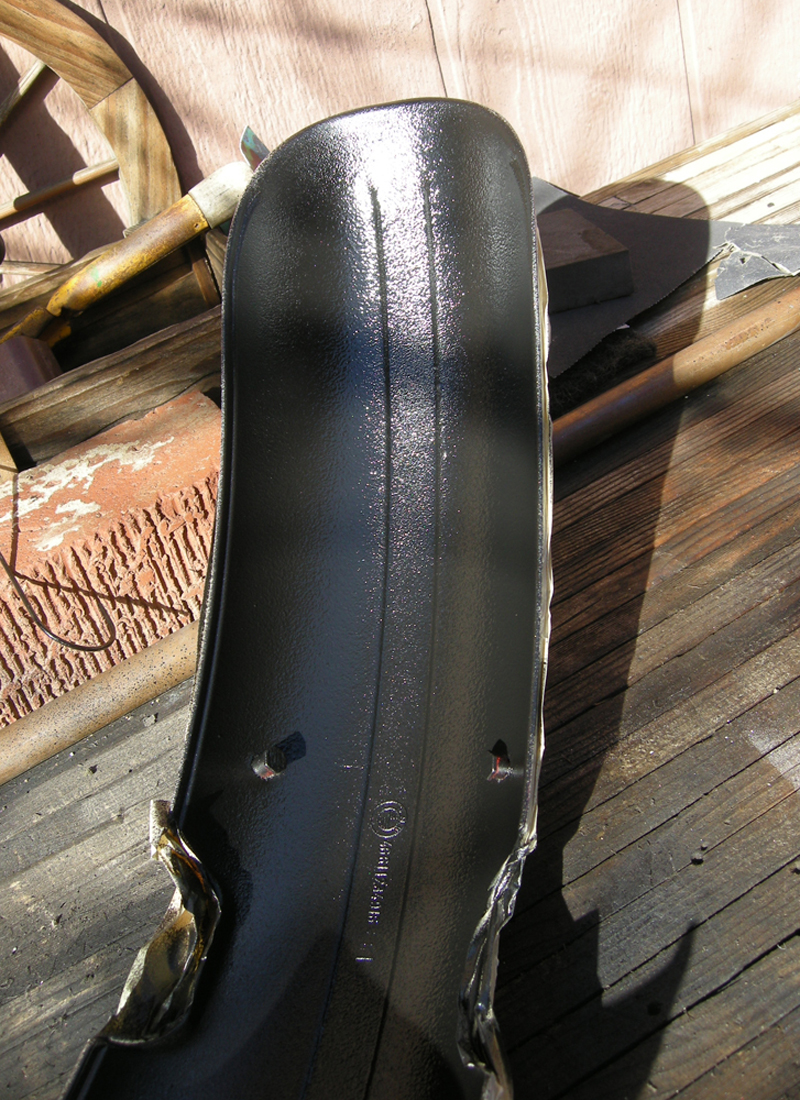
Satin black for the brace, truck coat underneath, galvanize coating for the screws.

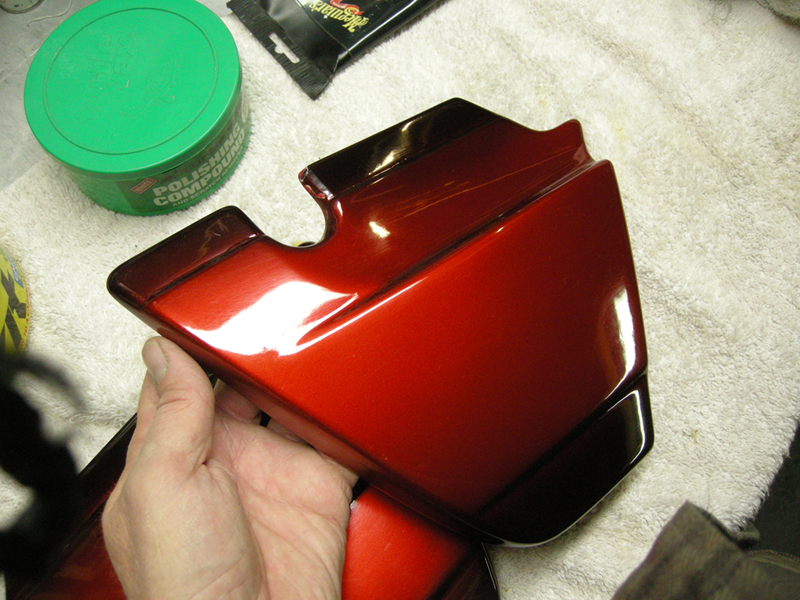
Some polishing compound and a couple coats of Scratch-X brought the fender back better than the side covers, (below). Paste wax tops it up.
Siidecovers get the treatment. Removing the mystical dragon rider sticker was a pain without marring the paint.
Luckily the OEM paint comes from the factory flawed...
I'll stop I'm doing,
My Friends are important
.All in all it made a nice display for our Xmas Eve party...party always ends up out in the garage.
.
12-25-10 - Xmas Evening...
Finally. I have a couple hours to fiddle about. Re-assembly with the methodicality of a preping priest at post Mass.
Slippity back together oh so gently. I did a clearance test with some putty to check clearance between the valves/pistons.
Appears to be plenty of room in there.
New head gaskets in just so...
..Torqued to spec of course..and set the valves.
Oh it's so nice having everything so Fresh!
To do list...Oil cooler assy and filter, coil wires and plugs install, fresh fluids...etc.
12-30-10
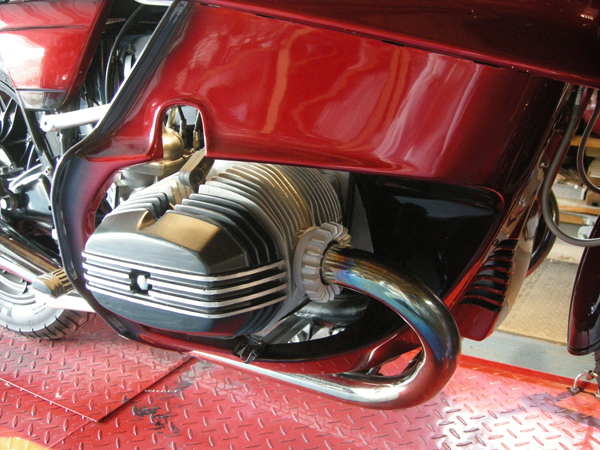
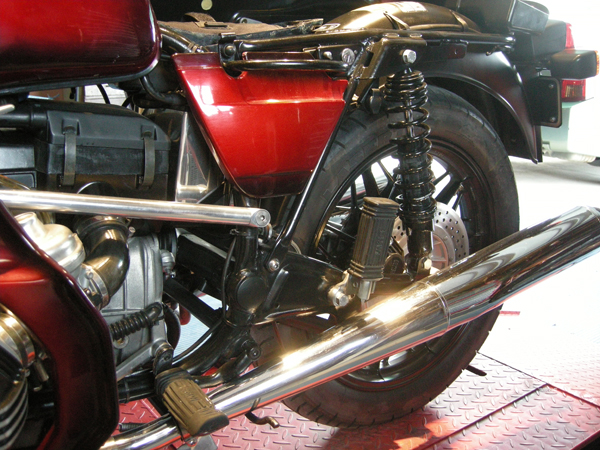
The exhaust just received from Nicekerson. The pipes are very nice indeed. It takes me about an hour and a half to get those all lined out and set to tighten up,
but done. They look way better than the crappers that came on the bike. The perfect set.
12-31-10 - New Years Eve
Looks like we're staying home for the coming Eve.. Snow in SoCal Hi-Dez predicted. What else to do but fart arounf in the geerage. O.K., I spent
the morning putting up the Xmas decorations in the rafters and throwing out a load of old crap that's accumulated to show my sense of earnest to the wife
in starting the New Year off fresh and less burdened.
Once the recycling was done and the trash taken out, the tool bench cleared and some room made for bike parts, a sigh of relief and a clear head let me
focus on the pieces of the puzzle.
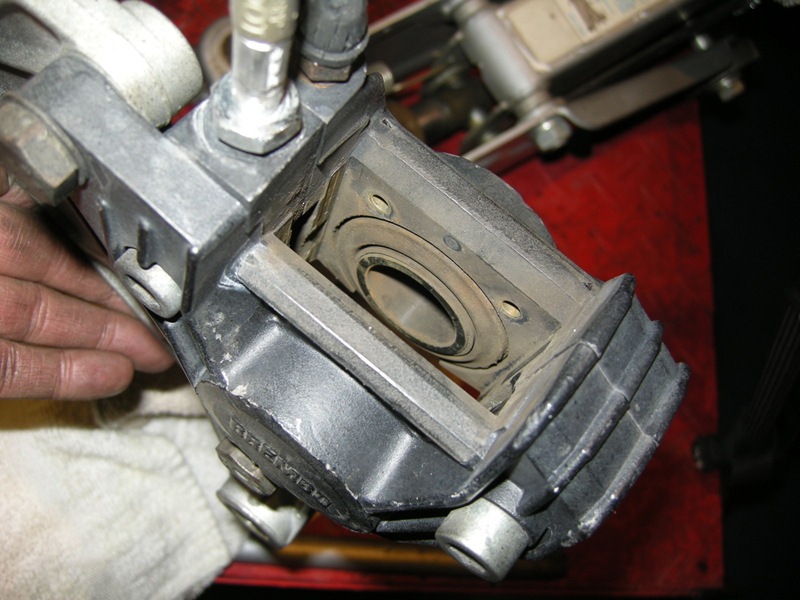
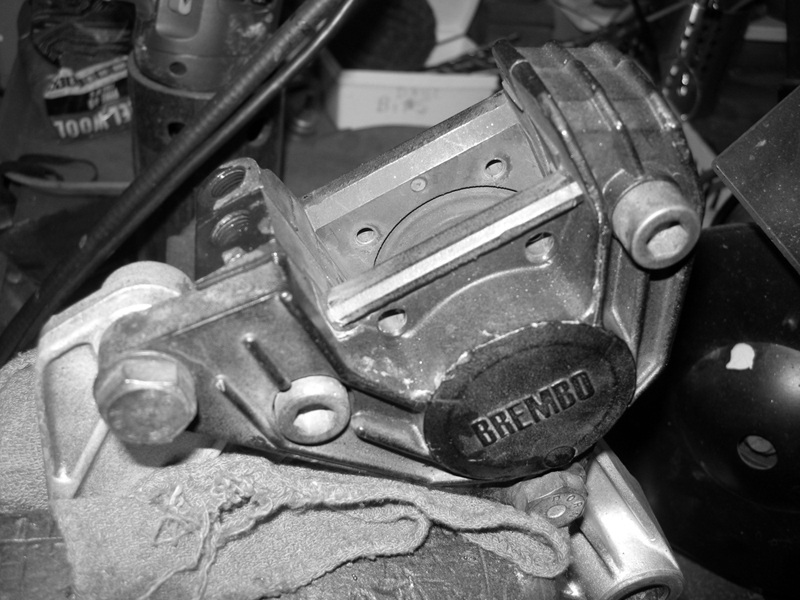
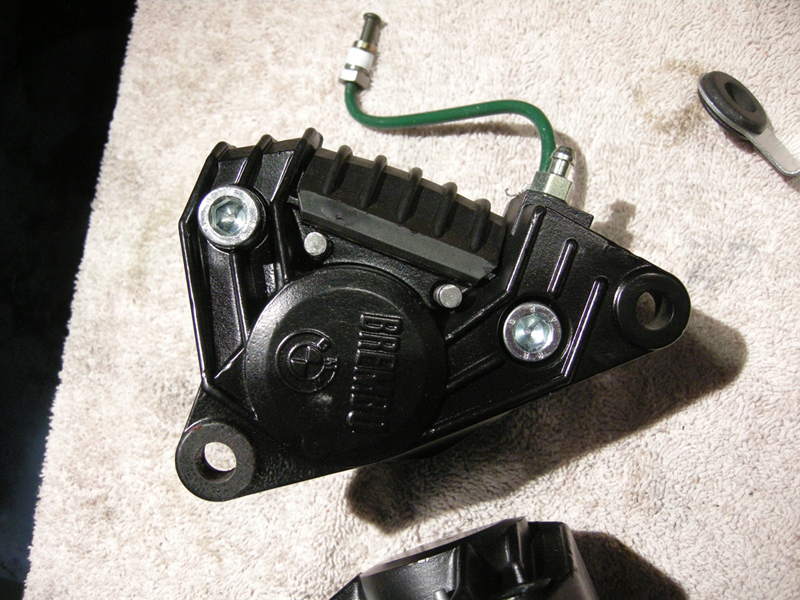
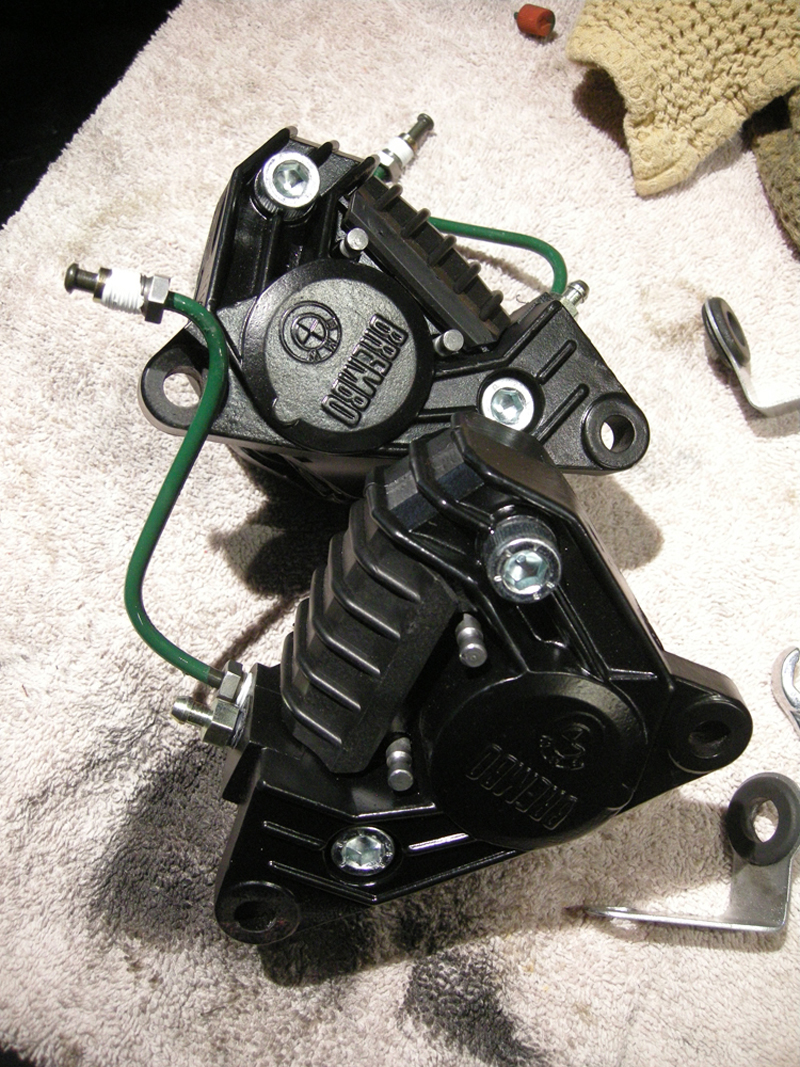
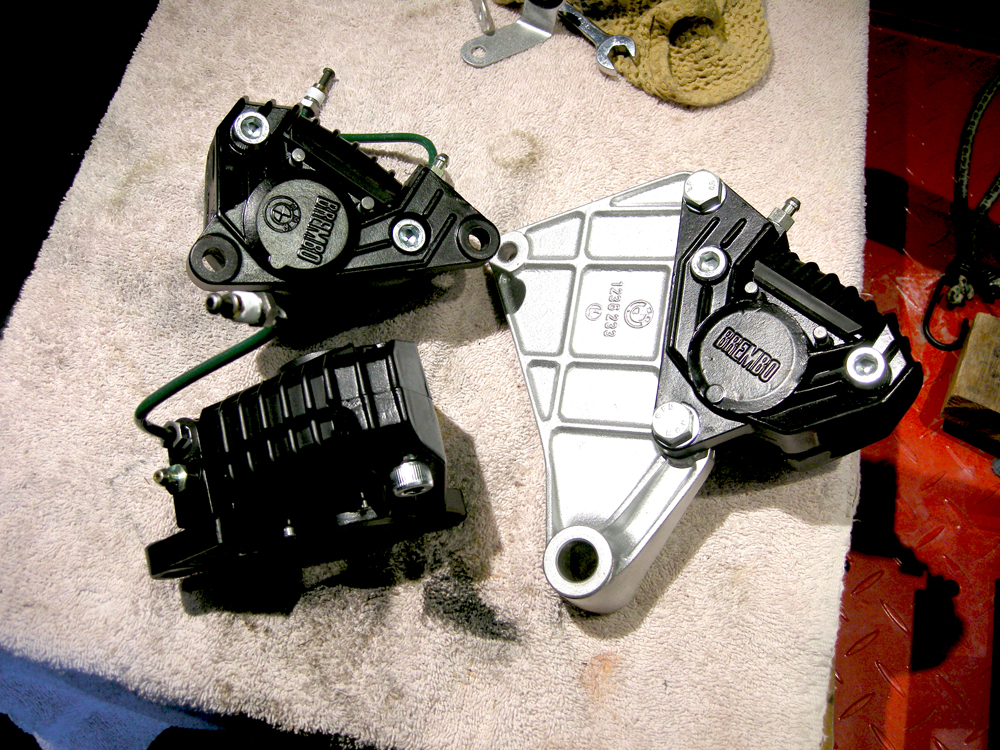
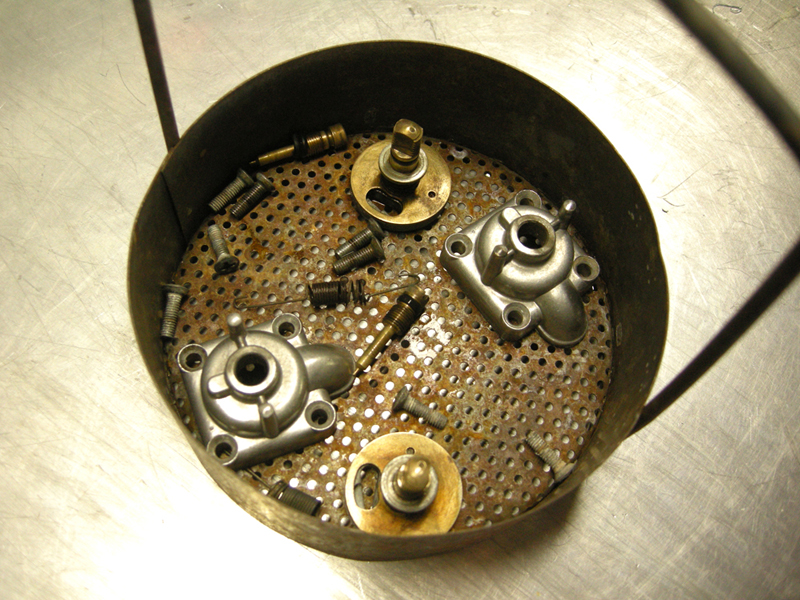
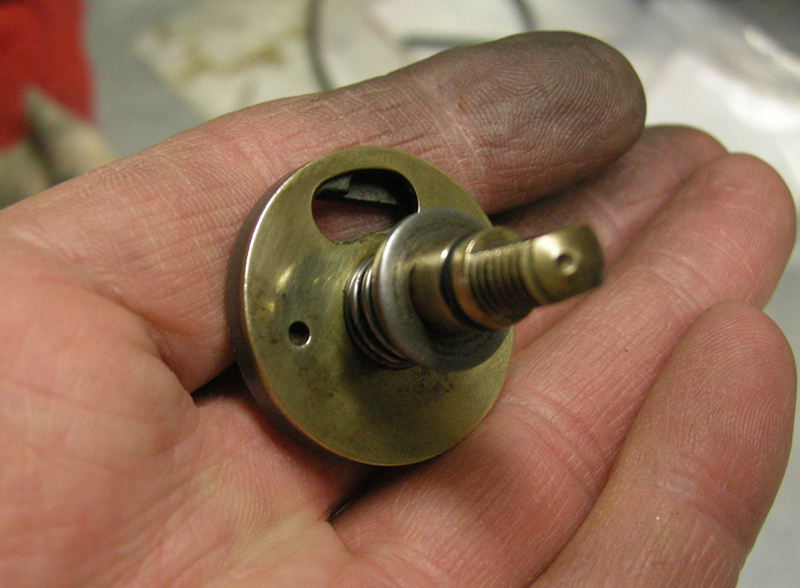
Brakes! I have three callipers to build. First the rear gets diassembled, actually other than some sperm whale juice the caliper looks pretty nice inside.
The pucks look remarkebly new outsde of some rust residue clinging about. Brushed up the corroded pins and keepers, pads are good, clean and sand them as well.
More cleaning and painting and the rear is done the next morning.

Looking like it's time fer me a pint!  ...an Guinness is me dog too!
1-1-11 - New Years Day
Slow startin'. What's the rush me friends ask. It's not a rush, it's the delight of the inter sanctum I love. As dirty and fume ridden as it may be.
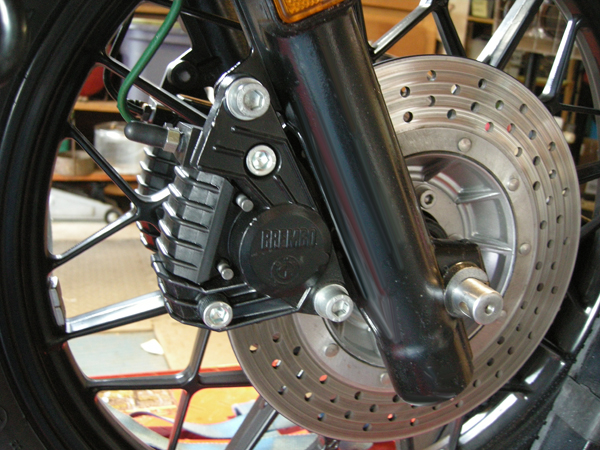
Front brakes are a differenet story. Really ugly blood-rust goo inside. A good hour on each just cleaning and preppin' for a coat of paint plus the new kits.
Ookie!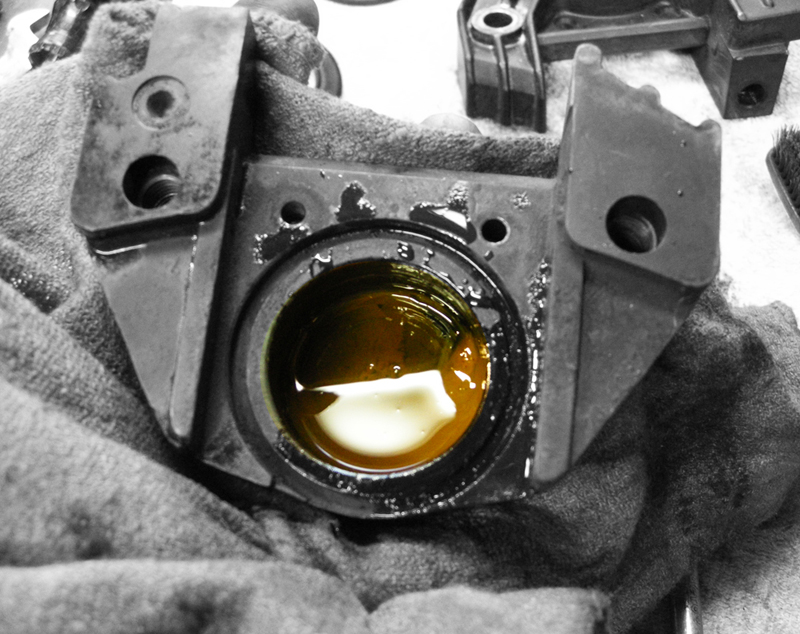
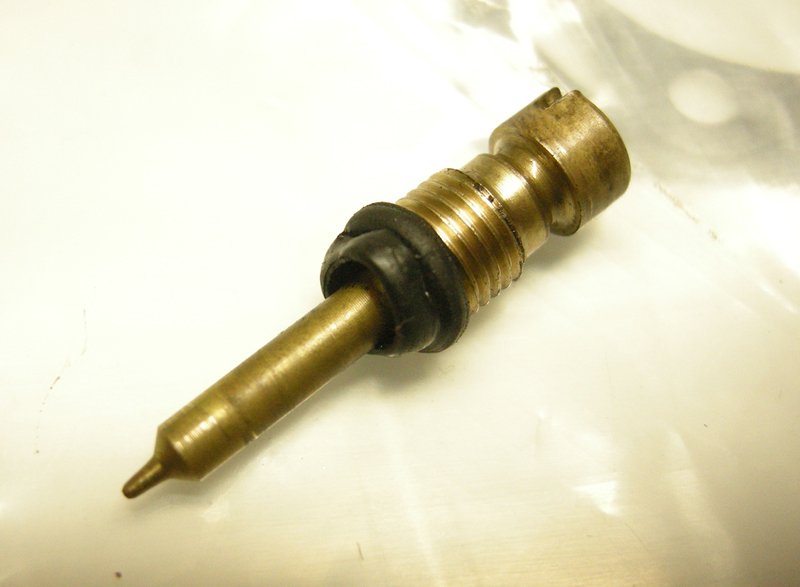
A run down to the local auto parts store and luck out in finding a fresh set of Speed Bleeders to replace the corroded one on the rear.
Mr. Ken had installed SB's on the front so the new ones went on the front calipers, one of the fronts to the rear.
Rigged up a 'Y' fitting to the fronts and my Speedy Vac pump and bled them out real good. Simple easy.
The rear for some reason took twice as long. Final the pump gave up the ghost. Rear brake feels fairly good now.
All fresh now.
1-2-11 - The day after New Years Day
Sore throat, think I'm getting a sore throat...and the weather is getting strange...oh dear.
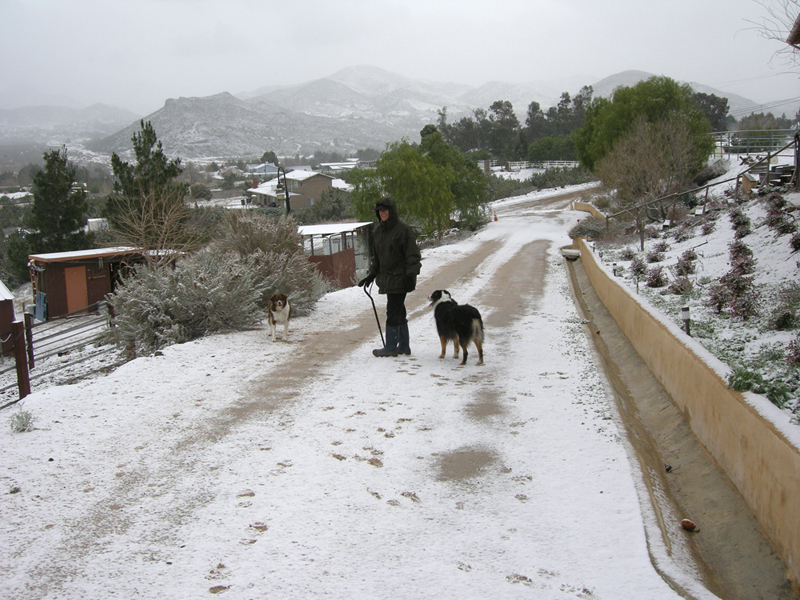
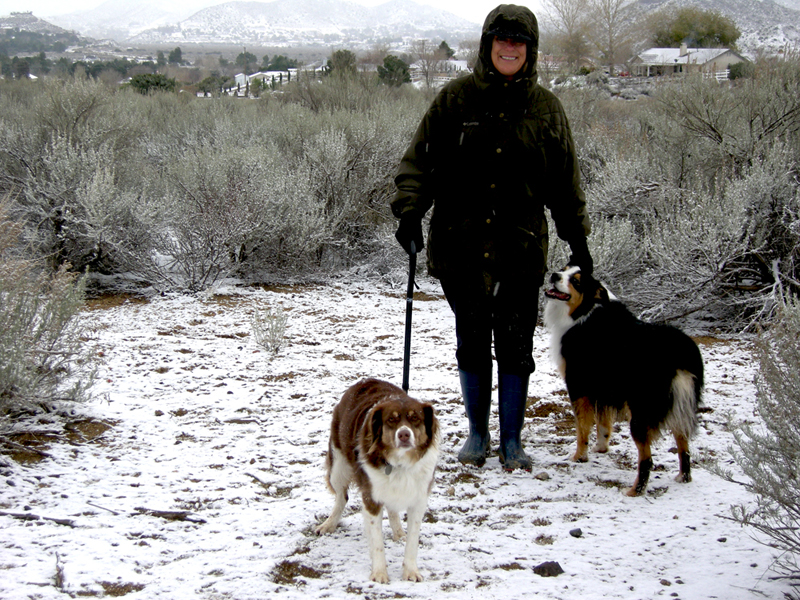
Maybe I should take a break...nawww. What, sit around the hoise in my bathroab? Jean hints at walking the dogs.
O.K., can do, let's ait til the snow gets real deep. It'll be fun....say, didn't you say you were tired? So the snow does come. After organizing stuff
again I take a peek outside the garage door. BRRRR!!!
No mind, stuff to do. Fun stuff. Today I start putting some pieces on, maybe even the wheel thingies. Might begin to look like suntin'.
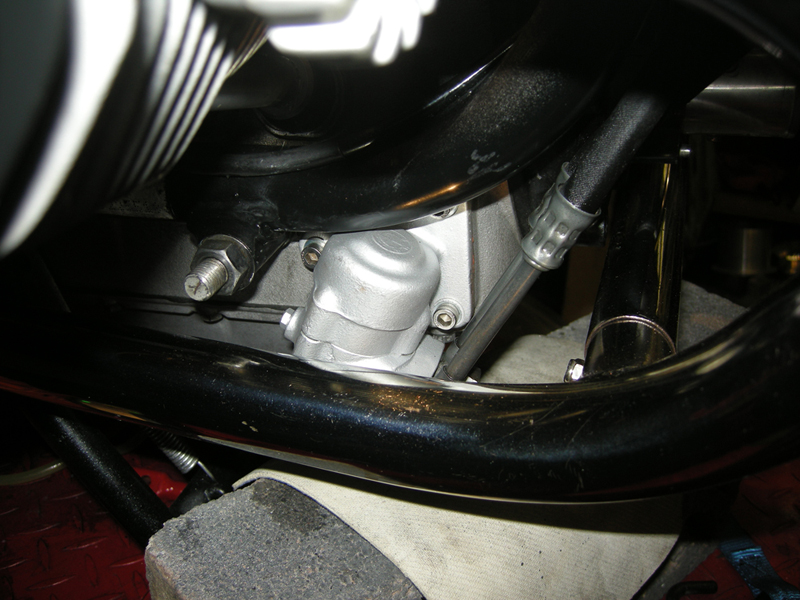
Oil cooler on, oil sending unit and filter, check!
Fluids in. Bike needs fluids. Tranny, final drive, driveshaft., top grade goo. All the drain and fill plugs fit well, the driveshaft drain is iffy on tightening.
I'll address that later.Splines lubed on the drive mit hi-zoot red gease.
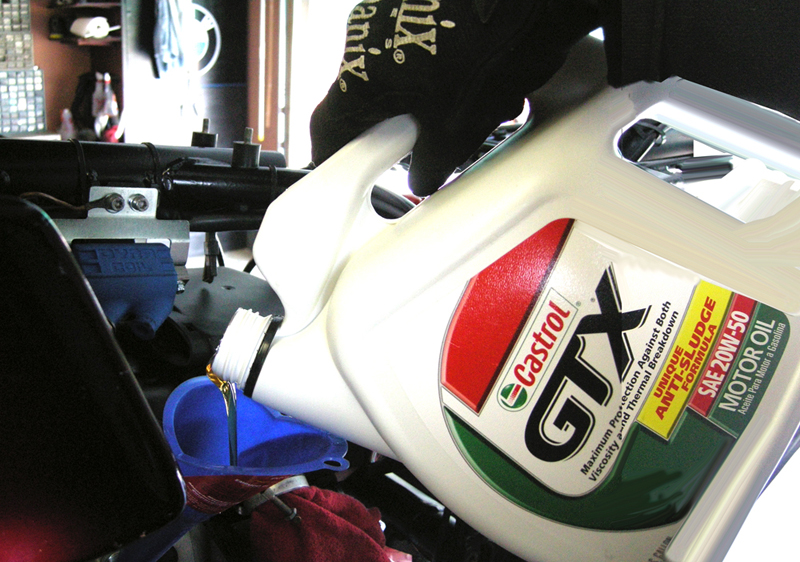
The motor get 20-50 GTX, the blood of BMW shops for years, that is before they came up with that synthetic BMW slick. I intend to run the GTX through
the motor for the first 500 miles and drain to get the rest of the dirty stuff out. Like Ozzie Auer once told me '2 quarts in, 2 quarts out!'... then he
made a little flick with his thumb that I can't describe. Anyhow, he was describing the option of swapping out the poil sans filter at mid-service intervals.
After tthis just waiting for my plugwires and a few bits and pieces... Alright dear! Let's go walk the dogs!.
Looks fairly moto-like.
1-7-11 - 3 day weekend and Crud
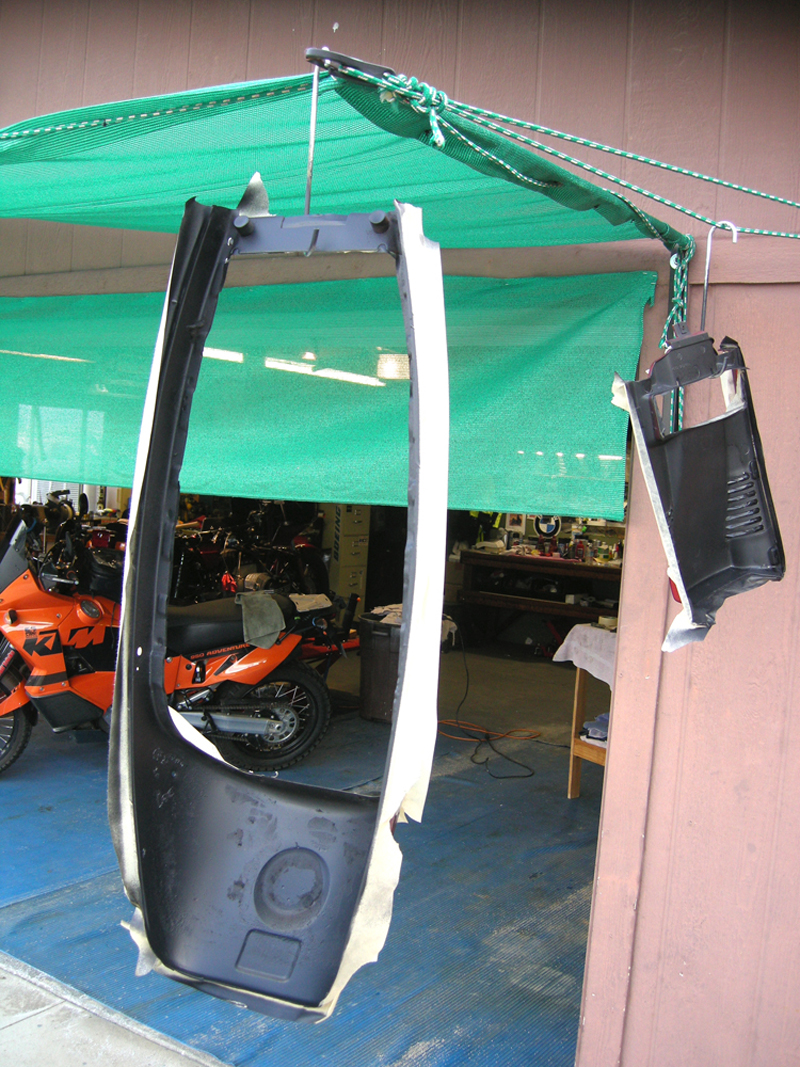
I definitely have The Crud...sluffed through the work week, glad Friday is my day off (don't ask)...snuffle. But I can't just lay around can I? Nope. So clean up the shop, organize the tools, and stare at the RS. Cold medicine makes me feel, um, medicated. I check ed out the body work on the shelf. Much to do. No m,atter where I look there's something else to clean or fix or scrub or paint. Chriky!
So I begin, polish polish polish. My favorite all around polishing pate arrives FLITZ! Good stuff this, works on metal, plastic, fiberglass, yadda yadda. My arms feel like lead, I have a headache and my feet throb. My hands feel like two balloons, fingers can't feel to grip...but I ain't comfotably numb.
But I get'er done.
Petcocks to clean and de-gunk. 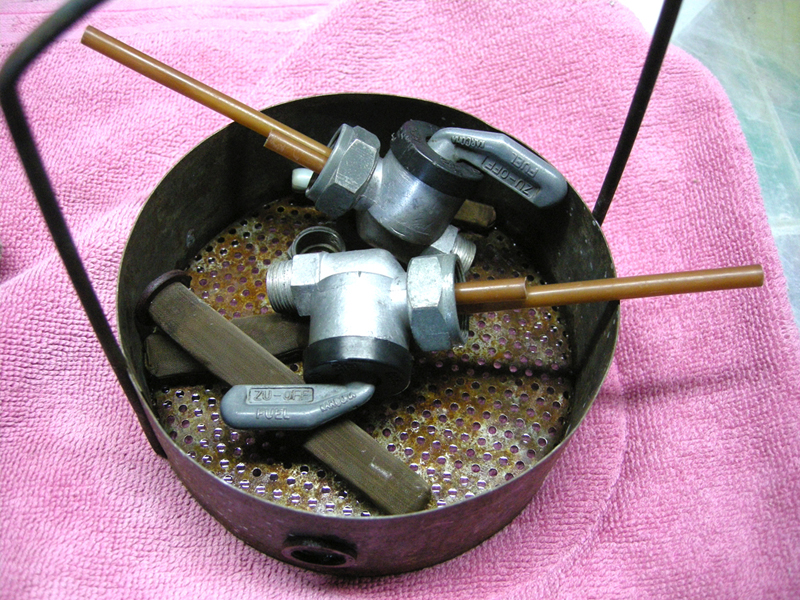
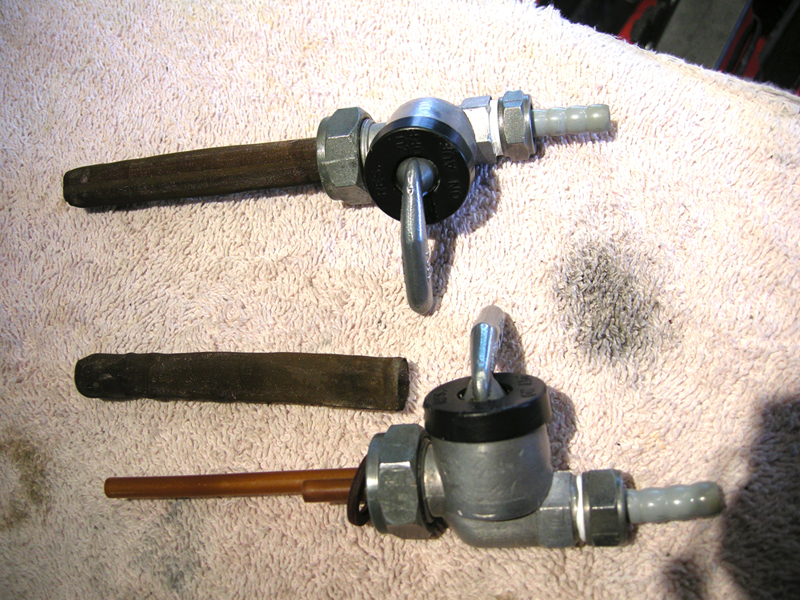
Tank has some crud around the spigot holes, and what looks like may be a split at the seam once repaired.
Mixed up some JP Weld and added a bead . Masked off the bubbly crudy strip along each side ans sealed it with truck bed coating. 
A quick fix for now...haven't decided if I'm so crazy about this paintjob. More red than is in my soul...I dream of an orange RS...

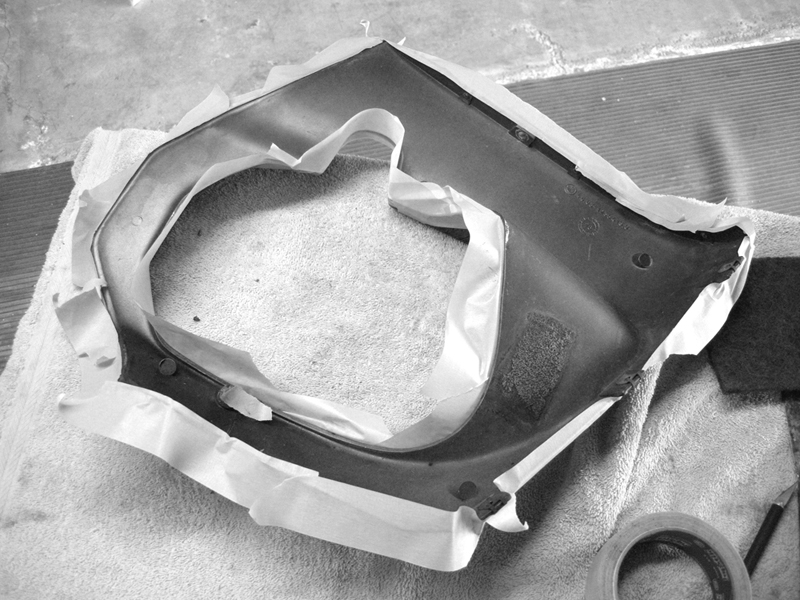
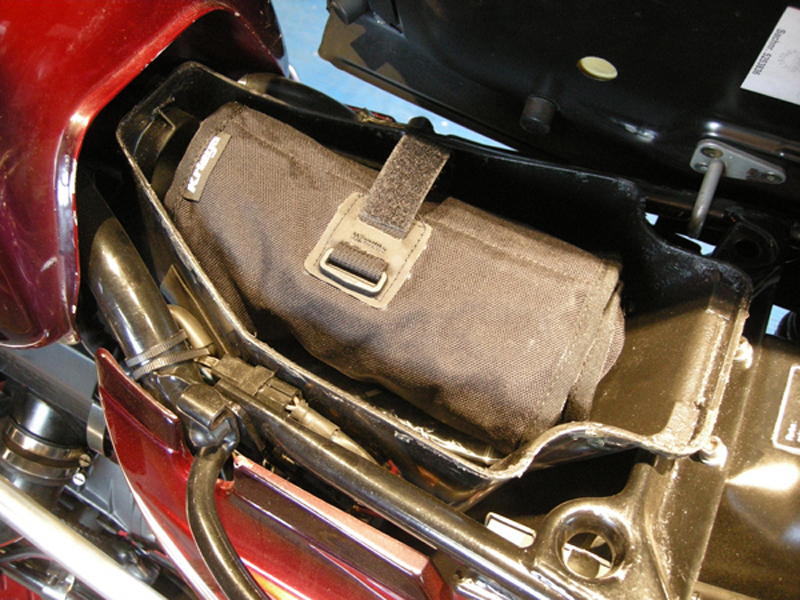
Some creative masking is in order to puull the inner fairing together. The seat cowl is nasty and needs a scrub in douch as well.
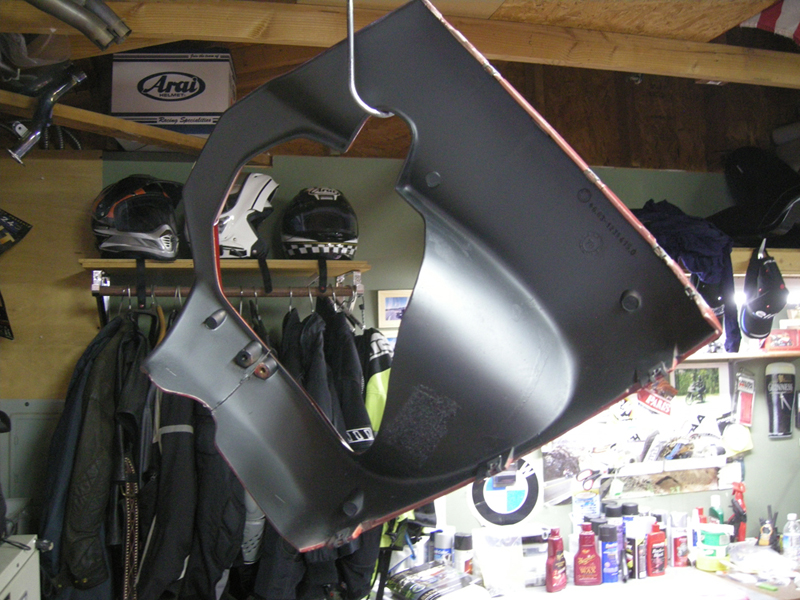
The final parts come in from MAX$$$BMW for the fairing, misc screws, pads, trim and some other unidentifiable bits...and some M&M's...
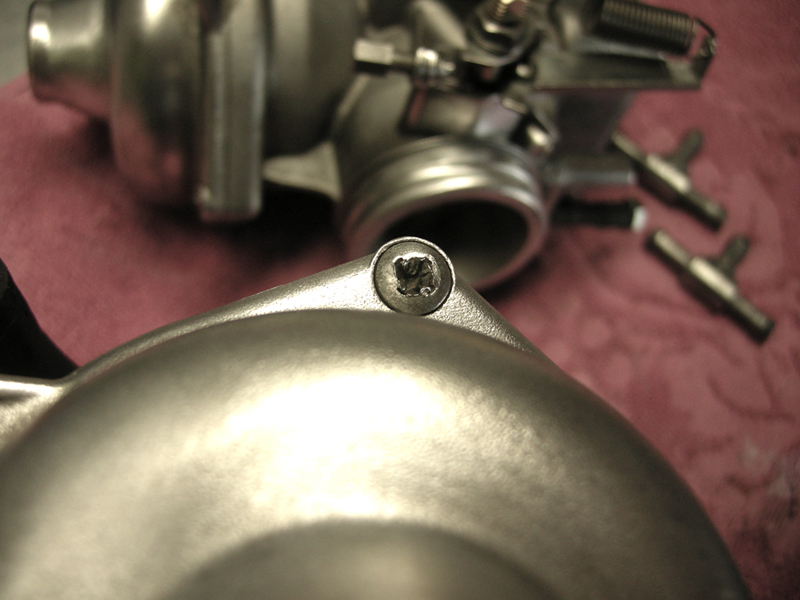
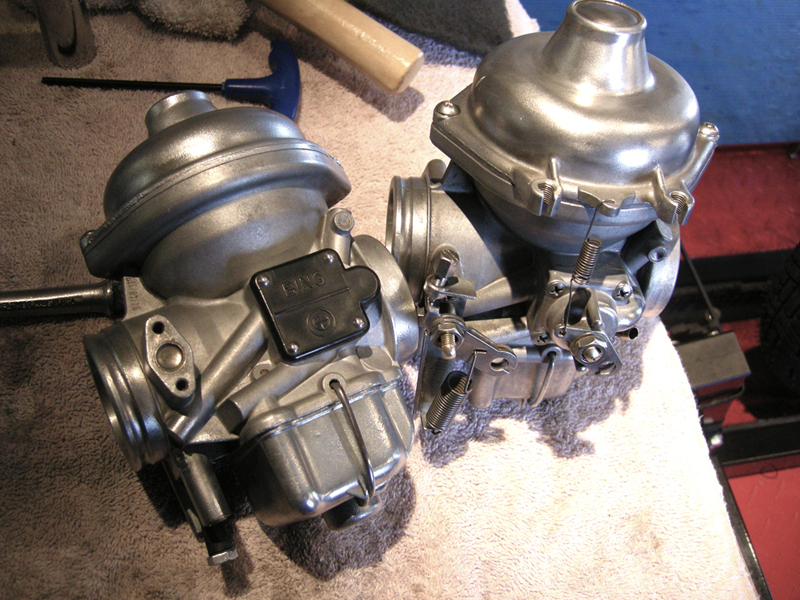
Once all that stuff is drying and I stumble about, I grab the carbs. Oh boy need to take this apart (minimally) and claen them. First off with the carn tops,
But NOOOooo!
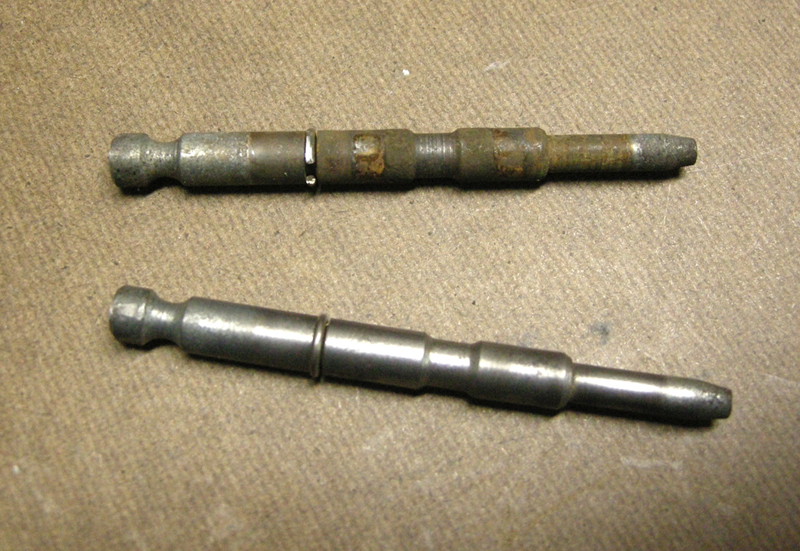
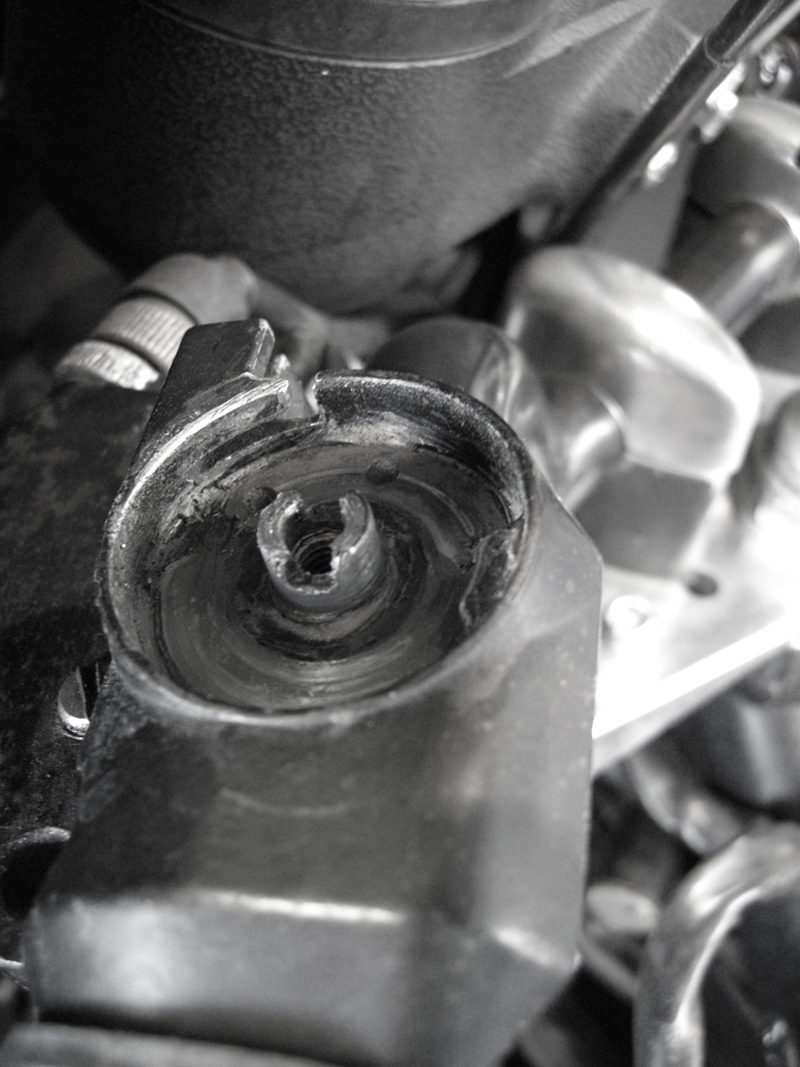
Of the 4 screws one comes out the other three I strip the Phillips heads out of. No matter WTF I do they won't come loose.
Some Fhuckhead used Locktite (RED?!!) on these bastards.
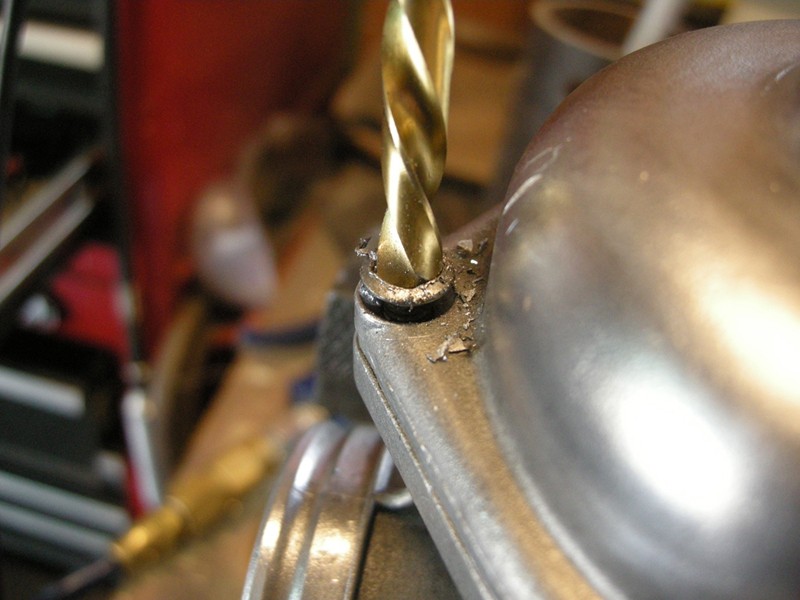
So it's down to the local rural auto parts store for a chance at an Easy-out. It's that or take a chance at drilling them out. I don't want to bugger up the carb tops
...and I feel like shidt.
Jason the kid that runs the counter is a bright boy. Kudos to Jason. He suggests I use a reverse drill bit.
Out of the 97 drill bits iin Pop's old toolbox I see no such thing as a reverse drill bit...I look at Jason and I'm thinking I made this dream up, I blurt out
"You mean they MAKE theses reverse bits?!?" (what for?)
'D-Do you HAVe ANY of theSe!?! JasuN? H-uh?..."
I probably spit on him as well, eyes all bleary, sweaty brow and cold hands.
"Sure" says Jason, "A set of 5, $16.95." standing back triple the approproiate social space behinfd the counter
I consider myself fortunate, like a member of the Donner Party who just came back to the cabin with some real meat. I get outta there with another
$25 added to the RS total (bought an easy-out too just in case)...
Well Dog bless ya J-boy, it worked! Just when the drillbit got to the correct depth it snagged and pulled the screwed screws out...ahhh...
Enuff exitment for one day. I have to sniffle amongst my excess...
1- 8-11 - Day two o' Excessive Compulsiveness
Damnit. I'm shootin' for the stars! Alka Seltzer Cold Plus, Ibuprofin, Excedrin, 1000mg Vitamin C, and Echinecea pplus some ioccocoi-stuff you put
under yer tonge taste like sugar pellets...dang I feel like crap. But I'm gonna start this motor I sez.
Parts all on. New Taylor sparkplug wires and new plugs in.

But furst...there are cables and hand controls to deal with. More maintenance I shoulda known needed doin.
Choke all dry and goobered up. Had that apart 4 times trying to get the right tension. Chokes don't close all the way
partially due to weak return springs. Need to cal MAX$$$ one more time. Hmmm, probably need an dipstick washer
too, since evidently this bike didn't come with one...
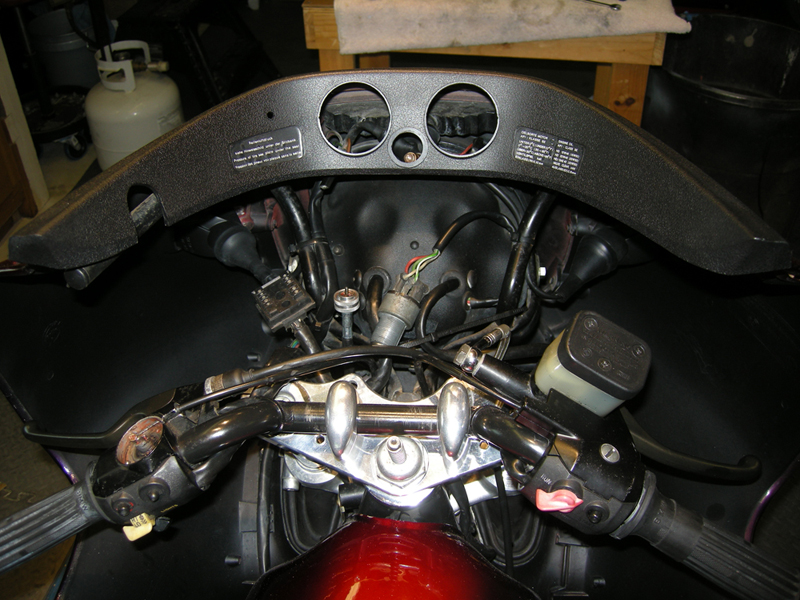
Then there's the throttle. Another cretin wrenching bog.
What's wrong with this picture?
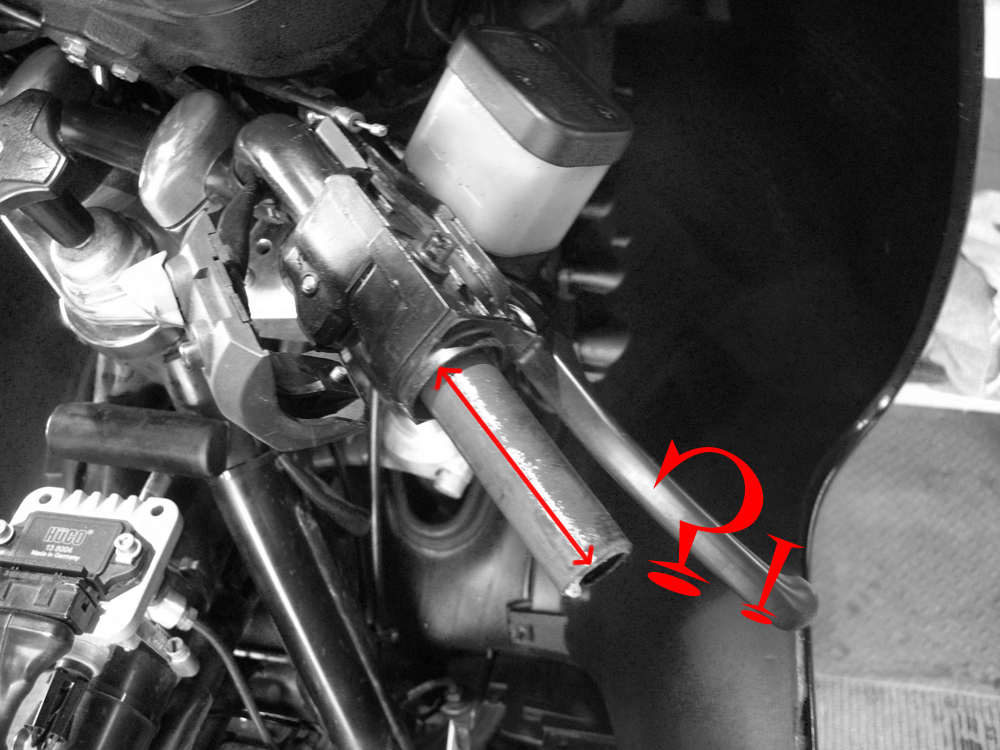
Okey Dokey, maybe it's just the meds...but what's wrong with the pic? Oh, I dunno, seems like the bar is just a bit short for the twist gip. Wouldn't yah say?
Oh heck, nobody'll see it, out of site out of mind!
O.K., so K-bike bars are the hot set-up (per some), evidently whomever installed these just used a pipe cutter to trim the ends of to clear the fairing...
Nice, but dress the ends so that the cutter flanging is smooth? Why bother?!!
Chricky! Hey, it's only the throttle!
So I loosen it up and slides it up as far as she goes. Reason for cheating on the grip out of bar was because the throttle cable gets fouled bt the speedo cluster.
Note to self, all mods are not good mods. Frikkin' internet. Erroneous Bullshite prevails. The only way to get minimal clearance with acceptable twist grip on bar,
is to raise the speedo cluster on the cluster bracket. This willl have to do for now. I'm thinking stock S bars are worth the pain.
But I digress...time for the moment o' troof. I clean up the bench, clear up all the distractions and take one last look.
Battery grounded, check, carbs eyeball adjusted , plugs in, key on
'sput-ta-da-sputa-da badda da- bwaap! She starts up directly and settles into a steady idle (bullshite).
O.K., a lump idle but I get it semi better and it des idle on it's own.

Valves and top-end sounds good. Pipes are a bit, um, LOUDer than I expected...
But... ...until I look under the bike and I see the stuck pig...
Oh the end of the day. Such a pleasant day too...oh gosh, not done yet...
.
Oh Dear! what's that?
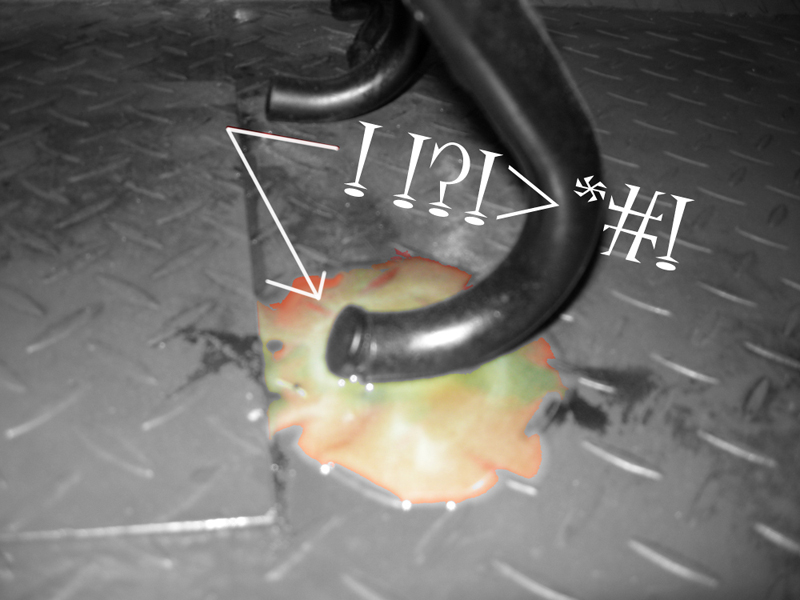
Oil running out the right cylinder by the tablespoons full?
Mercy Me!
'No rest for the wicked!', that's what my evil stepmother always told me...
...speakin' of the past my brother was a wino, but not for the same reasons.
I need a frikkin' glass of RED badly...
There's somethin' happening here
What it is ain't 'zactly clear...
Cut to chase, one glass down and I'm on it. NO CAN WAIT.
OFF with her Head!...and exhaust and the valve train, yadda yadda.
My masterpiece is all turded up. But I immediately see the prob, Lem.
A TURD! It's A TURD!  (R.I.P. Eddie)
I see something fall out when I pul the cylinder back...Oh My Dog it is a...
No Edith' it's just a pinched o-ring...nice work Master Mechanic. Well at least I go to bed knowing what my fate is.
1- 9-11 - Day Twee, da Final Frumptier
I gotta say, I'm not worried at all. Not yet.
Then I recall a post on ADVRider from some superduperknowledgeable-dude. So it appears, but I a grain o' salter.
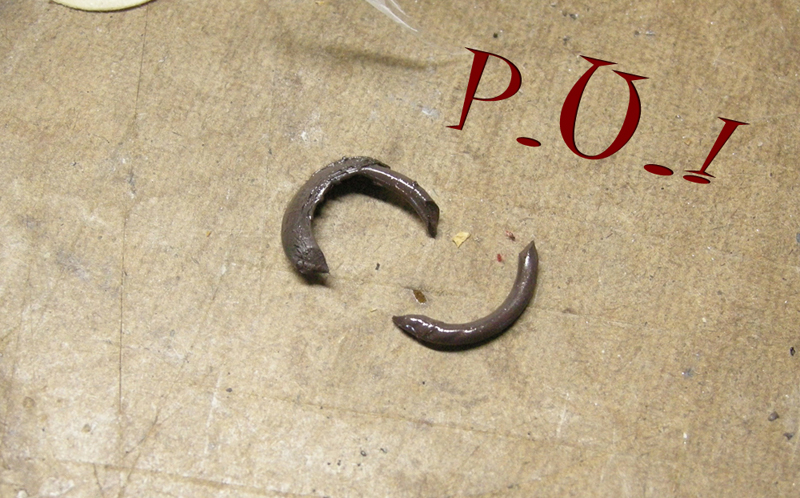
Something about quishing the cylinder stud o-ring so hard that it actually keaves an indentation on the block. Hard to believe? Yeah maybe me too.
So first thing in the morning I go and cop a feel. Momentary Panic. I can feel a lump...but it's not cancerous.
But I can still feel it see it...maybe not a lump, but an indentation. This said, in retrospective, I'm not so sure my lil' o-ring incident caused this, as my lil'
greenie I'm not so sure squished in that direction. There was some residue of sealnt on this side when I pulled it apart the first go 'round.
Methinks some else be fiddlin' wif her jugs before me. There! I am Blameless!
None the less, I'm worried.Then the phone rings...it's my wife. She's gone and left here riding chinks at home. In my confusion and semi-medicated state,
I offer to bring them to her some 10 miles away...well it is in the general direction of the auto parts store...and maybe Jason will l know what to do...
Maybe Hylomar will do the job after all. Maybe I'll give it a try, Nothing to loose. By chance Rural autoparts has ONE small tube...that's right $16.95.
Yeah, feelin' lucky again, etc.
Let's shorten this up a bit. I get home, slap it together like the methodical Pro that I am, let it set for an hour or so,
long enough
to out a way all the tools, clean up the oil from the bleed out the night beefore (confidence), and have a bite of lunch.
No need to rush things...
Beeyotch be there when I get back. What's onna SPEED channel? Hey, that Bubba is sumpin' else. huh? You KNow?
Ya-wn!
...are you kiddin'? Ichoke down a cold cheese and ol chicken on burnt totilla burrito and watch SPEED long enuff to see them leave the gate.
Got no time for messin' around...
One last checkover, hit the button and Da-Dum! This time she does settle into a nice lil tempo, mechanics sounding smooth, all giddy and ready to heve her fine points tweaked.
Ahhh! Feels good don't it?
I mean, getting the feeling you know what your doing...sometimes...
Synch with the Twinmax, check timing, fuggin' girl revs right up, like now baby. Loud-ass pipes.
Wife says OH Dear! Sounds louder than a Harlee!
That's right baby, we gots us some Fraulien Harlee's here...uh huh...
Must be the medication...
Sun setting, bounce the front end, tightened the axle, etc. lip the front cover on. But no, gettin' colder than me.
Snick it in gear and roll down the driveway. The girl can roll. I immediately noticed some address items , speedo whack, brakes weak,
First thing though it accellerates nicely, sounds like a time machine, and feels tiny.
I use to think these bikes where so BIG. After owning some oilheads, this is like a scooter.
Weee!
Oh, and um, forgot to say, NO L-E-A-K-S! Hey, I just noticed that the right side valvecover is on upside down...details...
Stuff to do: voltmeter, speedo, bleed brakes, charging system. Put the lowers on....but...
I'm going to Arizona next weekend and soak up some sun, play some golf or something different...zzzzzzzzzzzzzz...
1- 17-11 - Home again Home again back On Topic...
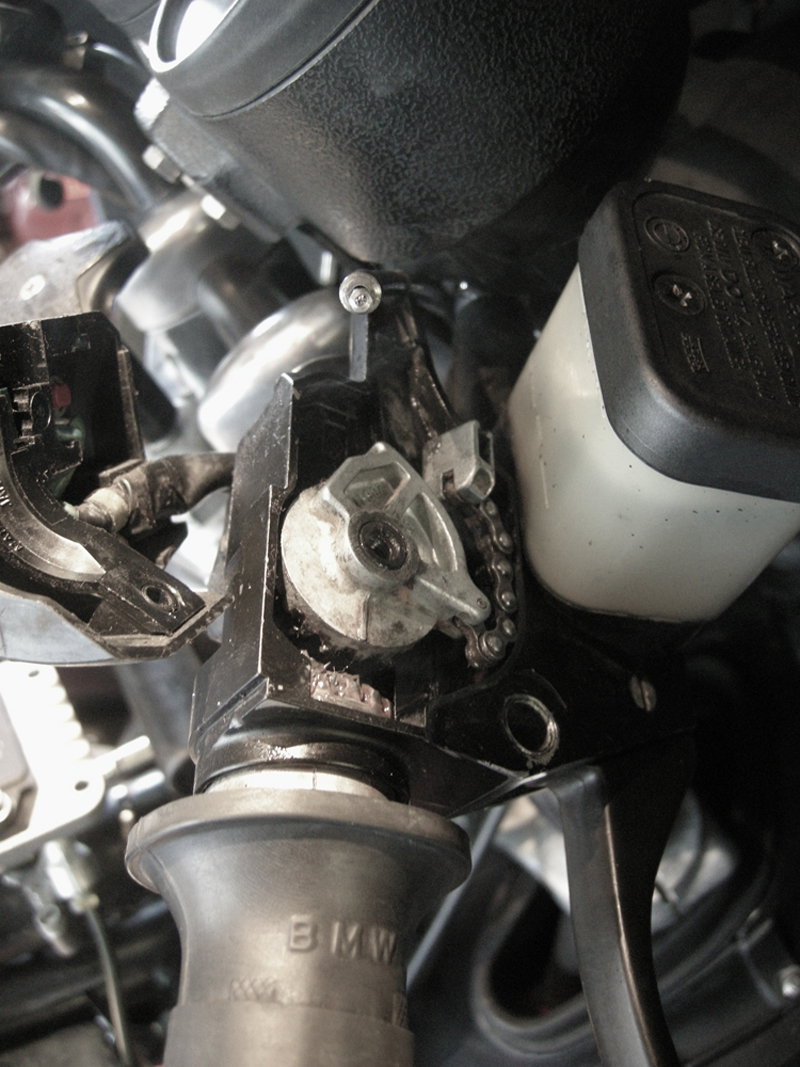
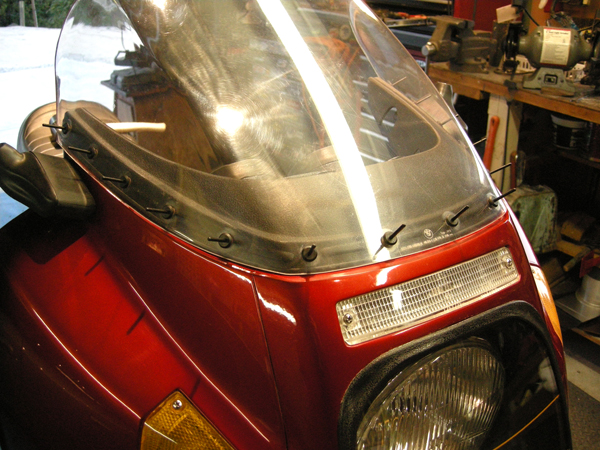
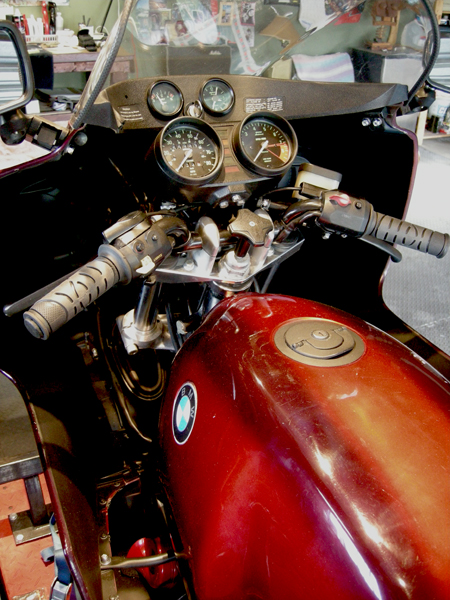
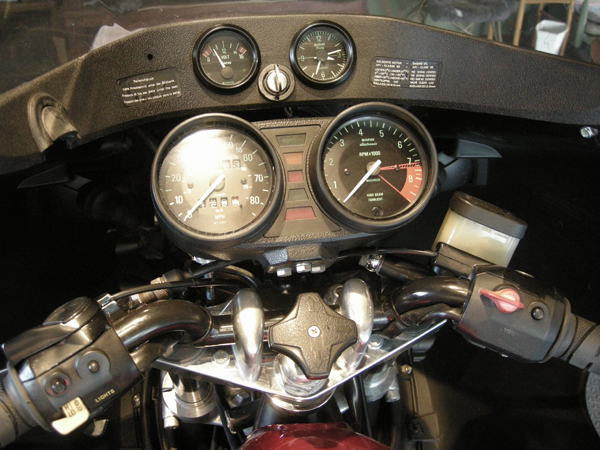
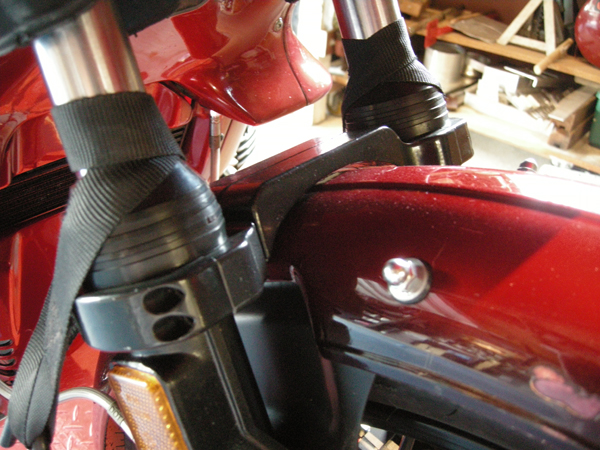
Home by 4PM from Phoenix...gee, that gives me an hour or two to fiddle about. Dismantle the dash and windshield. Had the speedo cluster off and
went thru that the night before we left.
Speedo had some loose screws.. I lubed and cleaned that and it's setting on the shelf.
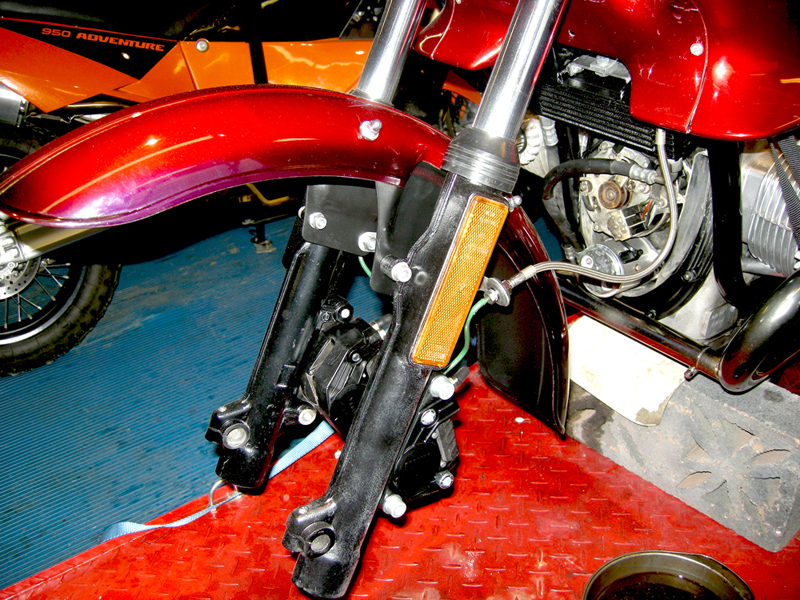
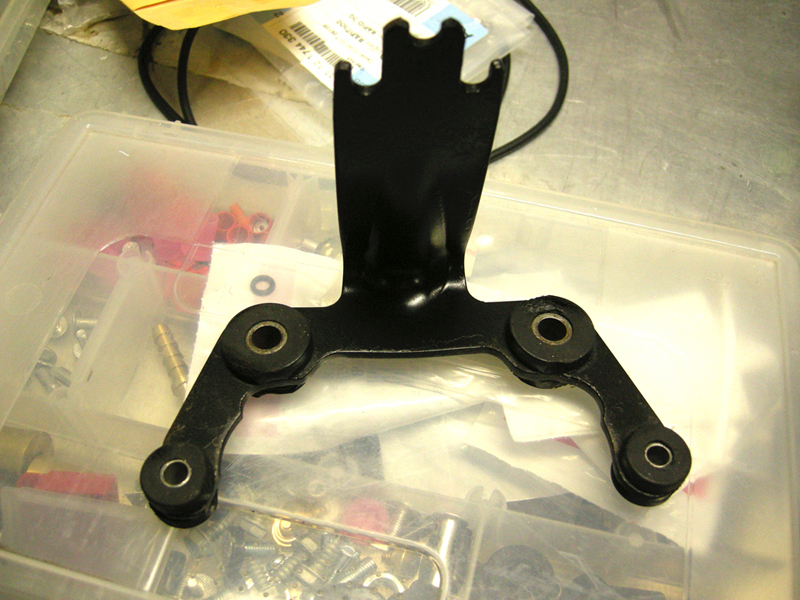
Modified the speedo bracket, by grinding/notching it for clearance around the handlebar mount nuts.(more than shown in pic.
I can now move the K-bars back to the rear position on the top tripleclamp to give some clearance for the brake line.
I'll see how the handlebars feel, but just sitting on the bike it seems mo' bettah ergo-speakin.
After cleaning all the wiring contacts and rerouting wire bundles I pulled the mirrors. pulled the mirrors and now I can see that the left fairing bracket is slightly
bent inward, which created the wonky non-symmetry . A bit of reverse bending and shimming will fix that.
I bought some handy dandy mirror extensions from a fellow named Nick Greear.
The mirrors are in fair shape but one was a bit rattly. Screw-it, ordered a new pair from MAX$$$BMW...
A little touchup on the mounts with 3M Trim paint makes them look new.
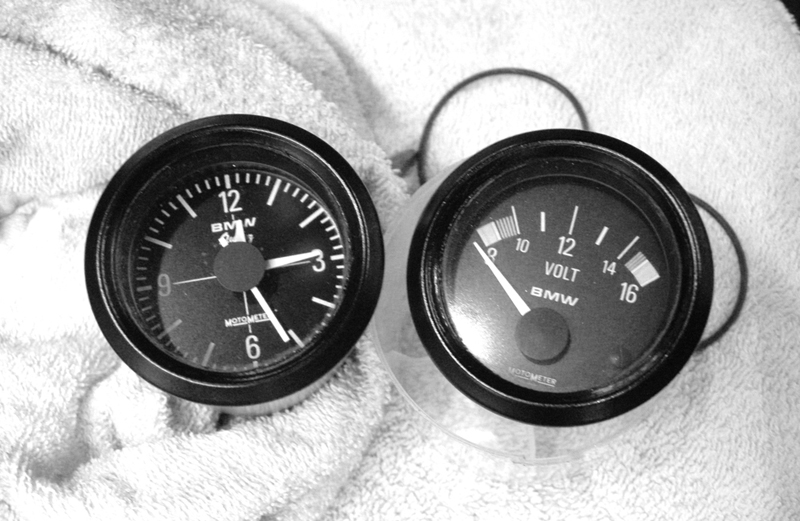
Some spot touch-up on the clock and voltmeter and choke lever as well.
Flix and plastic polish the windshield and the second hand windshield shows it's in nice shape. I have a new OEM trim for that and ordered some
plastic rivets from McMaster-Carr which are coming in today.
I'm hoping by Thursday evening I'll have it all done dash-wise.
One last thing I'll do is address the connections on the alternator
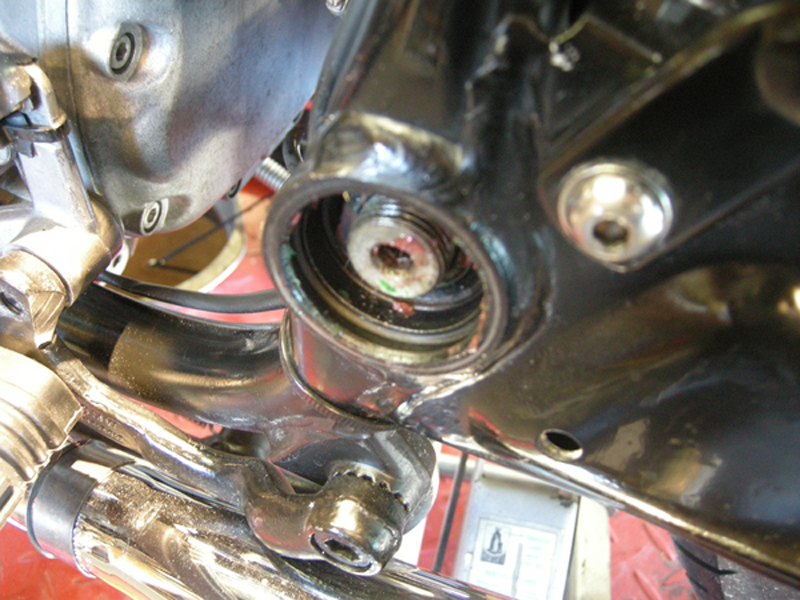
Up on the lift and pull the front cover. Fingers crossed on that. The constant dim alternator light worries me.
Friday morning I'm planning to head out to RPM Cycles in Ventura so that Gary can do the swingarm bearings for me.
O.K., I'm gettin' lazy, but he's got all the tools. I'll have him take a shot at the brake bleed again.
 We shall see....
ToDo List:
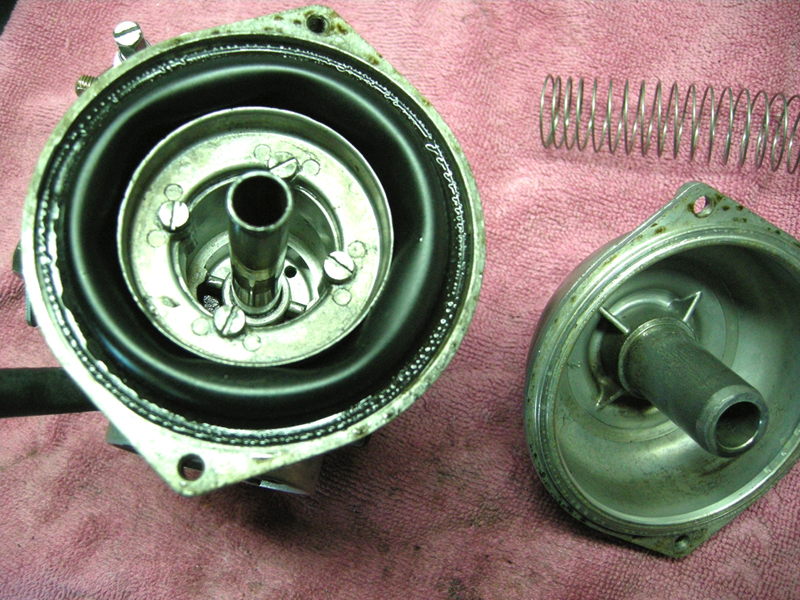
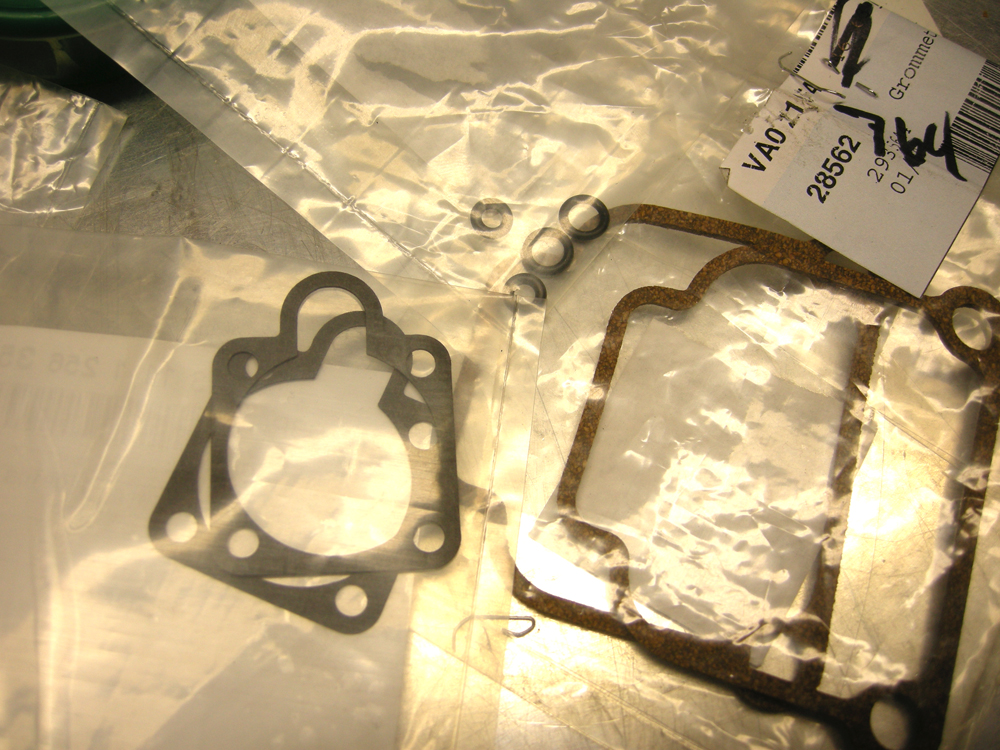
Carb seals and gaskets and choke springs need to be replaced, crusty choke parts soaking now...
Mount new mirrors and bolt down fairing
Install new sidestand spring
Reinstall front cover after cleaning contacts on alternator (found a loose one!)
Switch valve covers around cuz some smartass by the name of 'edray' on ADV reminded me they where upside down...
 I awready knew that....no really...
1-21-11: El Fini
Ragged and shagged. Too much to do this Friday to get'er done to go to RPM, so I'm taling the day to finish up the details.
Carbs: MAX$$$BMW parts in.
The choke valves are sticky, right side is corroded and rusty.
...so clean those puppies up.
The idle needles are good but one has a squished o-ring, must have been the wrong size...not surprised.
All back together, starts up, runs good but needs a little tweaking.
Now for the final deets. New plastic rivets from McMaster Carr make it simple. About $7 a box o' 20.
Spanky new mirrors (splurge!) with the Nick's extenders will be oh so vewy vewy nice...
New OEM windshie;dgasket and trimpiece as well...
A coat of 3M Trim Paint on the rear rack makes a near-stock looky-look good.
Oh, pulled the old hard and scquare OEM grips and opted for some new round and softie Pro Grip 719 GP Gel Grips.
These aren't really too jelly like, rather more softy rubber. Had them on my R11S.
Since I'm evidently not making it out to RPM today, I'll take a shot at the swingarm. No telling what we'll find there. Some dried grease, some wet.

What I wanna know is, how did it take me a full day to do all this crap...but for all intents and purposes...
It is Finished...
Jeez, I gotta clean this place up...
1-21-11: Run to the Coast...![]()
Sounds dramatic...luckily it wasn't. This 30 year old runs just fine. A few sputters where she acts like running out of gas
on one side. Stpped in Santa Paula for a bit...she pissed fuel allover herself. Right side float stuck. Onward to the shop. I made it.
Gary & company do the casual brake bleed, success, swingarm torque check, and take a shot at synching the carbs. All good.
Ready to leave I see Gary with a concerned look as he pulls the bike up.
He rides it back to the garage.
"Won't idle/ This bike needs the carbs cleaned'...
Evidently my near clean wasn't enough. Off they will come this weekend.
Meantime I begin to contemplate Madam Mikuni...
1-23-11: Counting my chickens...
How does a $2000 airhead figured to be a $3500 project turn into a $5K+project?
Hell if I know. But I have receipts, oh yes, I have receipts...
Call me obsessive complusive, but the little 'hidden secrets' I found in this bike didn't help much either.
But she is a nice, up to snuff, and strong running streamlined candy red baby!
Bike (not including transport) - $2000
Registration (over a year expired, gee thanks to P.O.) - $253
Priority One ($989)
Starter rebuild - $55
ECU $39
Heads (rebuilt) - $477
Motorrad Elektric- plugwires, wires, etc. - $55
Dyna coils $121
Tires - $242
Priority Two ($383)
Powdercoat wheels/other pieces - $220
Shop time - Remove bearings/tires - $40
Shop time - Install bearings/tires - $93
Shop time (RPM) - bleed brakes, etc. - $30
MAXBMW - OEM parts ($653)
Wheel bearings (3) and seals - $142
Top end gaskets/seals - $88
Caliper kits/bolts - $98
RS mirrors/misc hardware - $91
Fairing parts - $46
Fairing hardware - $5
Fairing nuts - $4
Carb gaskets/rubber - $35
Ignition Key/R100RS stickers - $63
Repair Kit? - $34
Drain plugs (not needed) dipstick gasket - $6
Misc. - $41
Priority Twee ($586)
Complete Exhaust (used) - $250
OEM Windshield (used) - $50
Nick Grear Mirror extensions - $55
Telefix fork brace (used) - $100
UNI Filter - $29
Grips - $18
Sidestand (used) - $16
Reynolds backrest for Mama (but we won't count this one ;) - $68
Misc. Cleaning/Hardware/Fluids ($415)
McMaster-Carr - Delrin rivets - $8
Pep Boys - paint, fluids, nuts, etc. - $102
Carquest Auto Parts - Sparkplugs, Speedbleeders, misc paint, hoses, tools, etc. - $99
Radio Shack - heat sink paste - $7.50
Local hardware store - bolts, nuts, etc. - $70
Home Depot - paint, misc. - $58
Harbor Freight - grinding/polishing, misc. - $48
FLIX polish - $22
Total Parts & Spiffin' - $3026!
...and that's just what I can remember...sheesh!