Install
Step by step Installation, easy peasy...
Instructions for Installing Barbacks - R1100S bikes with Comfort Bars
Please
read this completely before you begin. Oscar the CNC guy suggests you use Blue Loctite
on the barback screws for insurance. Should take about 20 minutes.(You'll get a set of these instructions when
you order. Also available to download in PDF here.
Props to Paul Longo who helped me with a few details here. Thanks
Paul!
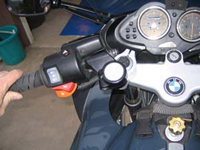
1. If necessary, cut the cable ties that fasten the handlebar control wiring
harnesses near the stock bars and at the steering head. (Note. I admit I had my
fairing panels off when I first installed the prototypes because I was doing a
brake bleed at the time. Therefore it was very easy to access the cable ties!)

2. If you haven't already raised your bars on the fork tubes like I did,
remove the wire circlip that holds the bars on. Put the circlip in your parts
drawer.
You won't be needing this.

3. Loosen the socket cap screws completely and remove the comfort bars on one side from the fork tubes. Place it on some padding (like a blanket) on top of the fuel tank to avoid scratches. Clean the surfaces of the fork tubes to remove any dirt, grease and oil..

4. Turn your forks all the way to the steering lock on the side you are
installing a barback for clearance and slack. Remove the bars and slip
the barback male post into the comfort bars female clamp on, snug the clamp bolt
slightly, just enough so that they don't pull off and you can still adjust them.

5. Mount the entire handlebar/barback onto the fork tube. You'll find this is much easier than trying to mount the barbacks first and then stretching your wires and cables to get the comfort bars onto the barback's post. Repeat steps 1-5 on the other side.

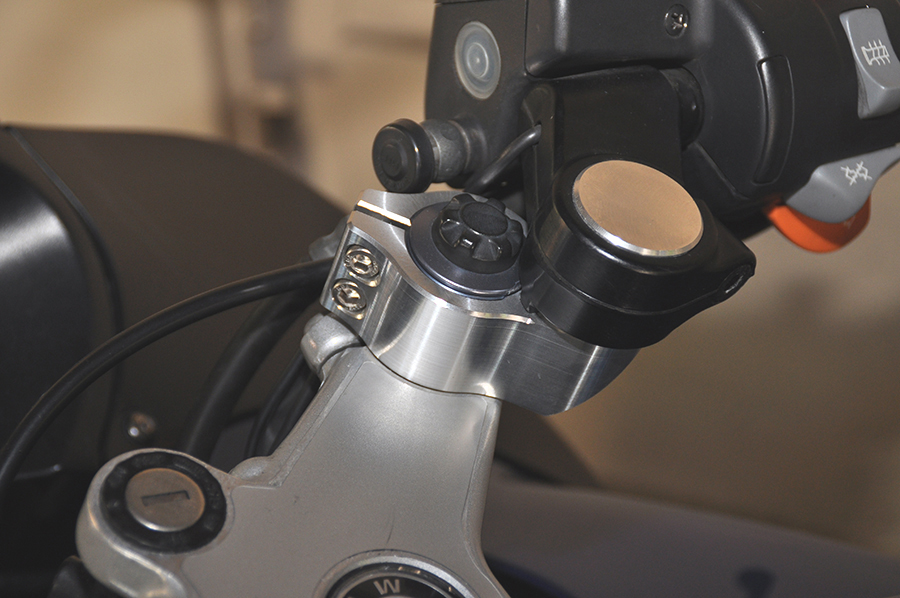
6. Line up the barbacks onto the fork tubes. This is a very snug fit, so be patient. Make sure your barback screws are completely loose. The back may want to "rock" onto the post. This is fine, but try to level it with a tap on the top surface. A mild whack with the heel of your hand or a mallet will help slip the barbacks in place on the fork tubes. Once you have the barbacks all the way down on the tubes, adjust them so that they are pointing straight ahead (parallel) and snug down the clamp screws just enough to keep them in position. Partially tighten clamp bolts on the bars to allow adjustment. There is some limitation of rotation where the banjo bolt will make contact with the rightside barback. Adjust both sides evenly and accordingly.

Note: You'll see that the positioning tab on the comfort bars will touch where it meets
the barback top surface, and the bottom of the barback also might make some contact
with the tapered fork tube cap.
The positioning tab acts like an alignment indicator.
For those of you who are adept, some filing and re-fitting could be done for a more custom
fit. A fair amount of machining/filing on the comfort bar would be required to
do this.
There are design improvements that could be done, but that's another
subject and another cost…
Personally, I'm O.K. with the way it works.
7. Alignment: Most people like to align the bar backs parallel and symmetrical,
tighten, and then adjust the comfort bars to suit. However, the barbacks have
some concentric adjustment on the fork tube axis as well as the handlebar axis. Use your own discretion and adjust
the set-up to fit your ergos best. Adjust the barbacks and comfort bars to clear
the fuel tank at full steering lock in both directions.
*If necessary, VERY
slightly loosen the hydraulic banjo bolts at the clutch and/or brake master cylinder
and rotate the line just enough to clear the left barback, then re-tighten the
banjo bolt. (*This from Paul, I haven't tried or needed to do this.).
8. Check wiring harnesses and hydraulic lines for possible points of abrasion and for adequate slack at full steering lock. Re-install new cable ties where necessary.
9. Tightening: Of course you want the barbacks tight enough so they don’t rotate. Per Paul's instructions, it's suggested that the torque on the barback screws 12-15 ft-lbs. Since you have 2 socket screws per clamp, you'll want to alter
tightening of each screw until the clamp is good and snug.
(Check the BMW shop manual for the handlebars and tripleclamps). Careful with that wrench Eugene! I had one guy twist the heads of the screws…that’s too tight! ;) But the billet and threads will take it.
Torque at your own
judgment. I tightened mine down so they don't move without a really good whack
on the bars. I'll suggest here that you tighten them down more than that.
When
in doubt, use a torque wrench (you do have a torque wrench don't you?!).
I'd
say that <18ft-lbs would be about max.
A note on longer brake lines and torque from Hal H in Pueblo, Co -
I ordered the 2 brake-line set from Spiegler 3-1/2 inches longer than stock and the fit perfectly. Also, on some of the BMWs the right front brake caliper has a fitting with a grub screw in it instead of a brake bleeder screw. I didn't notice this until I started to put the new line on. So, the project stopped until I got the bleeder. I bought it a local auto parts store. It is a M 10 -1.5.
The torque specified for the 6 mm clamping screws on the bar backs (25 n-m) is WAAAY to much for the screws. That torque is for the larger screws on the handle bar clamps. No wonder the instructions with the bar backs said to be careful with the torque wrench! The correct torque is 8 n-m. I torqued mine to 9 n-m and have had no problem with them slipping.
Thanks again for the great product.
Best regards,
Hal
Finally... Take a ride and see if it was worth the wait…and let me
know what you think.
